Hi mum/sister/distant relative. This is one of my favourite dishes to cook and savour. It is essential, quick to make, tasty and will test your agility in the kitchen.
Ingredients.
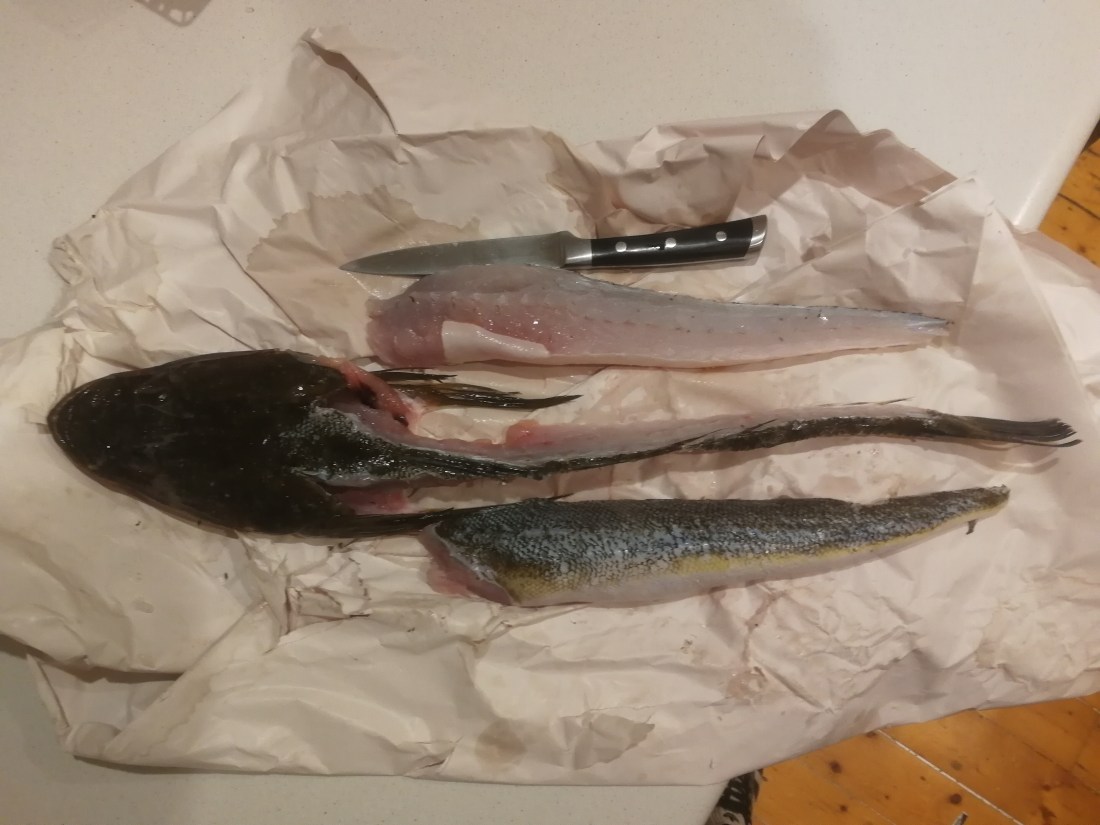
a flathead;
some basic white flour;
extra virgin olive oil;
salt & pepper (to be added after plating);
some salad to serve as a side, dressed with evo oil & lemon.
Preparation. Fillet the flathead as shown in this video. I enjoy filleting my own fish, you should try it too. I usually buy my flathead de-gutted and without scales. Leave the skin on. Put some flour on a plate and fill a bowl with cold water. Now dip one fillet in the cold water and let the excess water drip back into the bowl. Then, place the fillet on the plate and cover it with flour. Now dip it again and flour it again. You should have managed to create a somehow fragile but reasonably thick batter. Repeat the procedure for the other fillet.
The oil. Pour some evo oil into a pan, so that it is 0.5-1cm deep. Turn the heat on and check when it is hot enough by throwing little balls of flour and water in every now and again. If the fry, the oil is ready. throughout the frying, you need to ensure that the oil is not burning (lots of smoke and bad smell). You can lower the temperature by adding some extra oil and lowering the flame.
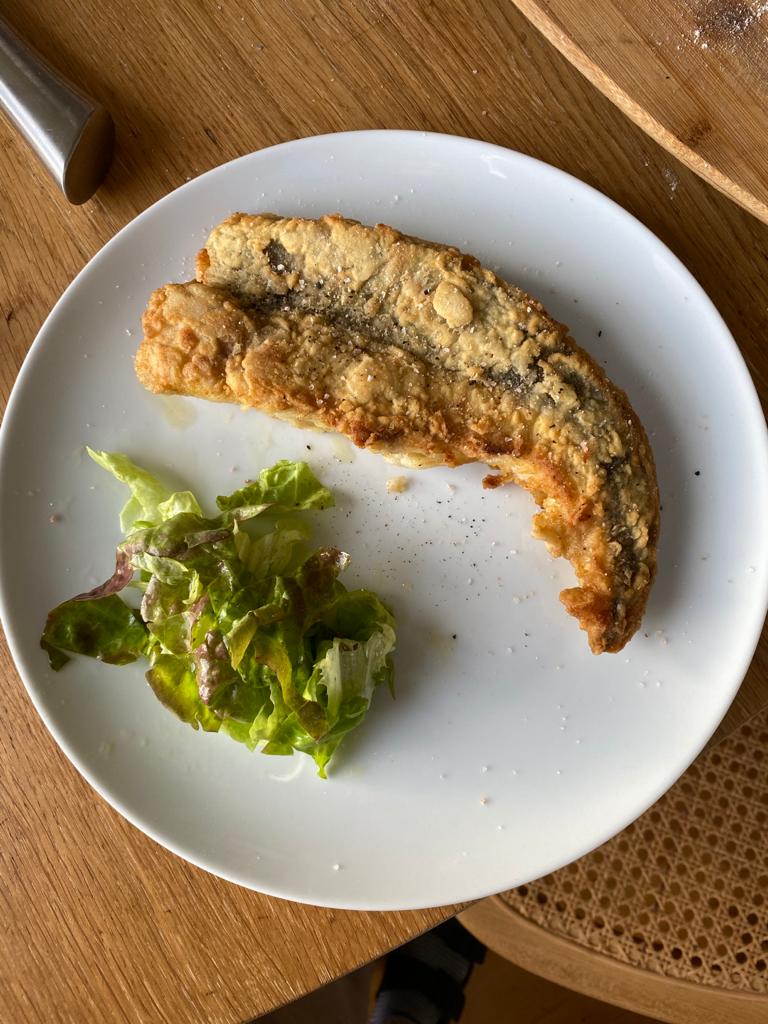
Fry! Now gently place your fillet(/s) into the pan. Let it fry on one side until it is crunchy (on that side). Then turn it. Be mindful to turn it only once, and be gentle. Let it fry it to crunchiness on that side too. You should also regularly scoop some hot oil on the short sides of the fillet, which will tend to remain undercooked. The whole frying process should take you 15 minutes maximum. The lovely golden colour of the battered fillet will suggest you when to take it off the flame and serve it. Only now add salt and pepper. Salting before or while frying will make your fish soft, not crispy.
Hey you, family member, let me explain how I make my lasagna to you, so you we can share the joy of making and devouring it. The recipe is not particularly mine — it’s a rather traditional version — but it is such in that I am sure it differs from other recipes you will find online. Notice that the prep pictures refer to a huge lasagna I made last year (unless specified). Let’s get to it.
Ingredients. I like to make more ragù (the Bolognese sauce) and besciamel (the white cream) than necessary, so that I can freeze some of the leftovers or repurpose them for another recipe. Hence, I make a lot of both. The below list will give you enough to make 6 BIG portions of lasagna.
Ragù:
a carrot, a celery stick (the whole branch), an onion;
half a glass of white wine (better if dry). You can use red wine too;
1kg of fatty beef mince (not the lean one, which will result dry);
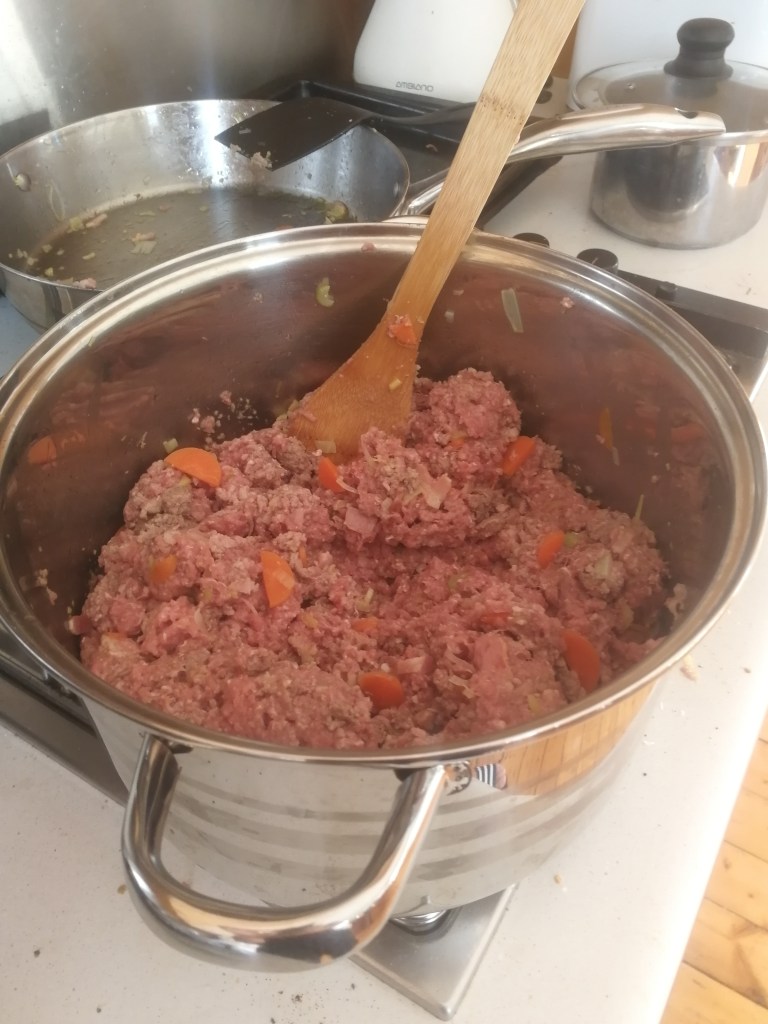
The ragù. This is 90% of the work. Let’s make another list, so that it is easier to follow:
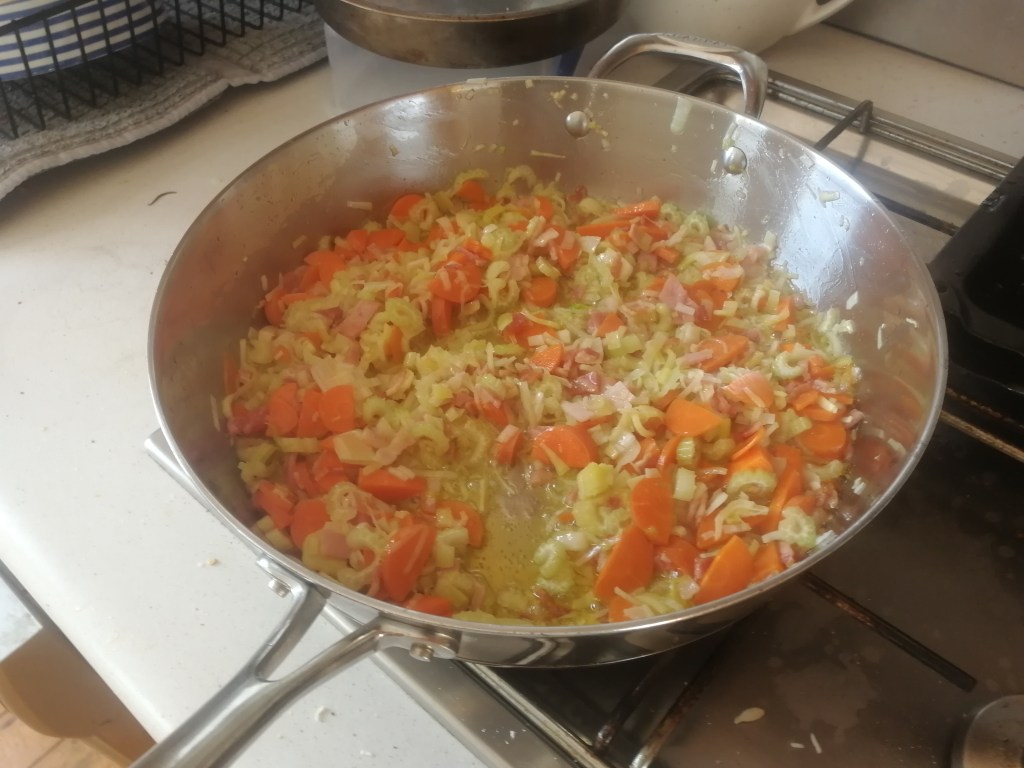
Pour a generous amount of extra virgin olive oil into a big pot. Dice the onion, the carrot, the bacon and the celery stick and let them light fry in the pot, while being careful not to burn them.
When they start browning, put the minced meat in, which you have already mixed all together (beef, veal and pork) by hand.
Put the flame on high allowing the meat to brown. Mix it while it cooks to brown in uniformly.
After about 10 minutes, the mince should have browned enough, pour the wine, keeping the flame on high, thus allowing the alcohol will evaporate quickly.
Add salt and pepper to your own taste.
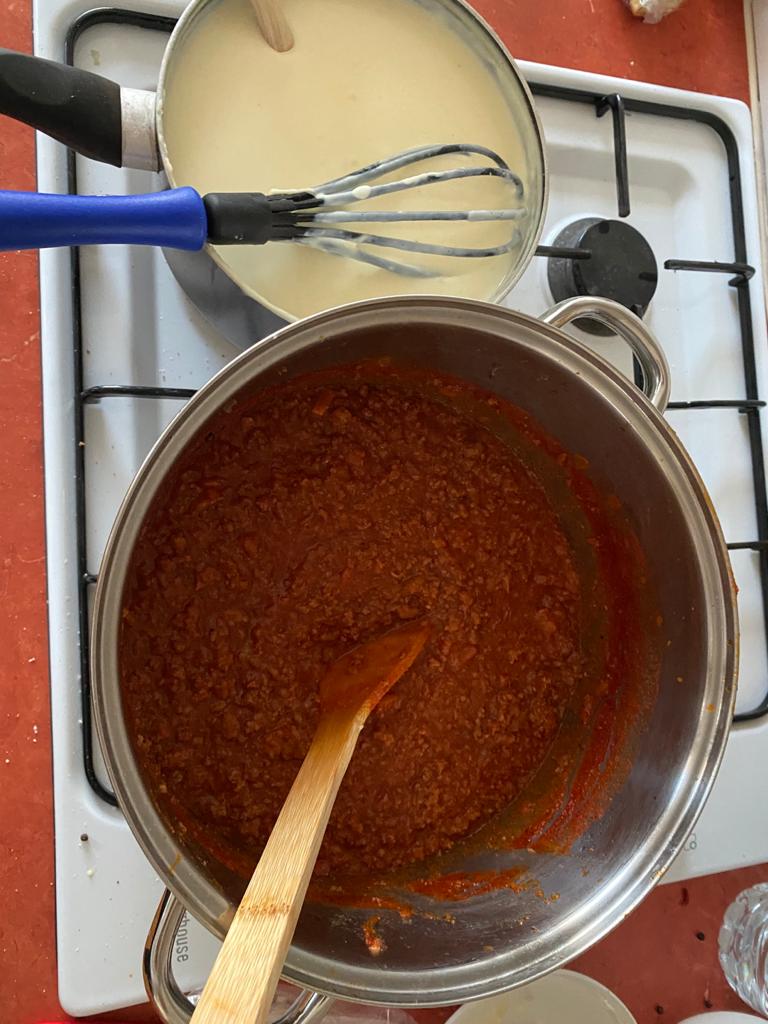
Once you cannot smell the wine’s alcohol, add the tomato passata and turn the flame to minimum.
At this point, if you have some meat or even chicken stock, add it. I usually don’t have it nor I want to buy it ready-made, so I substitute it with a dollop of milk (from the 2 litres listed above). The milk adds fats and texture, just like the stock, and it is a variation present in many traditional recipes. Some will see it a heretic move. Ignore them.
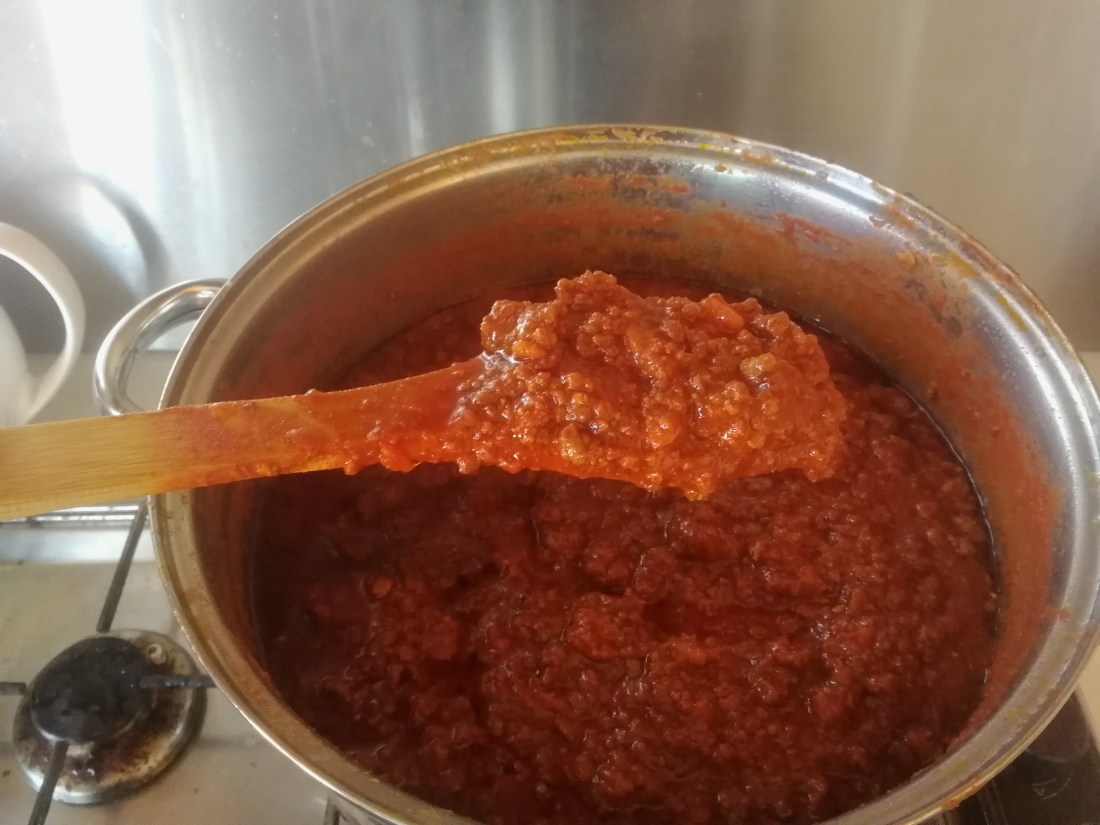
Together with the passata, add the bay leaf and let the whole mix cook for hours. The longer, the creamier. I left mine for an entire afternoon.
When it’s nice and thick, and you have decided to turn the heat off, add salt and pepper again.
Prep of huge Easter lasagna #2
The besciamel. This is a tricky stage, as making besciamel is conceptually easy but requires care. You must stay on it and continuously mix it until it is ready. Failure to do so will result in a burnt and lumpy cream.
Put the butter in a pot and let it melt gently. Careful not to burn it.
Add the flour. Sifting it will minimise the formation of grumes.
Mix and cook for about 5 minutes on a gentle flame.
Add the milk in about three steps, while increasing the heat to medium-low. The stronger the heat, the faster the thickening, but the more intensely you will have to whisk.
Keep whisking and dissolving the grumes until besciamel has lightly thickened. I say lightly thickened as it will keep thickening after you turn it off and you need to take that into account.
When it is ready, add a touch of grated nutmeg, adjusting based on you preferences.
Prep of lasagna using quantities listed in this post #1
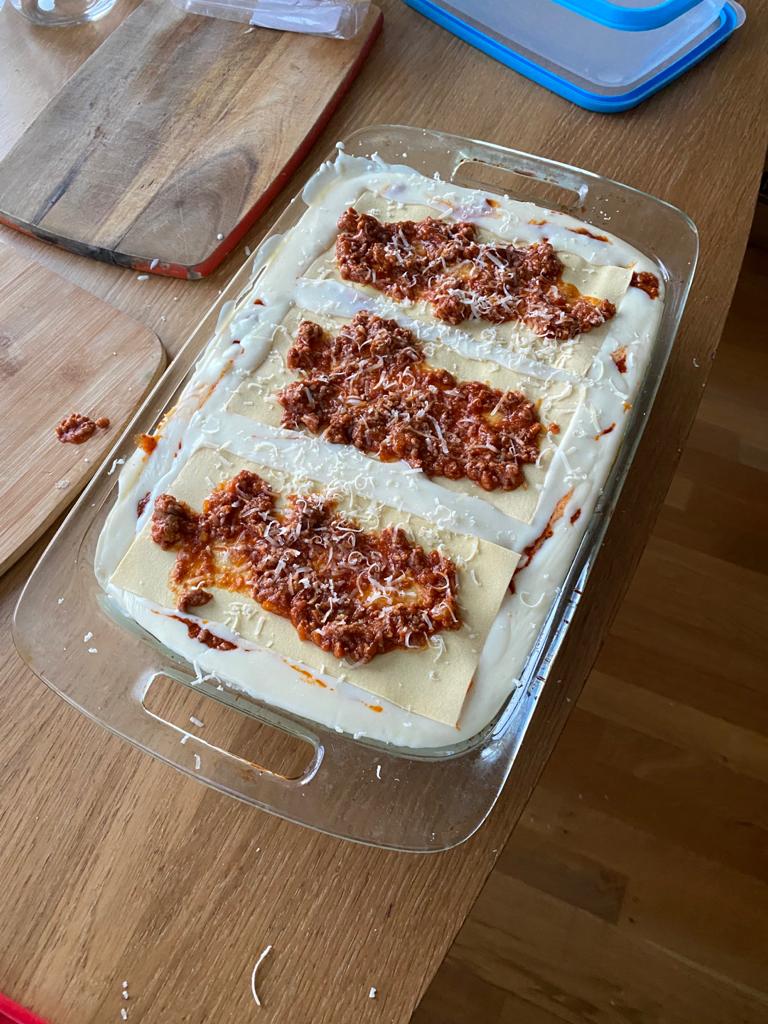
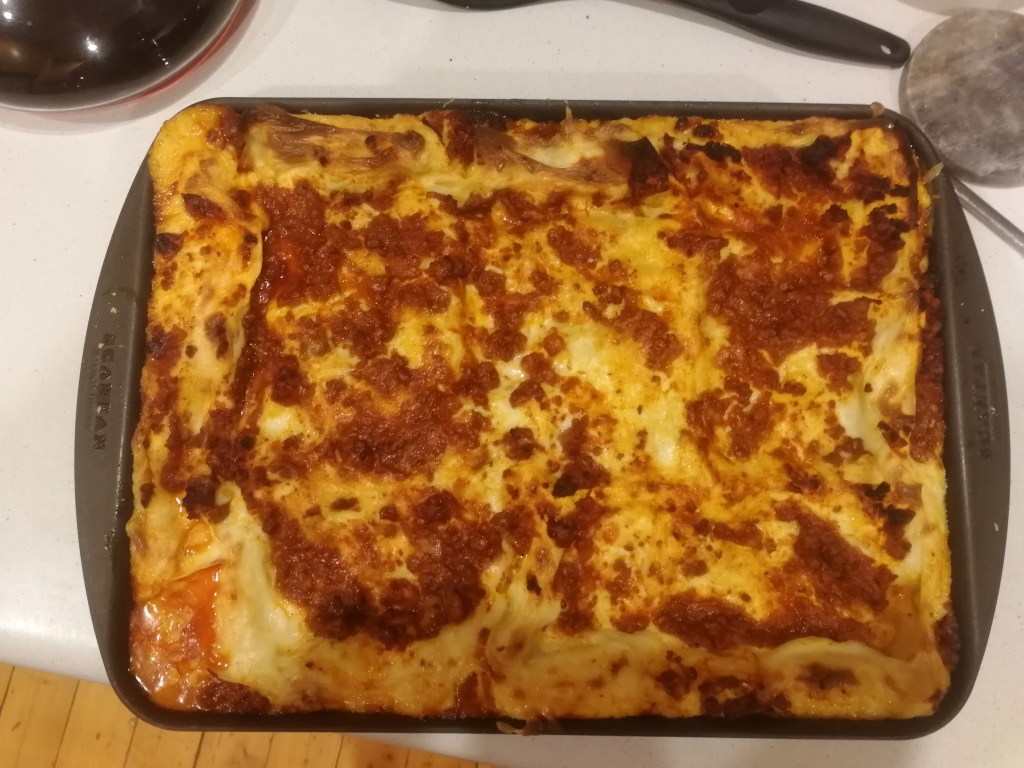
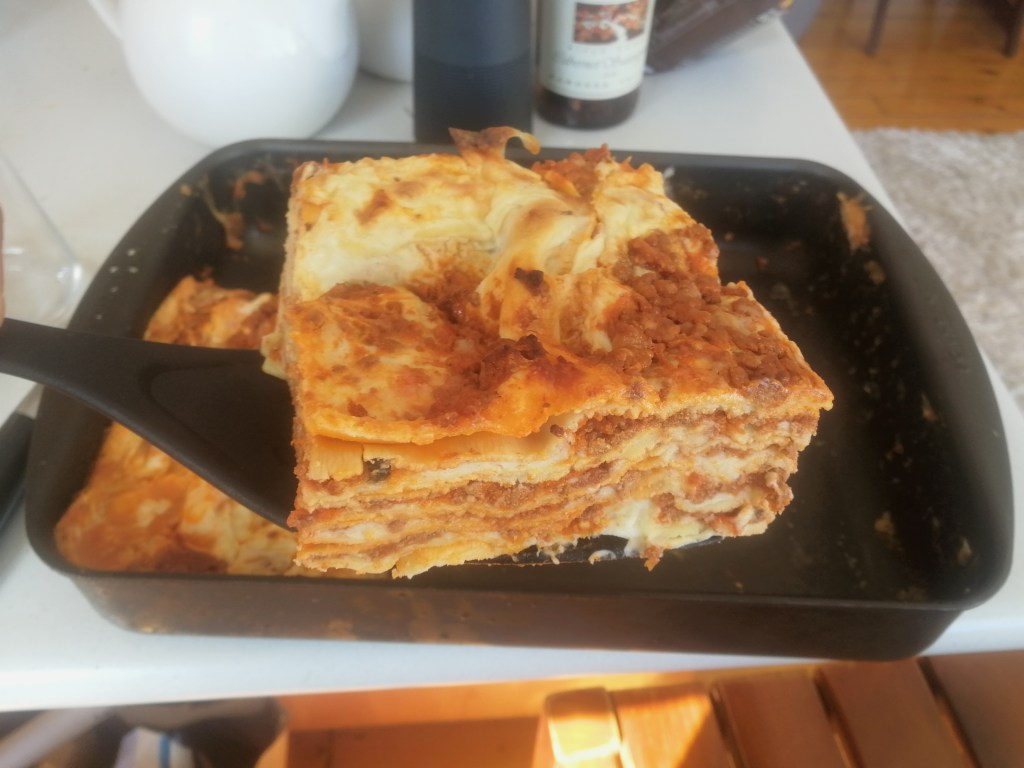
Build & Cook. Now pre-heat the oven at 200 C (fan oven). Pour a first layer of besciamel on your roasting pan (something similar to this kind of product). Then, cover it with (raw) lasagna sheets. Now pour a layer of besciamel, then a layer of ragù. Now grate a little bit of parmesan on top. Repeat the sheet-besciamel-ragù-parmesan process until the pan is full. The last layer should be made only of ragù and lots of parmesan (no besciamel). Cook it for about 30 minutes at 180 C. More importantly, simply take it out when the top looks golden, crispy and — why not — a bit burnt.
Prep of lasagna using quantities listed in this post #2
Let it cool down for a few minutes and enjoy it with your loved ones!
Ciao
PS you can find some very helpful step-by-step pics here. Use them to better visualise the steps.
Hi relatives, I am writing this post to recommend you this video and to put the video-recipe down in words. I shall be brief and painless. I only have one thing to say before I start: this is easily the tastiest easy meat-based pasta than you could ever make. Hence, give it a chance with your guests.
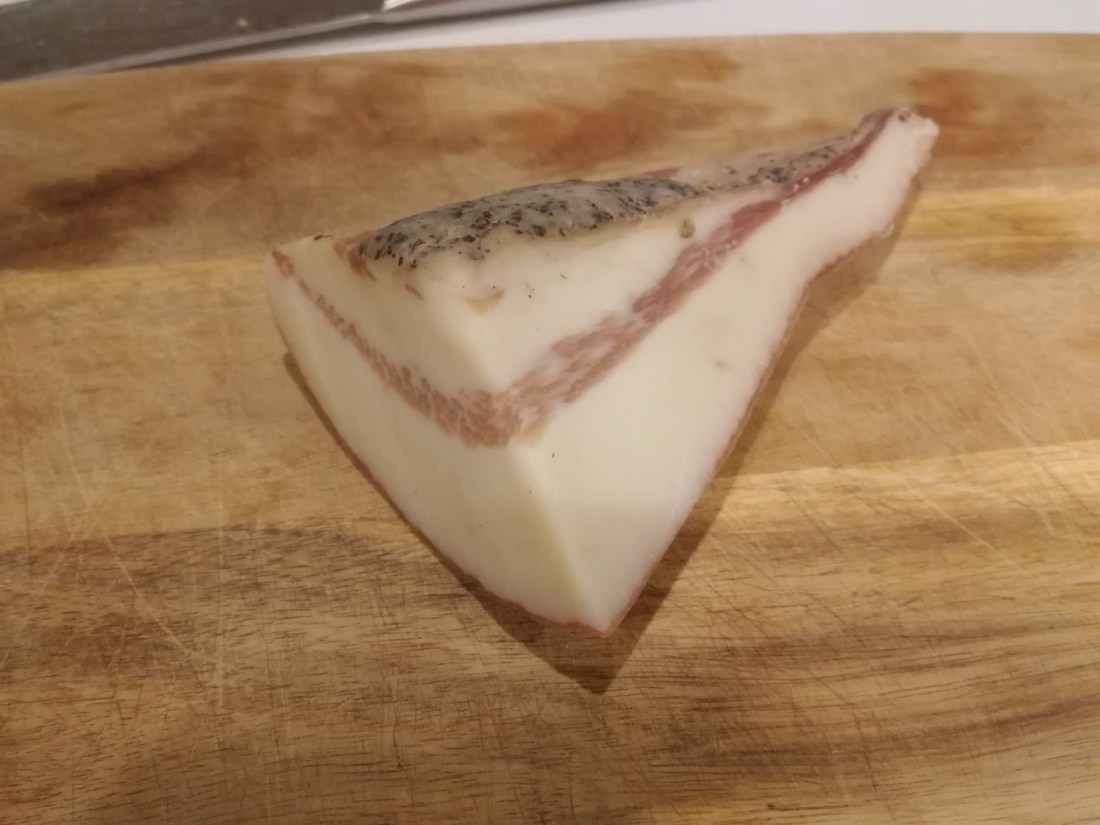
Disclaimer. Do not use pancetta nor bacon. It has to be guanciale. The flavour is completely different, lightly smoked and earthy, nutty… Heaven on Earth. In Sydney, you can find it in Harris Farm (I found it in two different shops, check the product at this link) and Crown Street Grocer (which has lots of top Italian imports and a fair price).
Ingredients. I think last time I made it for two people I used 200g of guanciale. The only other ingredients are spaghetti, a drop of white wine (best if dry), salt (for the pasta water) and pepper. The rule for buying good quality pasta, is to pick pastas that have at least 12.5 grams of proteins per 100g of product. A weak basic Barilla features only 11g, not to mention international brands. No, please, no. It will overcook and spoil your meal.
This one I got was a bit too fatty. Better to have more “red stripes” in it.
The recipe, in bullet points.
Cut skin of the guanciale (cotenna)
Cut the guancile in strips about .5 cm thick (no need for them to be cubes)
Put in pan. Nothing else: no butter nor oil go with it
Let it release its grease (the fat needs to melt)
Keep mixing it so that it cooks evenly and does not stick to the pan
When they are nice and golden, take the guanciale pieces out of the pan
Now the pan only contains the guanciale fat
Pour a little bit of white wine (less than half a glass) to take the edge off the taste of the fat
Max the heat
Use pecorino that is fairly fresh (not very seasoned and salty)
Grate it as thin as possible: it should look like a cloud!
When the alcohol has evaporated, put the pasta in the pan (when it is still a bit raw) . At this point, he removes some fat from it, I don’t… why lose flavour?
Add a bit of pasta water too, to finish cooking the pasta
Now grate black pepper on generously (the grey of the pepper gives the pasta its name)
Hey 3 readers, let me put down this short and hopefully effective blog post for you (and for myself).
Let’s assume that you want a big loaf that will last you for most of the week (further assuming only 2 people are eating it). The baking method is, as before, the poolish method, which is probably gives you the best bread you can get without creating your own starter (which is burdensome to keep alive). Hence you start by creating a predough, called poolish, to which you will at some point add the remaining ingredients to form your actual dough.
Notice that bakers think in percentages relative to the flour’s weight when they work with a recipe, so that they can easily scale it for loafs of different size. My recipe is for 1kg of flour so it has the extra benefit of making percentages straightforward. These are the overall ingredients that you will use:
1kg of flour, of which 500g of wholemeal flour and 500g of Manitoba [100% flour];
770g of water [77% hydration];
20g of salt [2% salt];
1g of dry yeast or less [0.1%]
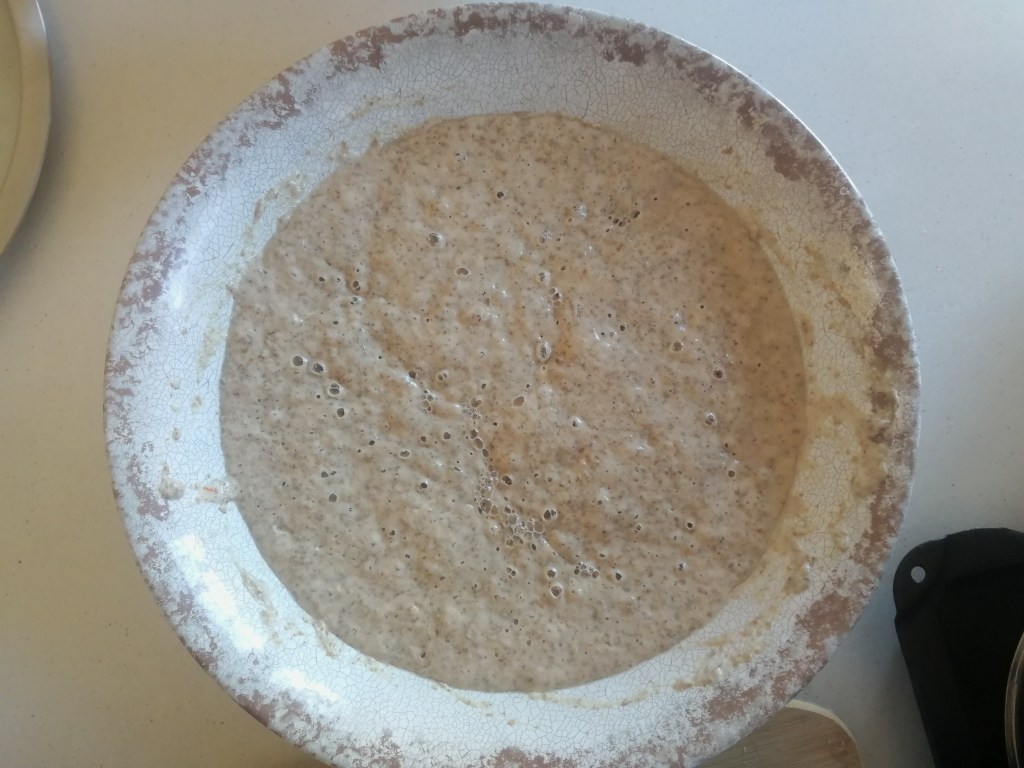
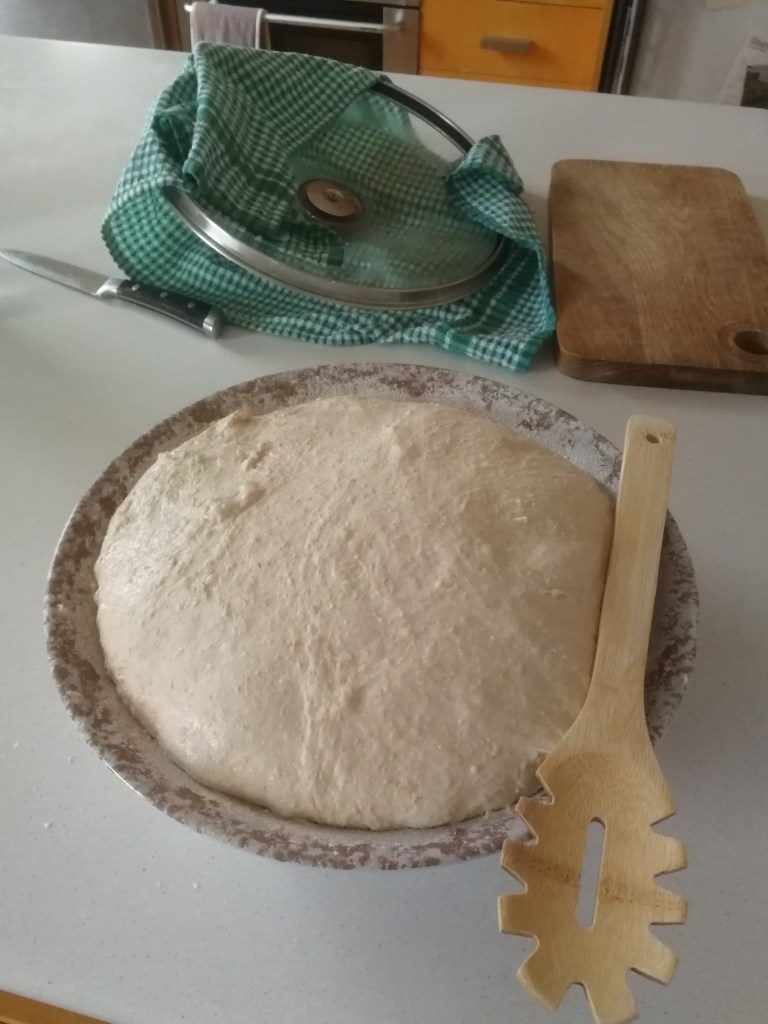
The poolish.Dissole all the yeast in 350g of lukewarm tap (drinking) water. Then add 350g of wholemeal flour and mix gently until you have a mass, a blob, of water and flour. If you have doubts about how to do the mixing in practice: don’t worry, it’s super simple. Check how this YouTuber does it (consider only the mixing part). Now cover it with a plastic film or a lid (always cover your dough) and leave it to rest at least overnight. If the temperature of your house is warm, it will be enough, if it is rather cold, it might take more. It should feature bubbles on its surface, as in the picture below. If you are not feeling confident that the poolish is ready, try the float test.
the poolish is ready
The actual dough. Add the rest of the ingredients (not the salt yet) and form the your actual dough. Let’s see how. Put your poolish in a big bowl (it might be already in one) and add 1/3 of the remaining flour (which will be a mix of wholemeal and Manitoba) and about 1/3 of the remaining water. Now mix and repeat until all the flour and almost all the water have been added. In the bit of water you kept aside, add all your 20g of salt. Don’t do anything with this salty water yet. You can get indications on how to mix from this video (from minute 1:47).
Autolysis. Have breakfast while your dough rests for minimum 20 minutes (max 1h). This will “automatically” create some structure within your dough, in what is a kind of self-kneading process. After the 20 minutes have passed, add the salty water and gently work the dough until the water is fully absorbed by the dough.
The folds. This recipe does not involve actively kneading, but rather helping the dough “self-kneading”, gaining structure progressively. If you are in lockdown, maybe you can fold the dough as shown below every 45 minutes or so for 3 times. If you have to go to work or don’t want to be harassed, just let the dough rest for 8 hours and do the folding after that. To see how to fold, check how it is done in this video, it’s super easy. Each time you repeat the procedure, you will feel the dough getting more supple and elastic, more stretchable. It is gaining the structure that will allow it to trap air inside (produced by the yeast) and to form “the bubbles”. If you have chosen the lockdown option, let the dough rest for 8 hours after the third cycle of folding.
Your pre-lamination dough.
The lamination. Now, this is an interesting passage that I have introduced only recently. It is very effective in giving additional structure to the dough and spreading the bubbles evenly. I learnt how to do it by watching this video. They add ingredients while laminating, but you don’t have to and if you are following my recipe you shouldn’t. After you have completed this step, leave the dough on the table for about 30-45 minutes.
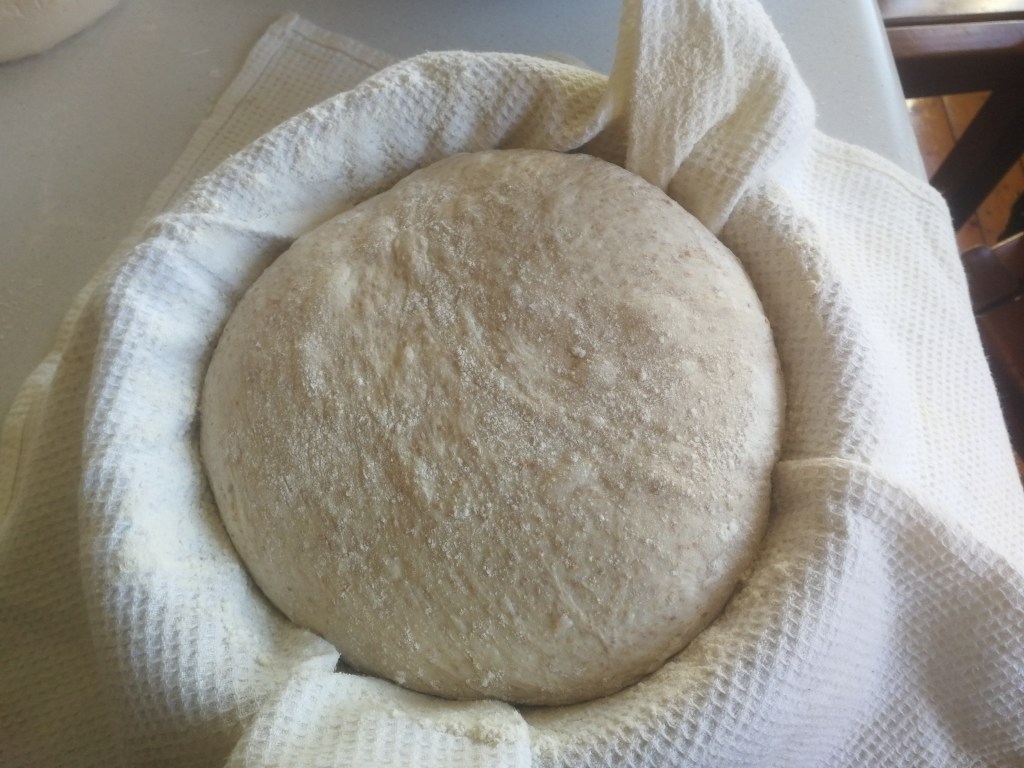
The formation. It is time to work the dough for the last time. Shape it in a boule (a round loaf) using this technique. Then grab a clean and dry towel, put it (wide open) in a bowl and cover it with a generous amount of flour. Now place your nice and round dough into it and dust it with flour at the top too. Cover the dough with the corners of the towel and put it in the fridge (proofing phase). It will stay there at least 30 minutes, the minimal amount of time to make it cold.
The dough is ready for proofing.
The scoring. Leave the dough on the table while your oven gets to 250 degrees (Celsius). When the oven is ready: (i) create tension in the dough, as shown here (as the dough has relaxed a bit since the time you shaped it); (ii) score it, using your sharpest knife, as shown here; (iii) generate steam in the oven. About point (iii), I usually do as shown here, which entails pouring water on a hot tray at the bottom of the oven.
The baking. The loaf will bake for 15 minutes at 250 degrees (static oven, often called bake, or classic bake, mode). Then you will open the oven, remove the steam-generating tray, lower the temperature to 180 (200 max) degrees and let it bake.
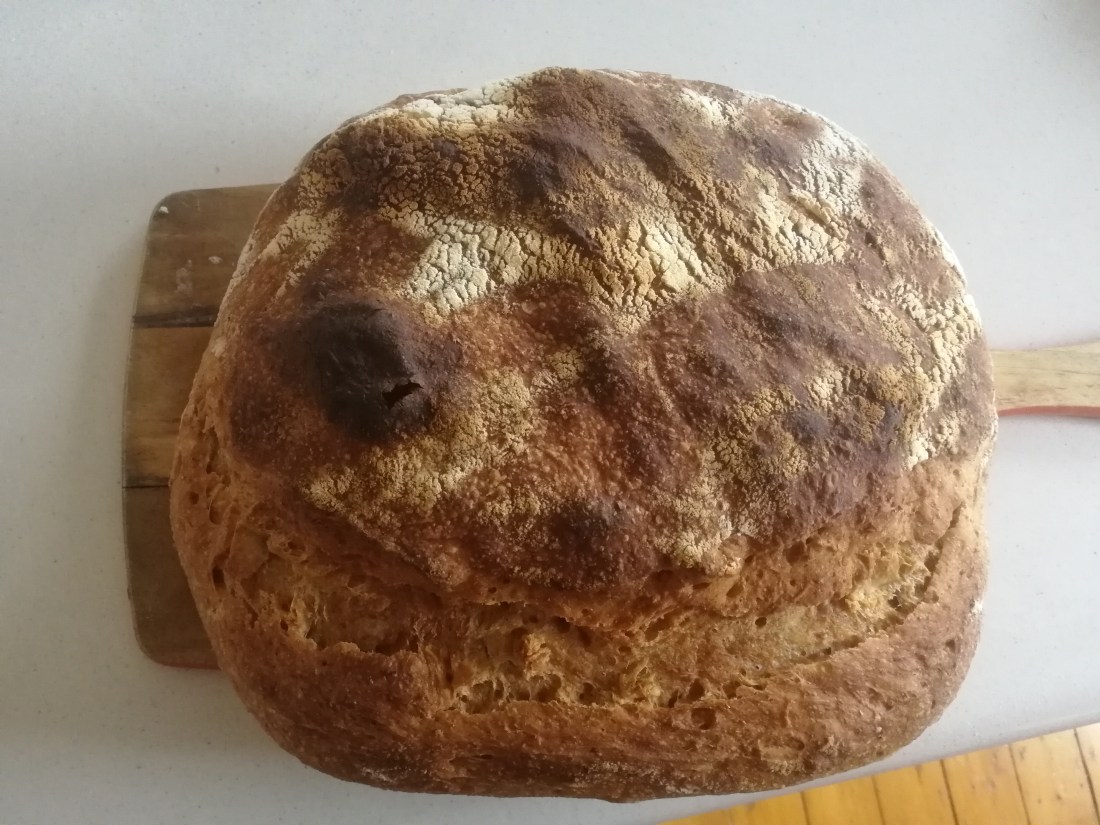
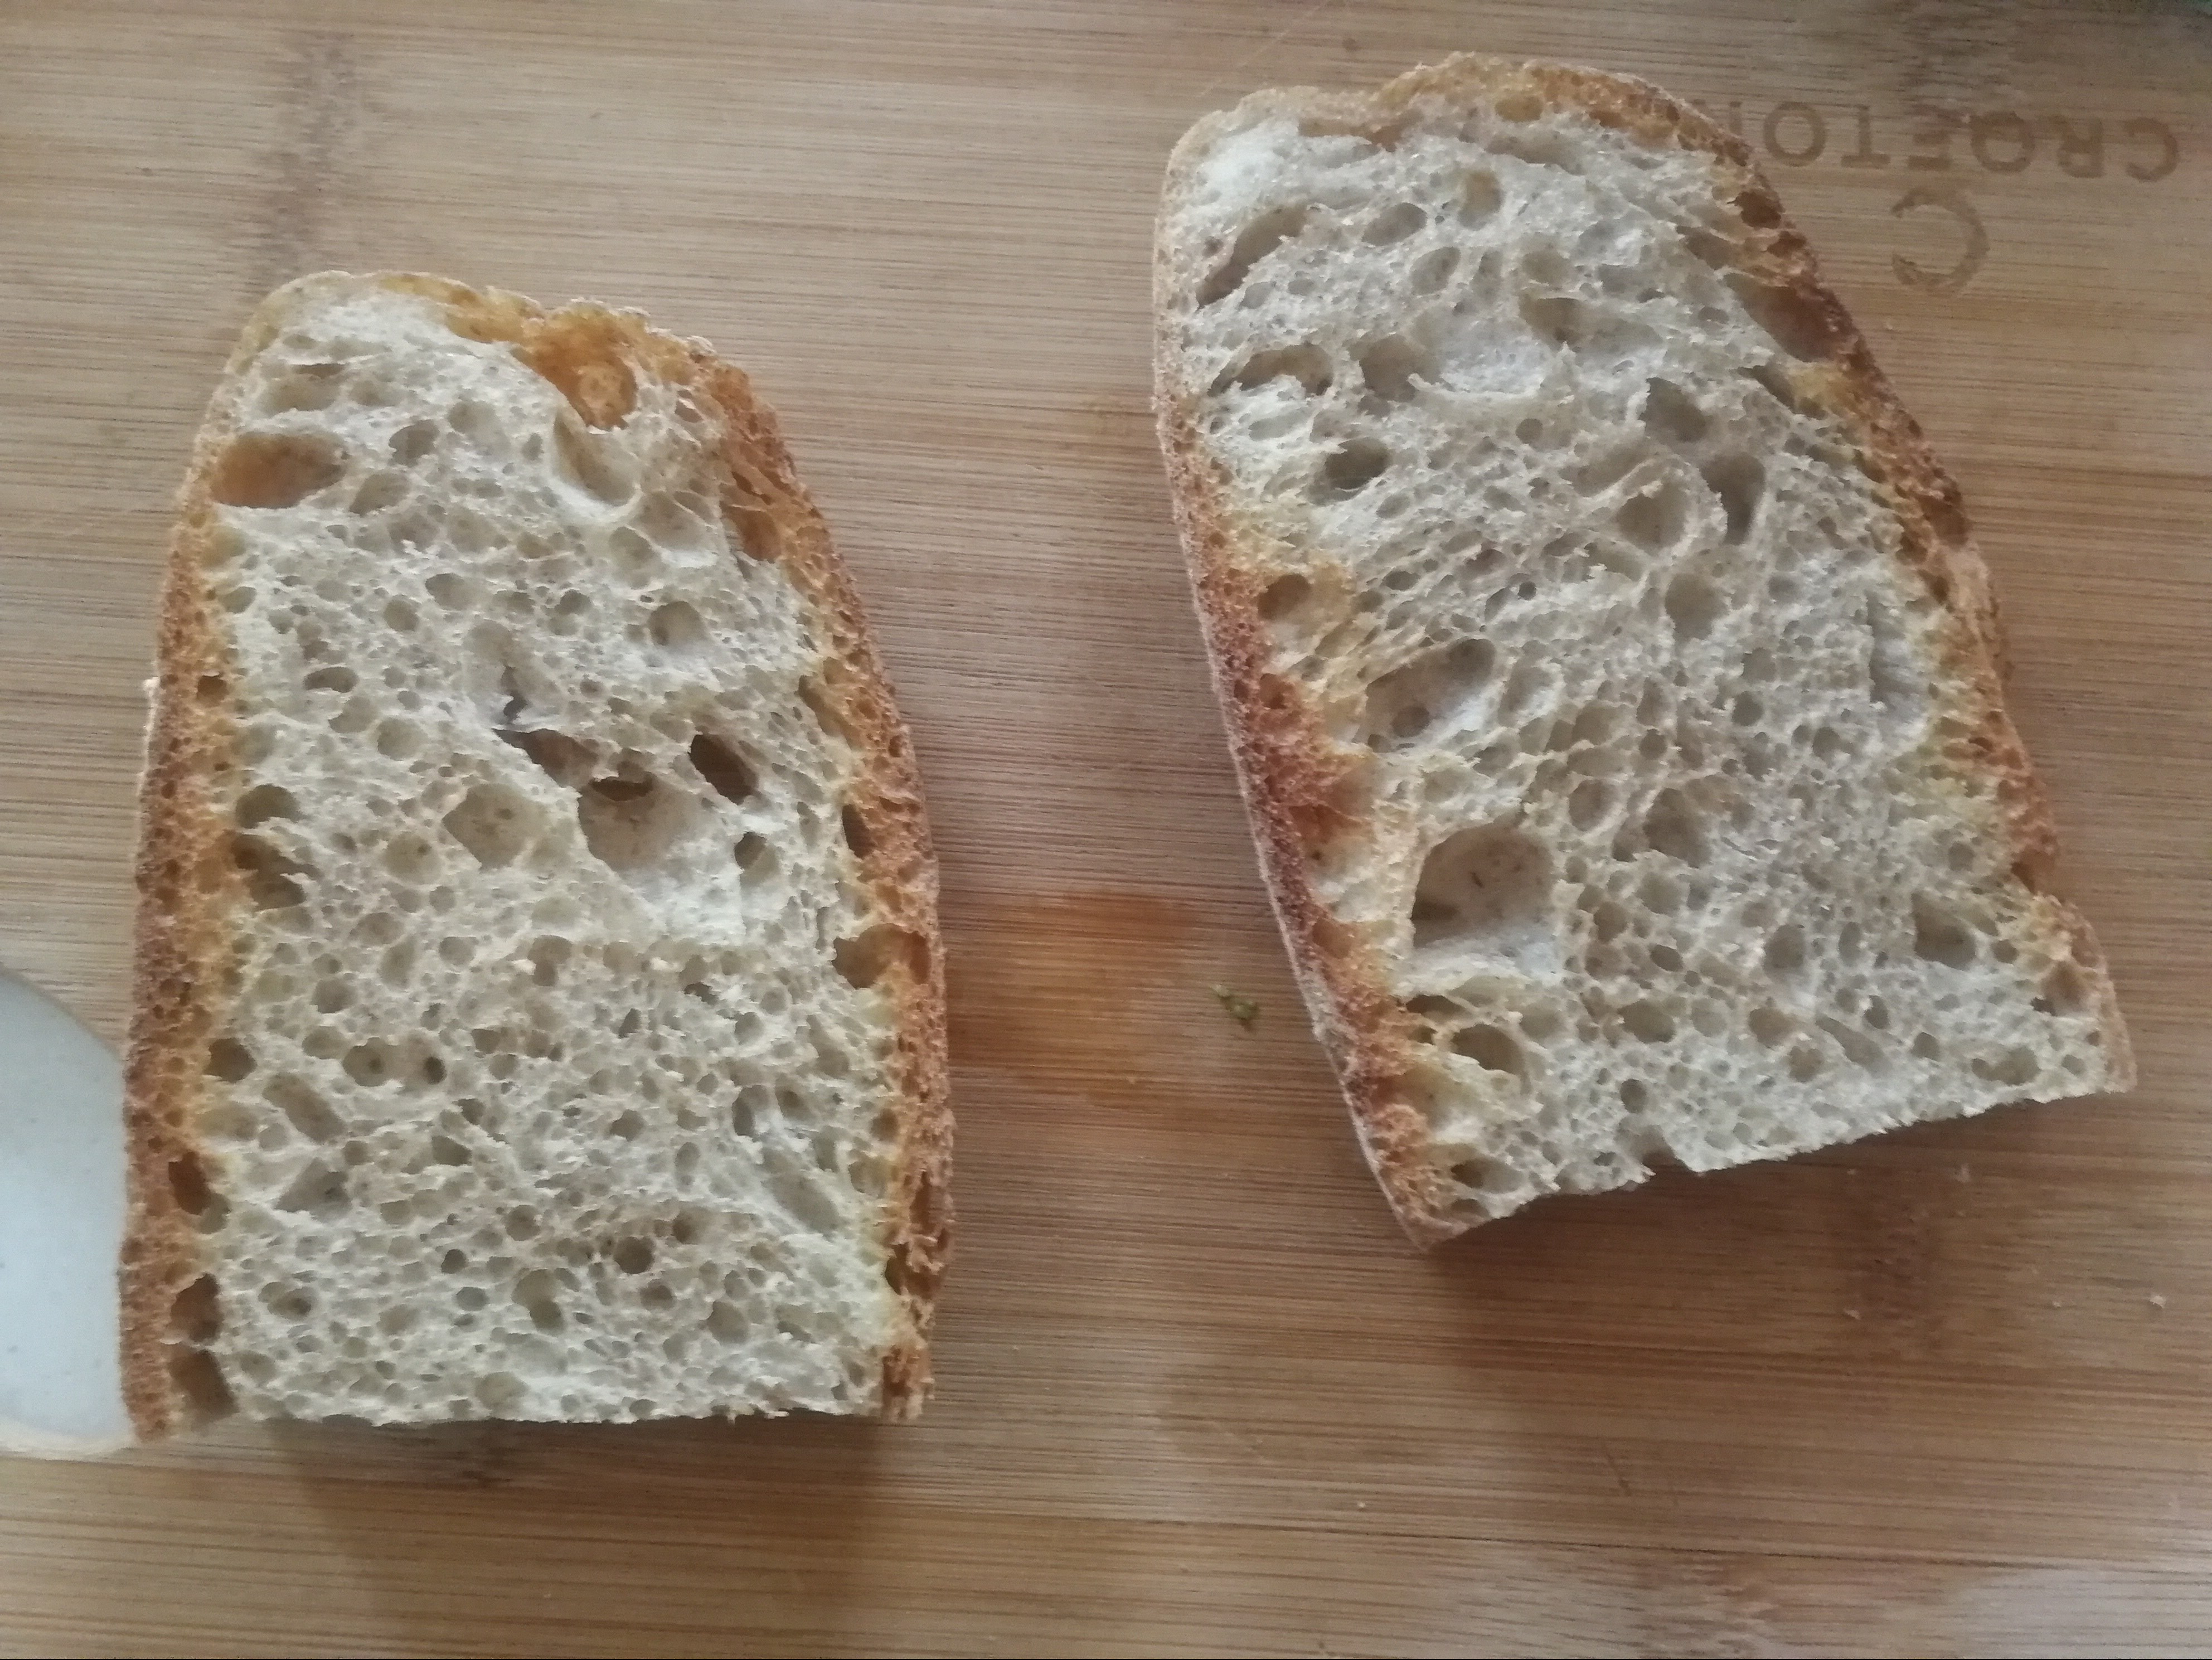
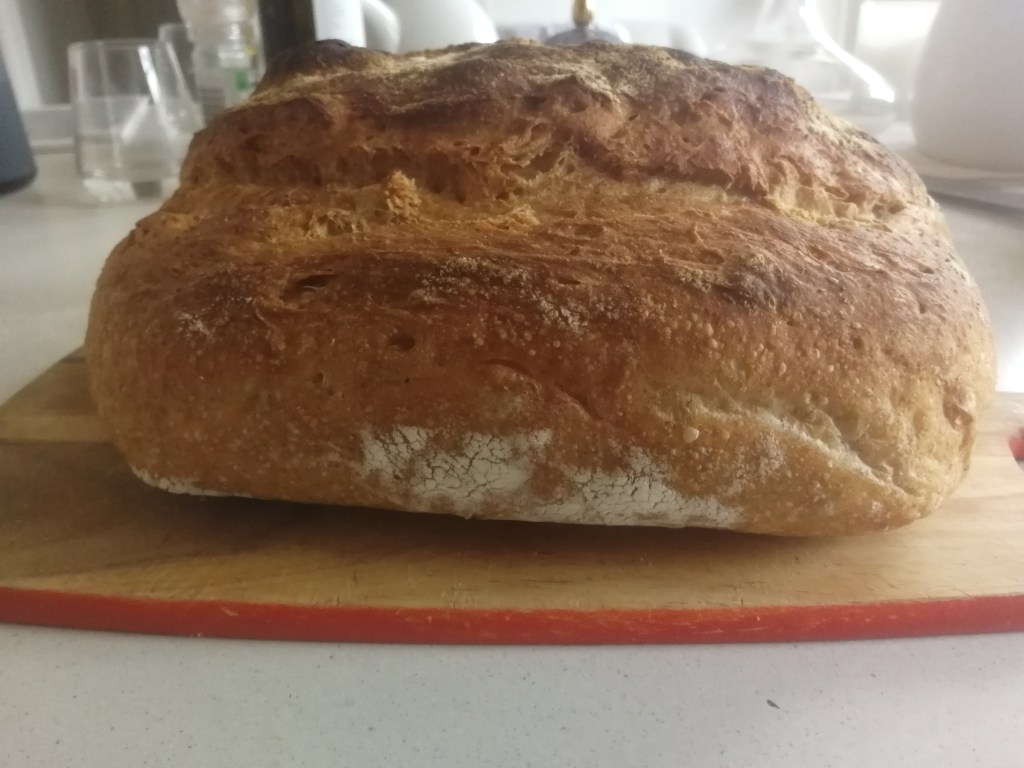
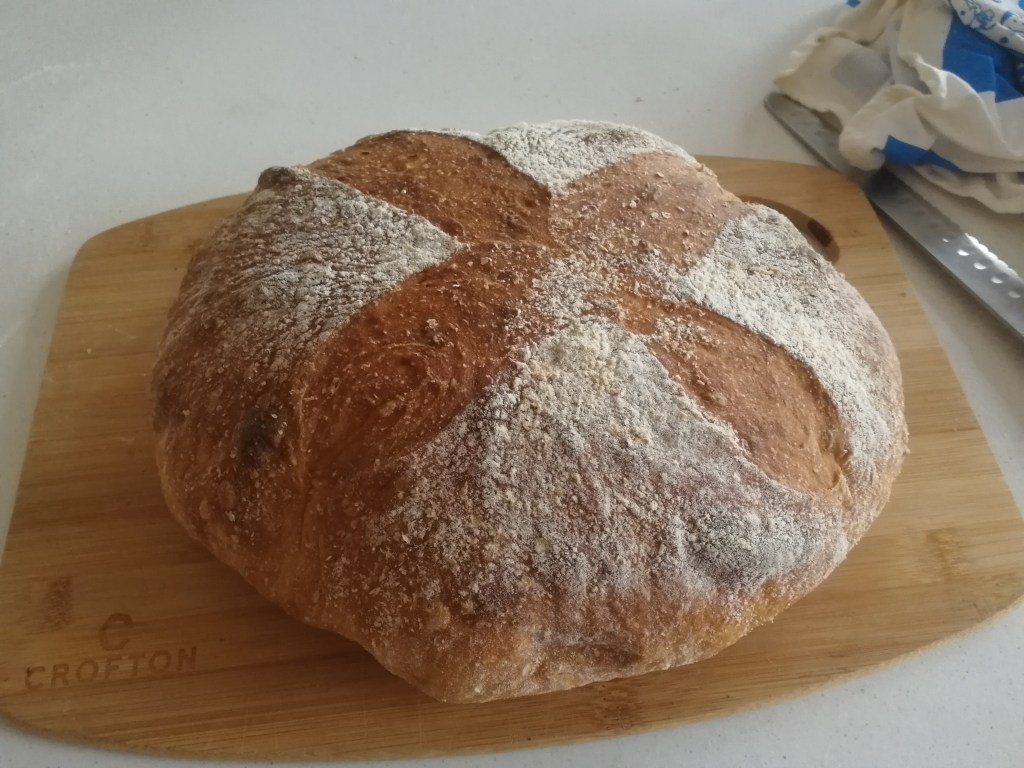
Ta-dà. You can now remove the loaf from the oven, and let it cool down on a grill for 4 hours. I let it cool overnight and try it first thing in the morning. As a grill I use my gas cooktop (obviously not turned on). Congratulations! See some results below.
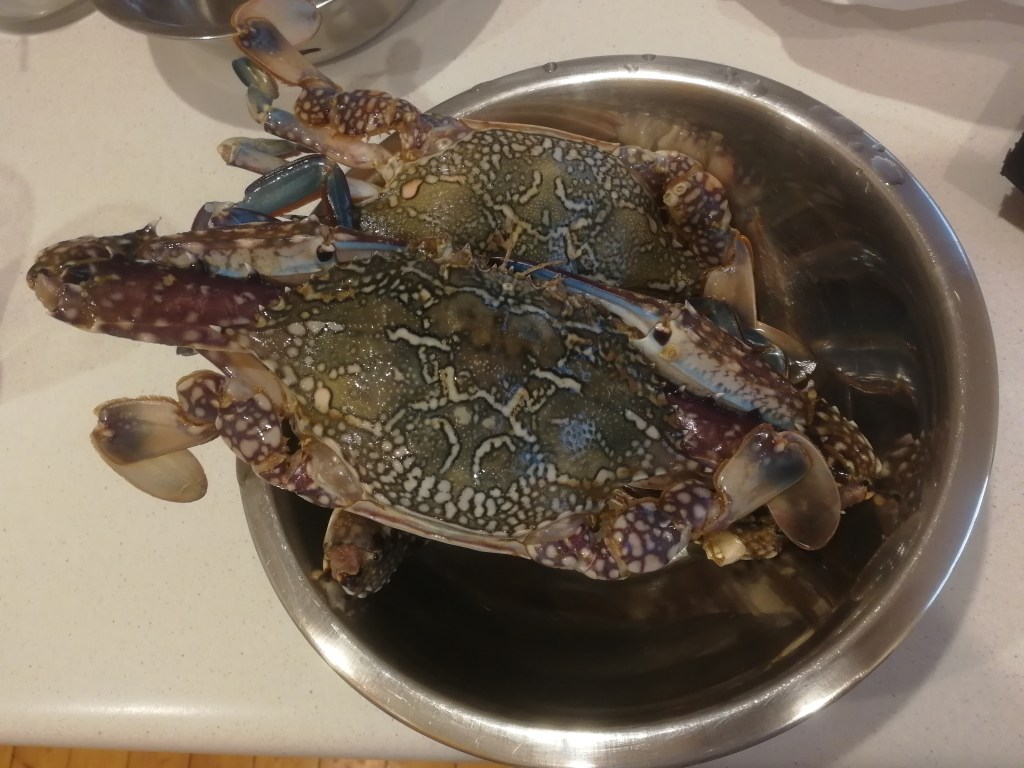
When a year ago I started getting into Italian seafood cousine, I immediately got obsessed with one of the world’s highest delicacies: crustacean pasta. Here in Australia I tried both the Blue Swimmer Crab and the Mud Crab, which is much bigger and more impressive, and for pasta sauce purposes I preferred the former.
This is a great dish and I decided to write about it after making it for New Year’s Eve and being enthusiastic about the outcome. I used this video recipe as a starting point and modified it slightly.
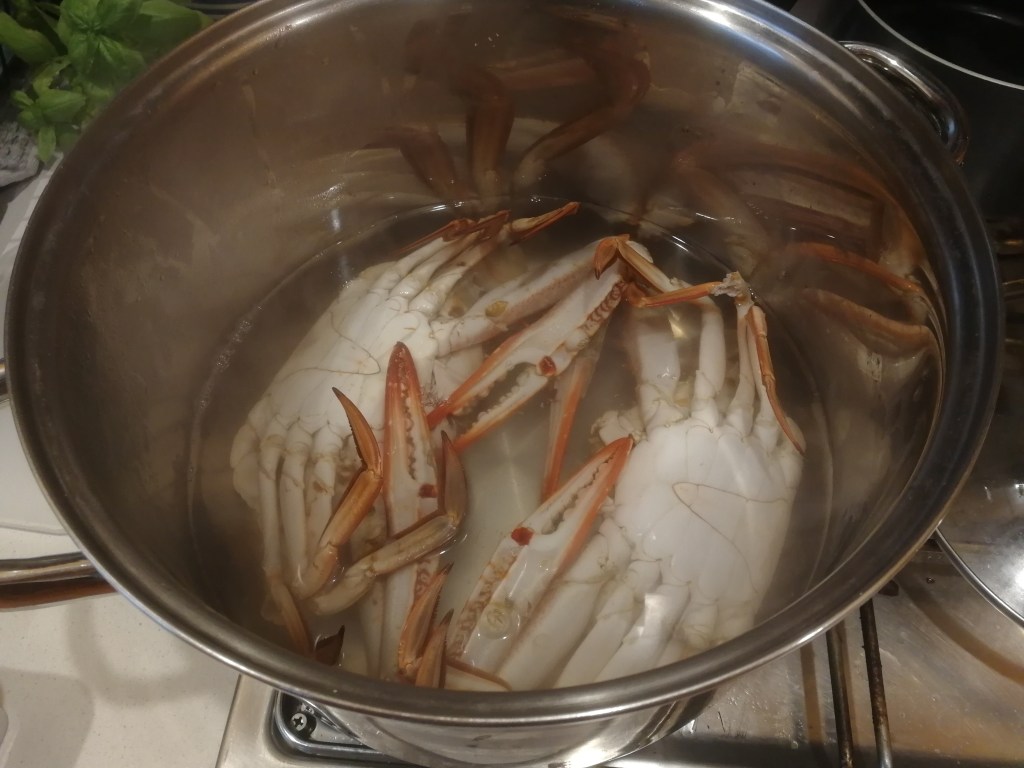
Boil the crabs (or crab) for 3 minutes circa in a pot with enough salted water to use later to cook your pasta. The idea is to start cooking the crabs while enriching the flavour of the water in the process. For bigger crabs, cook for a couple of minutes extra.
In the meantime, make a soffritto by lightly-frying a garlic clove, a chilli (it’s not a spicy dish, this is just for extra flavour) and a parsley stem (no leaves because they burn quickly). If you leave them cooking on minimal heat you can proceed with the next steps without turning the fire off.
Remove the crabs from the water and clean them as shown here. Mine is a lazy man’s recipe, so I simply remove the tail of the crab and its gills, but I do not extract any meat from the crab. It’s boring, it takes time and appropriate tools and getting dirty is integral to the crab-eating experience.
IMPORTANT: When you crack the torso open, it will release a sizeable amount of juicy water. Do not let it go to waste. Collect the water using a bowl during the procedure.
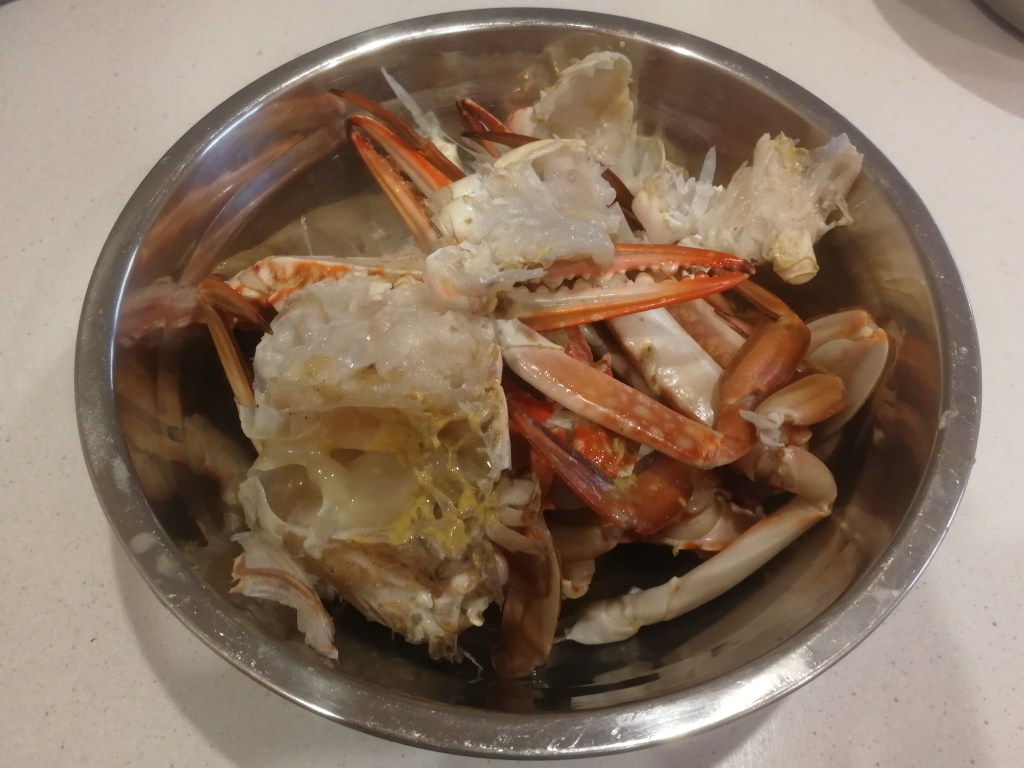
Put the top part of the torsos — the meatless shells — and the residual water detailed at point (4) into the boiling pasta water. To confirm, this is the water you have cooked the crab in in step (1). You are hence left with the legs and the meaty part of the torso — which you have split in two as shown here.
Crab parts that will go in the sauce pan.
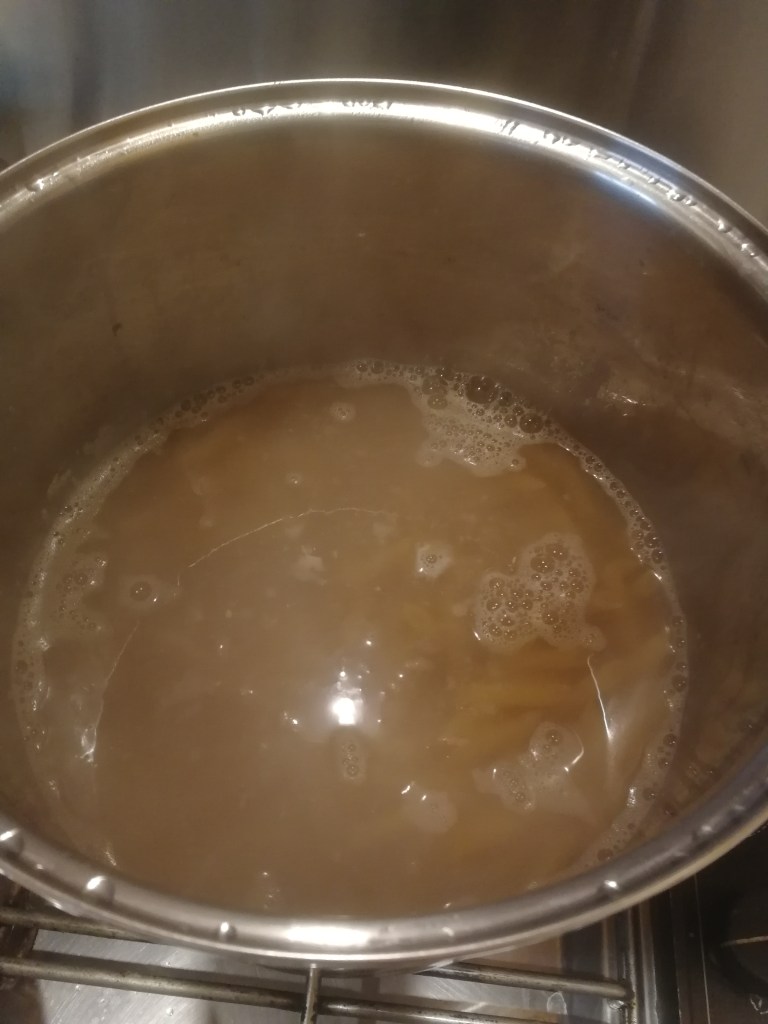
Put the pasta in the boiling pasta water. The juices of the crabs should have made this water dark and flavoursome. You can remove the crab shells and use them to embellish the plate in the dishing phase.
Pasta getting cooked in salted water rich with crab juices.
While the pasta starts cooking, throw the legs and torsos in the soffritto, together with some plum tomatoes (the sweet kind). Add half a ladle of tasty pasta water too, allowing you to cook on a high flame without burning the soffritto.
After about 5 minutes, add some brandy (or cognac) to the pan and flambé, as shown here or by lighting it using a match.
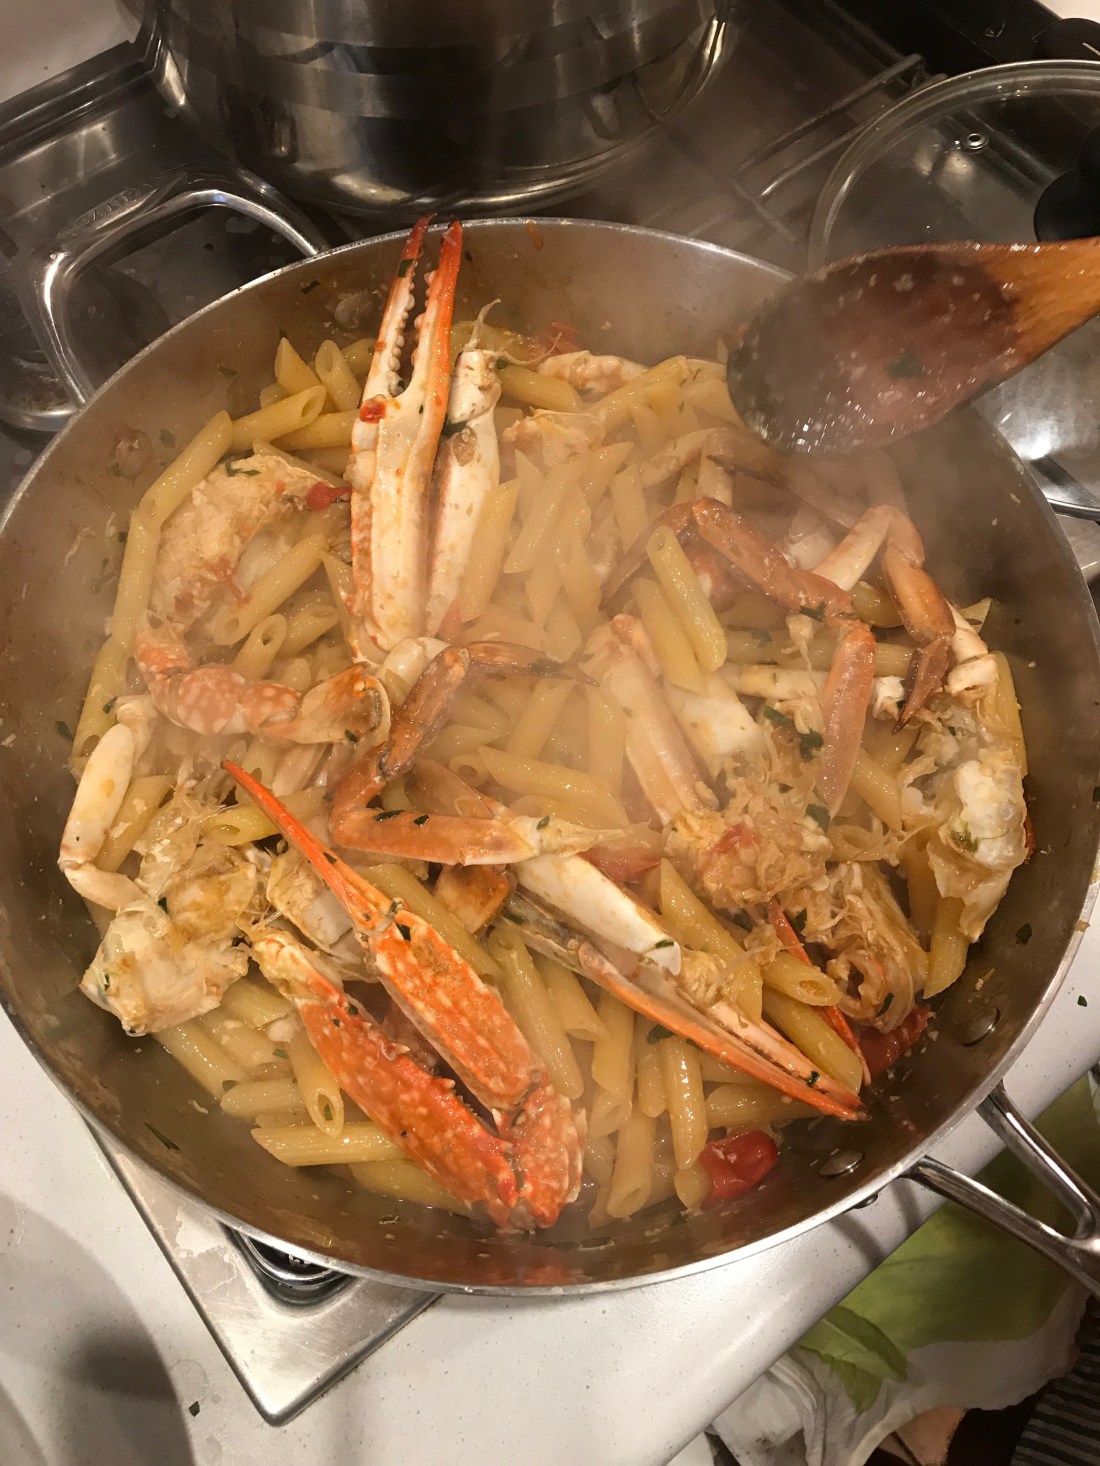
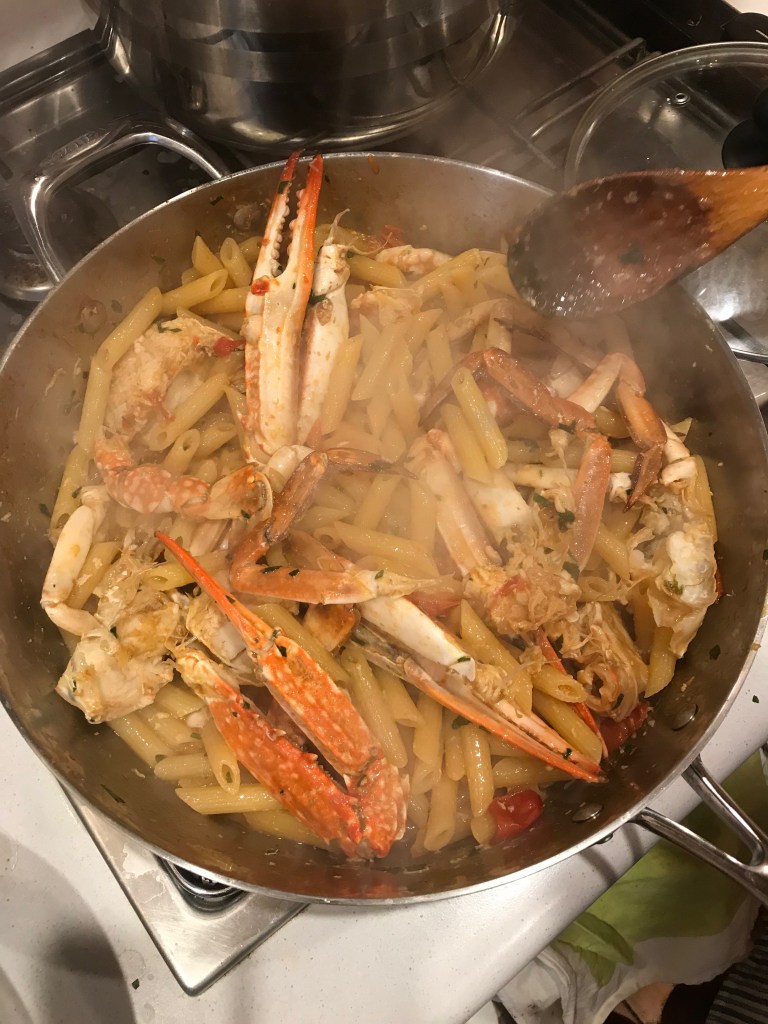
It is important that you finish cooking the pasta in the sauce pan. This procedure is called risotto-ing the pasta. The pasta still needs to cook for, say, 3 minutes. You place it in the sauce pan and add ladles of pasta water until the pasta is ready (to check when ready, simply keep tasting it). Watch this helpful video if you are confused. Keep either flipping the pasta or mixing it vigorously with a wooden spoon throughout the process. The idea is to trap air into the sauce so that it might thicken.
While cooking, add some tomato paste. It will enrich the flavour while not making the sauce too tomato-y. During the last minute of cooking, add some chopped parsley too. Keep a pinch of parsley on the side to add directly on the pasta when plating the dish.
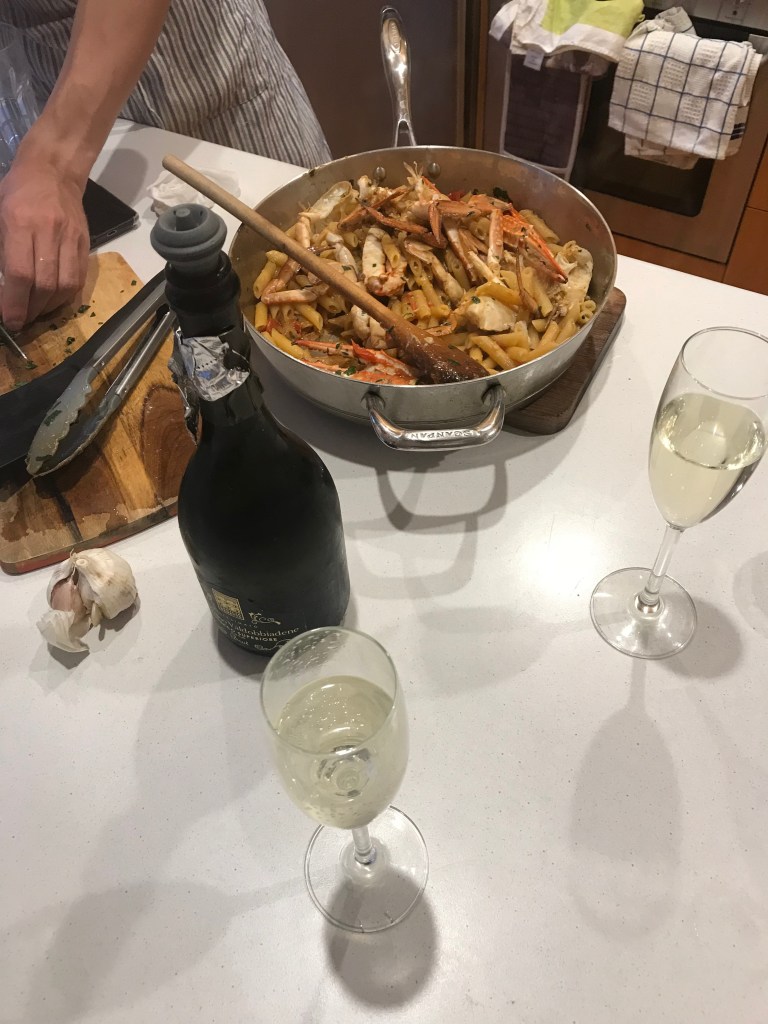
Congratulations, you have successfully prepared a dish that will make you famous among your friends!
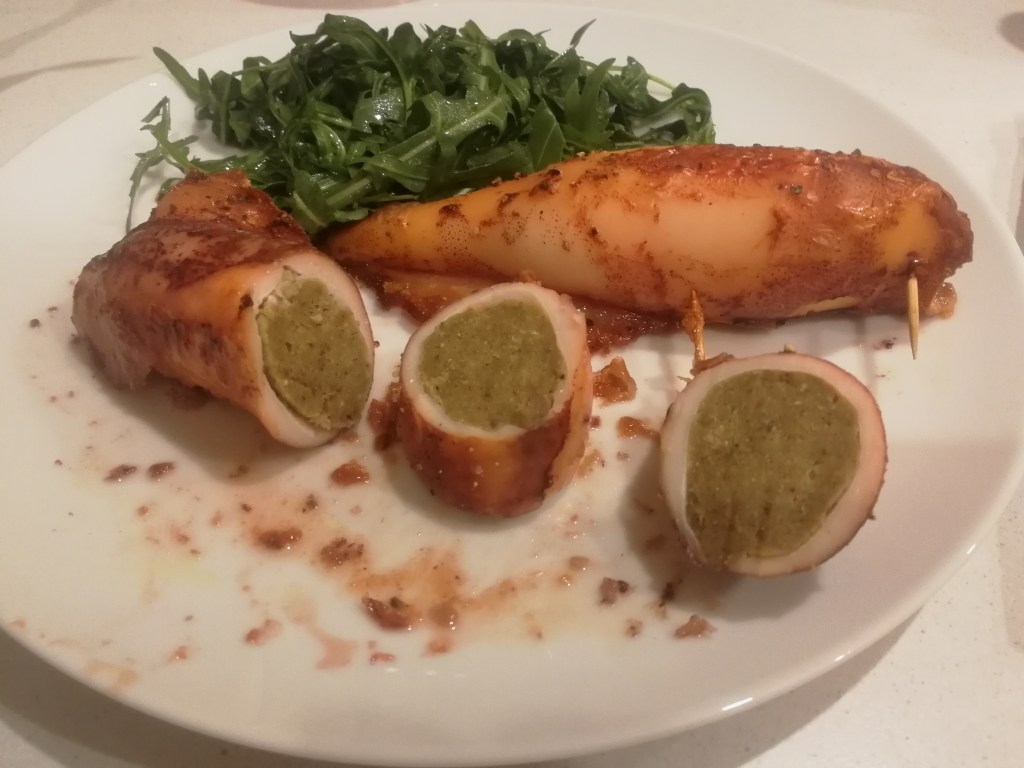
This is my super duper quick version of the totani ripieni recipe; perfect for when you want to treat yourself but have worked long hours.
Get 4 nice calamari. You know they are fresh when they still have their skin on. Clean them and separate the tentacles from the long head.
Now blitz the tentacles with stale bread, a bunch of parsley, one garlic clove and add salt and pepper. Take the oven to 175°. Stuff the calamari head with the paste obtained, close them with a toothpick as shown in the picture below. Put some baking paper on a tray and place the calamari on it. Grind a little bit of salt and pepper on them, grease them with a touch of extra virgin olive oil and then bake for 30 minutes. You are done, congratulations!
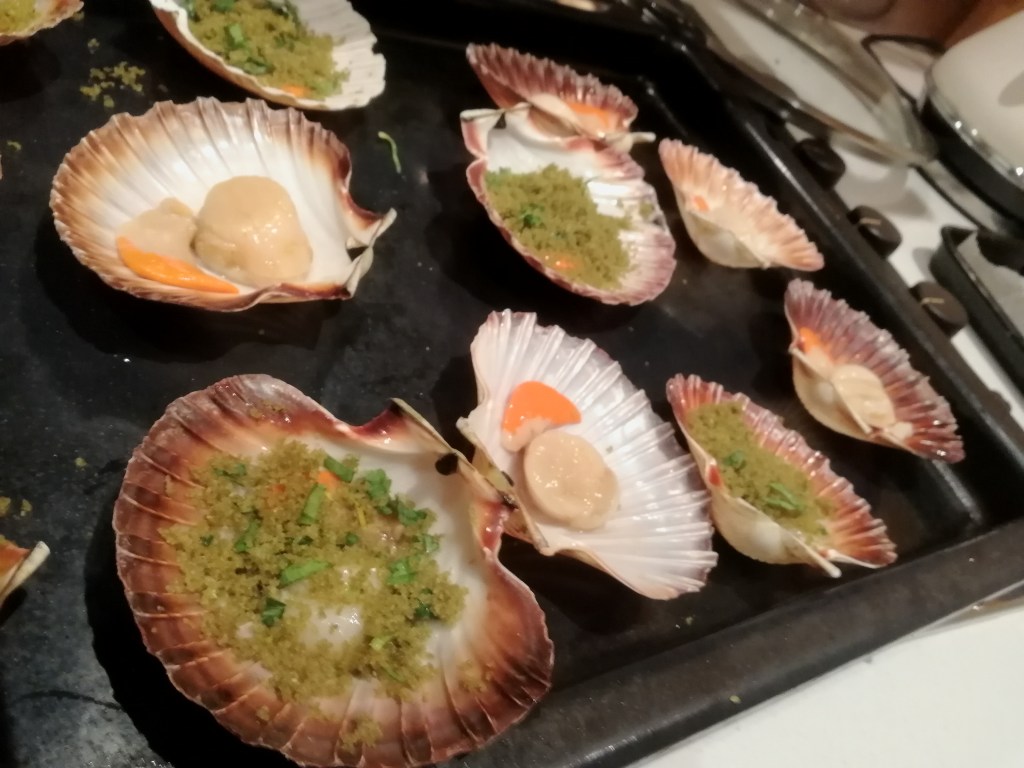
It’s scallop season! I took this opportunity to try a classic Italian recipe, often found at Christmas family gatherings. It’s super easy and the result is just delicious. This recipe is a slightly modified version of the one found here at Giallozafferano.
Buy the scallops (here 8). If fresh, clean them as shown in this video. Remember to not discard the orange part, or “coral”, as it tastes great too. Remove the crust from a piece of bread and place 100 g of bread in a mixer together with some parsley, 40 g of extra-virgin olive oil, a touch of lemon zest and a pinch of salt and black pepper. When adding salt to the breadcrumbs, keep in mind that this is the only salt you will use. Mix it: you have your panure.
Now, put the scallops back in their shells, cover them with the panure. Place them on a tray and the right in the oven, where they will cook for approx. 15 minutes at 190°. Complimenti!
This is a very basic recipe and a solid place to start. You can play around with the flavour by adding thyme, marjoram and other aromatic herbs. I might be trying another version soon, by legendary Chef Gualtiero Marchesi… I will let you know!
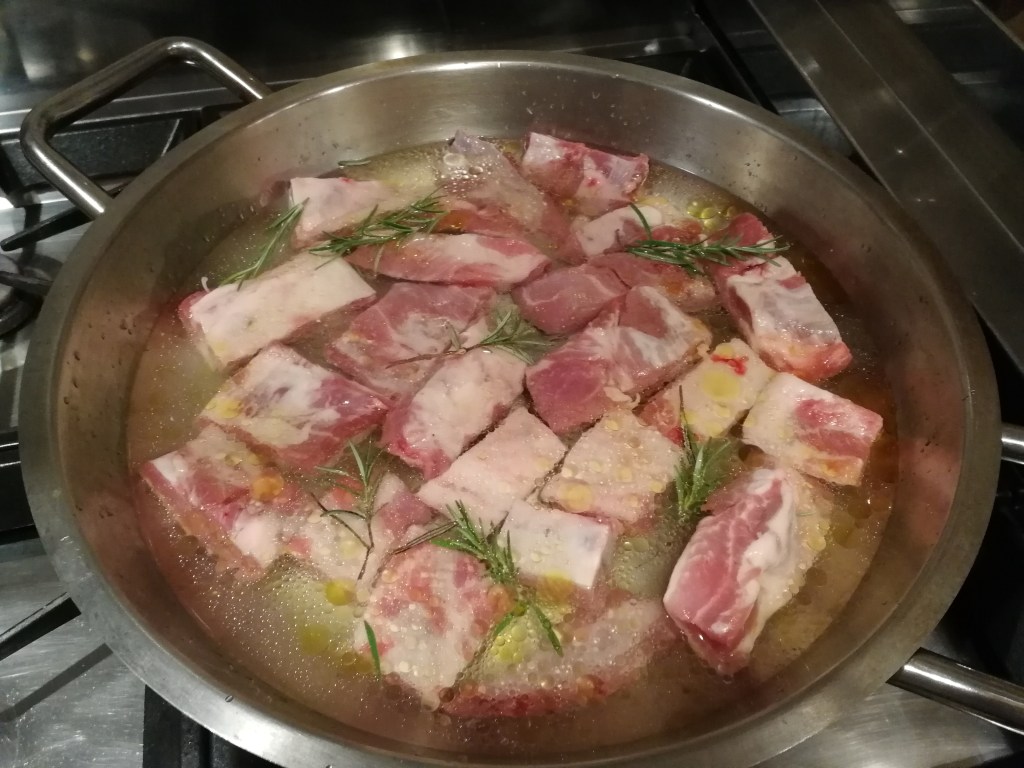
I tried out this recipe from the book “in cucina con Nadia & Giovanni Santini” for a dinner party with friends and it was a massive success. To give you some context, Nadia won the Veuve Cliquot World’s Best Female Chef prize in 2013 and cooks with her son Giovanni in the 3-Michelin-stars restaurant “Il Pescatore”.
So, ask your friends to provide abundant quality red wine and buy lots of ribs (they happen to be inexpensive). Here I am giving you the recipe for 12 ribs (4-6 people). Rub the ribs with salt and pepper and put them in a pan that can be placed in an oven, together with 1 litre of water, 50 ml of extra-virgin olive oil, the lemon juice of 1 lemon and 1 rosemary branch. Yes, you have to put it all together before you turn the flame on.
Cook them on a medium flame until all of the water has evaporated, then either place them in the oven (180°) or leave them in the pan. It is going to take around 50 minutes (minimum, in my experience) to make the water evaporate. Take them out when they have properly browned. If you opt for the pan, make sure to turn them continuously.
Have the parsley sauce ready to pair them with. For 6-8 people, start by finely chopping 1 bunch of parsley and putting it in a small bowl. Cover it with extra virgin olive oil (3 table spoons), add 1 undressed garlic clove cut in half and a pinch of salt and pepper. Add also the juice of half a lemon and 1 table spoon of white-wine vinegar. Your sauce is now ready. Enjoy.
Isola d’Elba, best know known for being Napoleon’s luxury exile destination, is a wonderful island located in front of Tuscany. It is a truly remarkable place, which has escaped the over-development that has interested many tourist destinations in the past decades. My family’s restaurant, part of a wider business, is there located, close to one of Italy’s best beaches: Fetovaia.
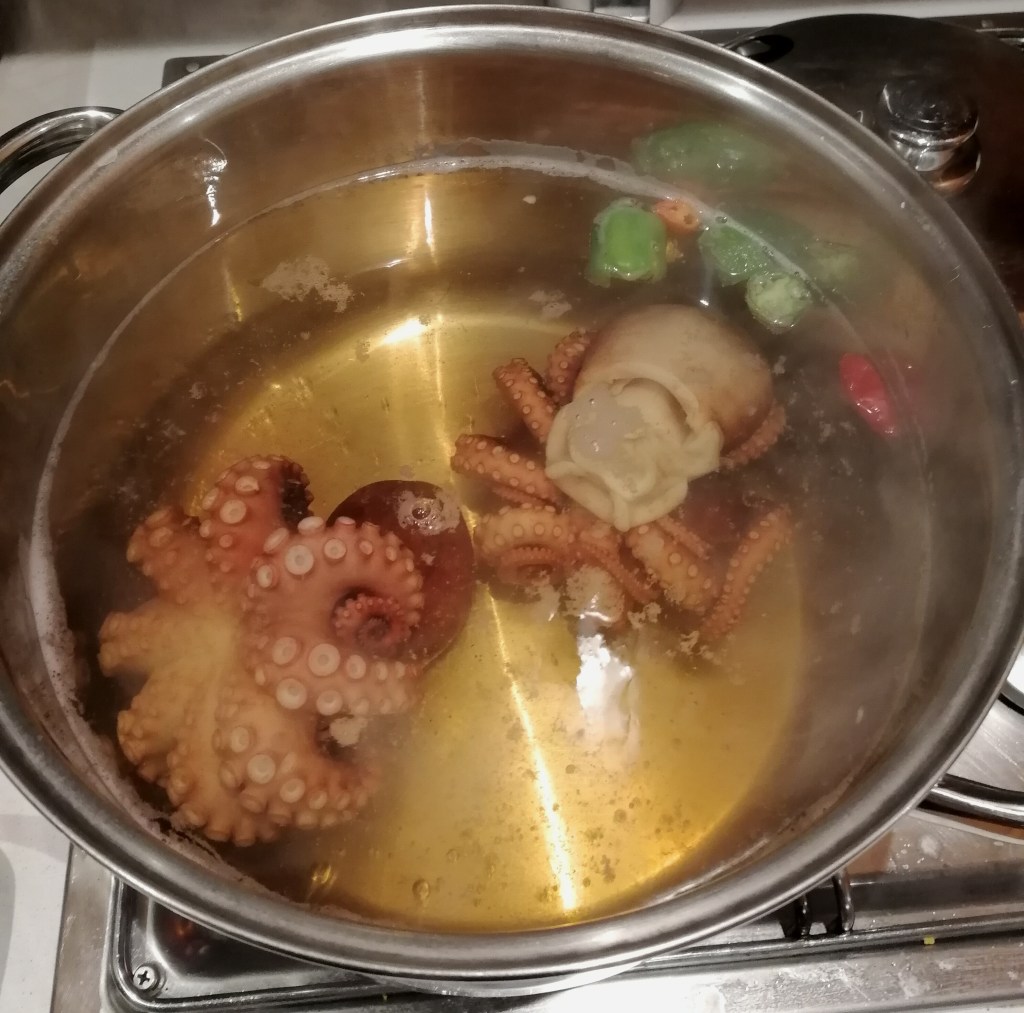
Enough marketing though, I want to talk with you about an essential recipe of the Elban cousine. Polpo all’Elbana is the way to eat octopus, to access its true flavour. It is a simple recipe, yet it does not disappoint. My source is Chef Alvaro Claudi (video), who passionately took upon himself the duty to put in words (he wrote several books) the secular culinary tradition of the island. In the video, he reminds us how octopus is not only a delicacy, it is also very low in calories if cooked simply.
Let us get to the point(s) now and see how to make it:
Fill a pot with water and boil it;
While you are waiting for the water to boil, clean the octopus. It is easy: just remove what is in the head, carve the eyes out and remove the beak, located at the intersection of all the tentacles;
Once the water is boiling, salt it. It should be 3 times the amount you would put for cooking pasta. If you don’t know how much salt to use, put 30 g for every litre of water in the pot. This is supposed to replicate the salinity of sea water. Add also a generous amount of chilli to it;
Fork the head of the octopus and bathe it all three times in the boiling water. This has a twofold function: to toughen the skin, so that it will not fall while cooking, and to give the octopus a pleasant shape, as you will be able to see yourself;
Leave the octopus in the boiling water for 20 minutes per each kilo of octopus;
Turn the heat off and leave the octopus to rest in the water for as much time it took to boiled it, while placing a lid on the pot. E.g. for an octopus weighting 1.5 kg, boil it for 30 minutes and leave it in its water for another 30 minutes. This will soften its texture;
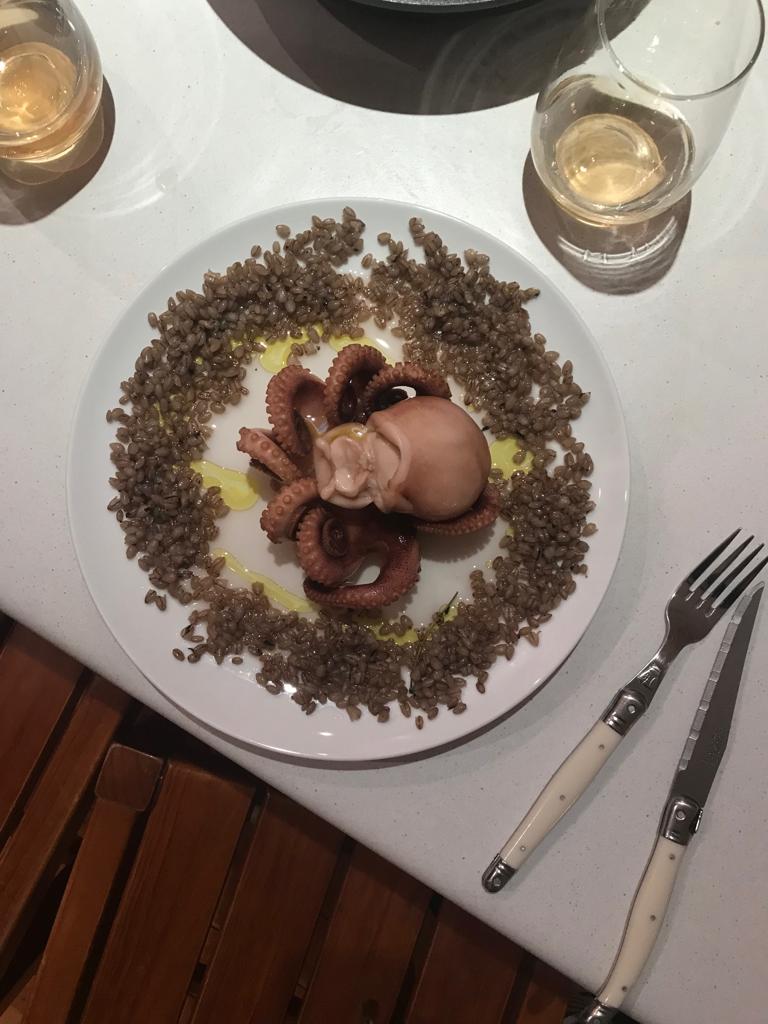
Take it out of the water and serve it with no condiments added (only a drop of extra-virgin olive oil is allowed).
I served it with barley, boiled and the pan-fried in a garlic, pepper and thyme soffritto. The white wine is a divine 2013 Pinot Grigio Nals Magreid Punggl from Alto Adige.
Spaghetti con la bottarga has always been one of my favourite dishes. It is so full of character, so quintessentially marine. Enough poetry, let us learn how to make this delicacy. The idea is to make a aglio, olio e peperoncino (aka spaghetti with garlic, e.v. olive oil and chilli) and then to grate bottarga on it. Hence,
Fill a large pot with water and put it on a high flame; while it you wait for it to boil, do the rest;
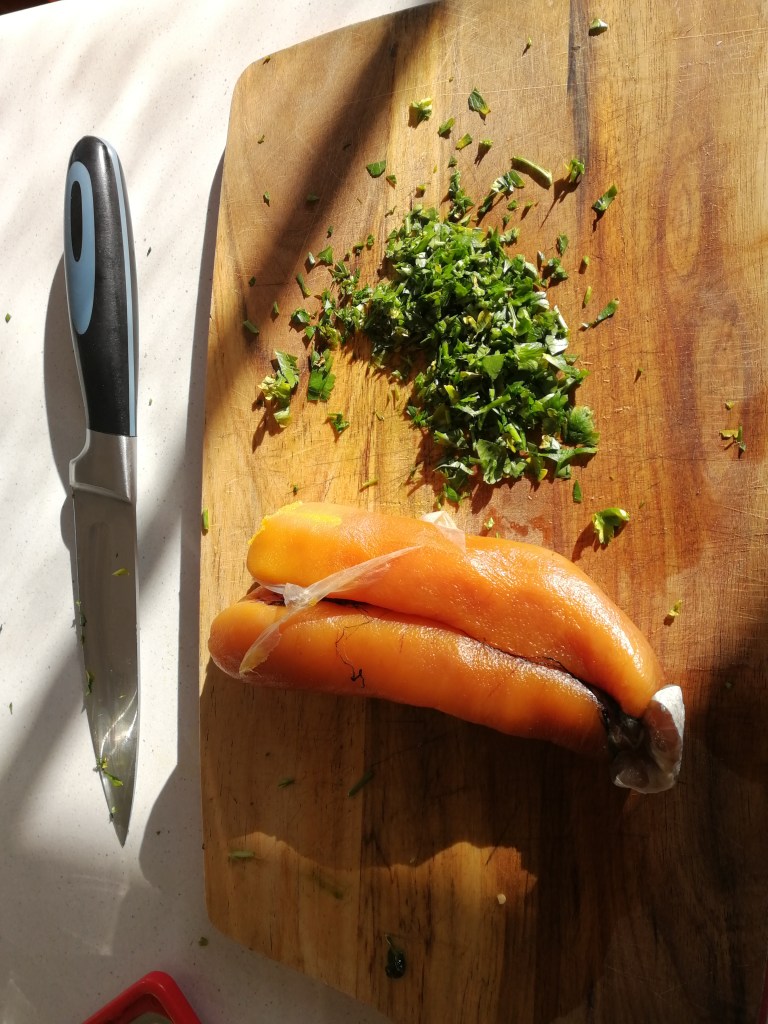
Finely chop a bit of parsley: you will need it later;
While the water heats up, pour extra virgin olive oil (e.v.o.) on a pan, medium flame. It needs to be a good quality e.v.o.;
Once the oil is hot, put garlic and chilli into the pan and let them lightly fry;
The water is boiling: salt it. If you don’t know how much salt to put, follow this rule of thumb: For each 100 grams of pasta, put 1 litre of water and 10 grams of salt;
Now put the spaghetti in the boiling salted water;
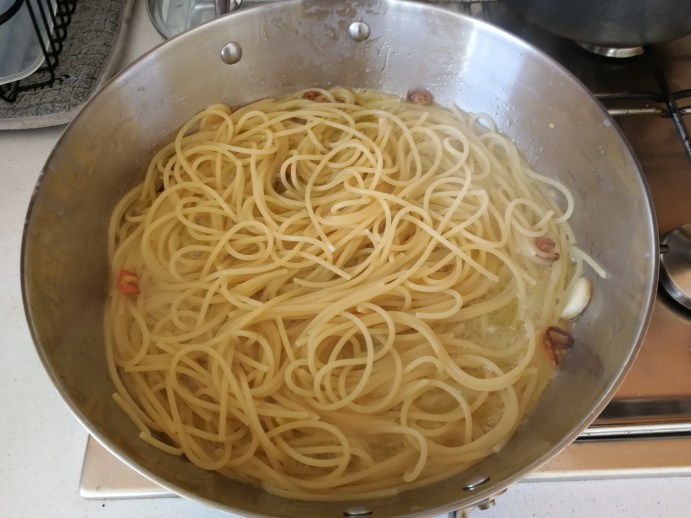
Cook the pasta al dente. The suggested cooking time for pasta al dente is usually written on the pasta box. However, for this recipe, drain the spaghetti one minute before that suggested cooking time and place the spaghetti in the pan (with the garlic and chilli). Keep some pasta water on the side, in case you need to adjust the density of the “sauce”;The aglio, olio e peperoncino finishes to cook in the pan (I added some water because it needed more cooking)
Pan-fry the spaghetti for a minute;
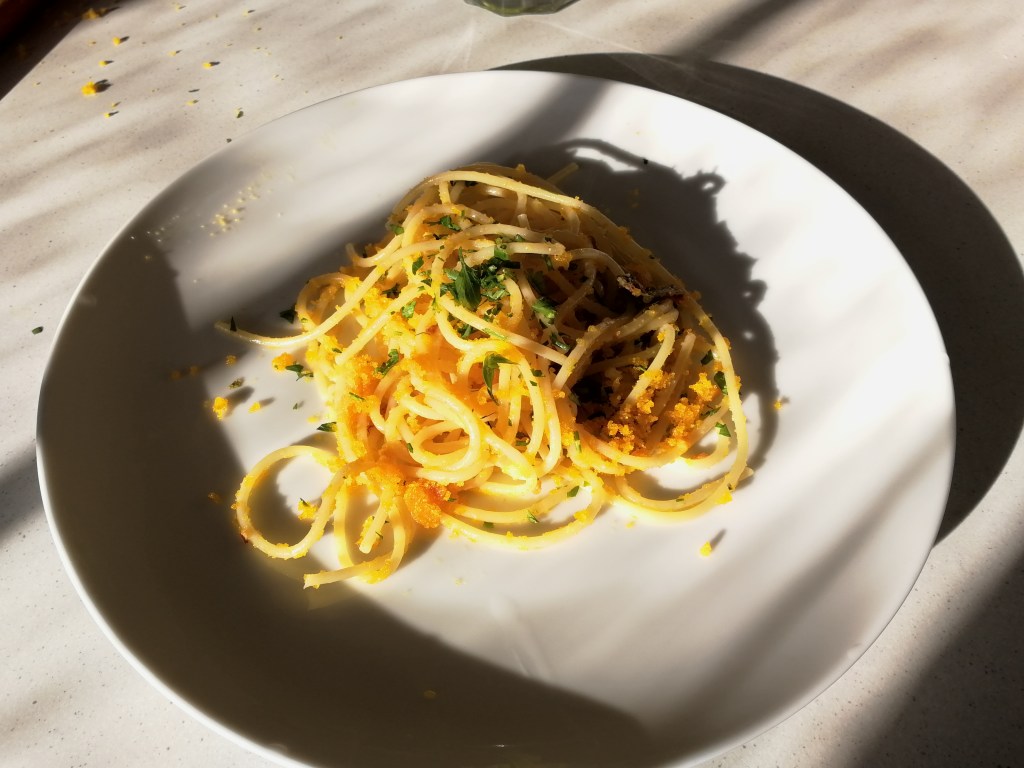
Once the minute has passed, turn the flame off and finely grate about a tablespoon of bottarga onto the spaghetti and gently mix. Be careful not to over do it, you will grate some more bottarga on each individual plate that you serve;
The final step is to serve the pasta! As already noted, you may grate a bit more bottarga on top of the spaghetti. Don’t forget to sprinkle with parsley.
Congratulations! You are a privileged human being. Fortunately I still have some bottarga in the fridge…