Abate pears 400 g (I use an arbitrarily large amount of 3-4 pears… the more the merrier). They must be nicely ripe and soft. Cow’s milk ricotta 375 g (exact amount doesn’t matter) Flour 250 g Baking powder 16 g Medium eggs 3 (surprisingly, I made it without eggs in the past and it tastes very similar!) Sugar 140 g Lemon zest of 1/2 lemon Vanilla pod 1 or capful of vanilla essence
Preparation Start by cutting the pears in cubes around 1 by 1 cm. No need to be anal about size. Remember to remove the core. I personally don’t mind leaving the skin on. Place the cubes in a bowl with a small amount of lemon juice to prevent them from oxidising.
Beat the sugar with the ricotta with a whisk. Then add the seeds from the vanilla pod (or, more realistically, add a teaspoon of good-quality vanilla extract). Next, add the 3 eggs one by one, continuing to whisk the mixture. Add the grated lemon zest.
Sift the flour with the baking powder and add them to the mixture, mixing until a smooth dough forms. Incorporate the diced pears into the mixture.
Butter and flour a 24cm diameter springform cake pan well. Pour the cake mixture into the pan and level it using a spatula.
Bake the cake at 180°C (static oven) for 50/70 minutes, or until a wooden toothpick inserted into the center of the cake comes out dry. If the cake darkens too much on the surface during cooking, cover it with aluminum foil and/or pour a little bit of water at the bottom of the oven to produce some steam. I prefer it not dark on the top.
Remove the soft ricotta and pear cake from the oven, allow it to cool, then turn it out. Enjoy! As a dessert, it goes great served warm with a bit of vanilla ice-cream on the side. As an afternoon tea cake, have it at room temperature or cold on its own
PS: I recommend storing it in the fridge both for taste and durability.
This is a recipe close to my heart, as used to eat cecina every summer at Il Castagnacciao, Portoferraio (LI). The below recipe is taken and translated from this video by the great IlBocca, a cook from Livorno specialising in local recipes.
Ingredients
250g of besan or chickpea flour – get the best you can
10-15g of salt
1 shot of great extra virgin olive oil – Rosto mellow from Harris Farm if you are in Australia
750ml of water
Steps
Soak all the flour in all the water for at least 5 hours (the more time, the easier to digest it later). To mix them, start with a bowl, put the flour in, and then gradually pour the water in, mixing it with a whisk as you pour. Finally, add salt and mix. Cover it and let it rest on the kitchen bench (a fresh spot, but not in the fridge).
Further mix this resulting liquid dough every hour.
After 5 hours, add the olive oil and whisk.
Preheat your oven to the maximum temperature in static mode.
Grease up the tray you are going to use either with a heat-resistant oil, such as sunflower oil (safer choice), or with some more of the same e.v.o. oil you used before (riskier choice, as it might burn). The choice of the size of the tray should be made so that the liquid dough, once poured, will be about 0.5 cm thick.
Put the greased-up tray in the preheated oven for about 2-5 minutes, i.e. until the oil is hot (but before it starts smoking).
Now pour the liquid dough in.
Let it cook for about 25 minutes on static at maximum temperature.
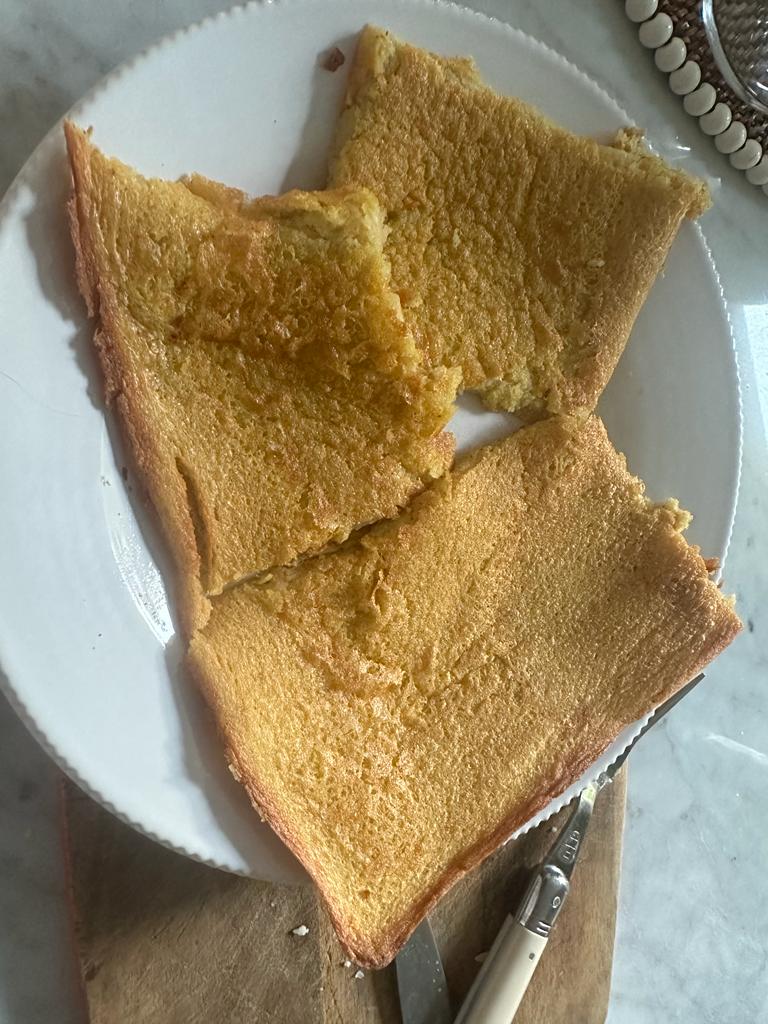
For the last 5-10 minutes put the oven on grill mode for a final browning touch. Don’t overdo it though, if the cecina already looks like in the picture, or even a bit darker, just take it out.
It is finally ready! Enjoy it, possibly with a generous amount of pepper on top.
This type of dish is not part of the Italian tradition—these long roasts of big chunks of meat, be they chickens cooked whole or legs and shoulders of various animals (with some exceptions, of course). It is a staple in English-speaking countries though, and I must say, I am a sucker for a good roast. It then makes sense that I borrow heavily from Gordon Ramsey’s video on how to make pork belly roast. Use this video to better understand my recipe.
The shoulder, in particular, is a delicious cut that is also easy on the pocket. It is meaty (unlike the belly) but also rich in fat and connective tissue, which brings a lot of flavor to the table. I used a deboned and vacuum-sealed pork roast. A high-end (free-range, etc.) piece but from a supermarket. It is usually recommended to buy it from the butcher in order to get a nice crackling skin, as the butcher’s meat is bled and dried much better. Notwithstanding the supermarket meat, I got excellent results. Let me explain how below.
Ingredients:
Pork shoulder – mine was deboned and tied into a roll
A fennel bulb
Apples
White potatoes
Red wine (of good quality)
A pinch of brown sugar
Fennel seeds
One juniper berry
A couple of cloves
Sage (fresh)
Rosemary (fresh)
A bay leaf (dried or fresh)
Salt & pepper
Extra virgin olive oil
Recipe:
Open and untie the pork. Wash it, dry it well, oil it, and season the side without skin with salt, pepper, fennel, rosemary, and sage. Only put salt on the skin side. Salt should be generous as this is a big cut. Let it rest for about 20 minutes if possible.
Now sear the pork skin in hot oil (EVO or a seed oil if you are afraid of burning the oil). This will dry out the skin nicely before hitting the oven and it is an important step if, like me, you are using packaged meat. You can do steps (2) and (3) into a large pan and then move everything into a tray or work directly with the tray.
Then remove the pork and add to the tray/pan apples, potatoes, and the fennel bulb, cut into big chunks. The flame should remain high so that they brown before going in the oven.
Now put the fruit and vegetables in a tray and place the pork shoulder rolled out flat with the skin facing up.
Pour at least two generous glasses of red wine into the tray (avoid wetting the pork skin in the process). Add water until the liquids reach just below the pork skin. We are not using stock here so a generous amount of wine is important. Add the bay leaf.
Put the tray on the stove and bring it to a boil. Preheat the oven to 160 degrees (Celsius) in the meantime. Set it to “static” (not “fan”).
Once boiling, place the tray in the oven for 3-4 hours. If you don’t have as much time, bake it for 2.5 hours at 160 and finish it 15 minutes on grill mode. Keep an eye on it though and adjust the timing based on how ready/burning it looks. Don’t ever take the suggested cooking time in recipes too seriously.
Once ready, remove the pork and the fruit and vegetables. Leave the liquids in the tray and place the tray on the stove on a high flame until they have thickened, turning into gravy. You can add a tablespoon of flour to the liquids to help the thickening.
You are ready to serve! Cut the crackling pork with a bread knife and plate it with the fennel, apples, and potatoes, pouring the gravy on top.
Enjoy this with a nice glass of full-bodied red and quality company.
PS I would recommend following this dish with a leafy salad, seasoned with (EVO, salt and) plenty of lemon juice to clear the palate.
1/2 litre of chicken stock (the simplest, most natural one you can find at the shops)
a rosemary branch
black pepper
salt
500g pappardelle
Preparation
Seal the pork neck on high heat in a big pan greased with evo
Deglaze with a glass of white wine
Once the alcohol smell is gone, take the pork neck out, cut it into big cubes (say 2x2x2 cm) and then put everything in a pot, together with carrots and celery in chopped in big chunks and the whole onion with 3 cloves “nails” pinned into it
Add the stock and enough water to cover everything
Add juniper berries, 5 peppercorns, the bay leaf
Let it stew on boil gently for 3 hours—heat should be low enough to allow for gentle boiling
Once done, take the carrots out and smashed them
Put the pasta in the empty big pan you used before (big pot if you don’t have one) together with the meat and smashed carrots pouring 2/3 of the stew juices in
add the rosemary
salt now everything, gradually adjusting as it cooks, according to taste
keep gently mixing, so that all the pasta cooks in the juices
you will notice that the pork meat will break down nicely during this process
add the remaining juices in a couple of rounds—the goal is to have the pasta wet enough to cook it while also getting a thick sauce (too much liquid would make it soupy)
Once the pasta is al dente (it should take between 5 and 8 minutes), add a bit of grated Parmigiano Reggiano (or Grana Padano) on top and mix. Add more on top after plating for looks
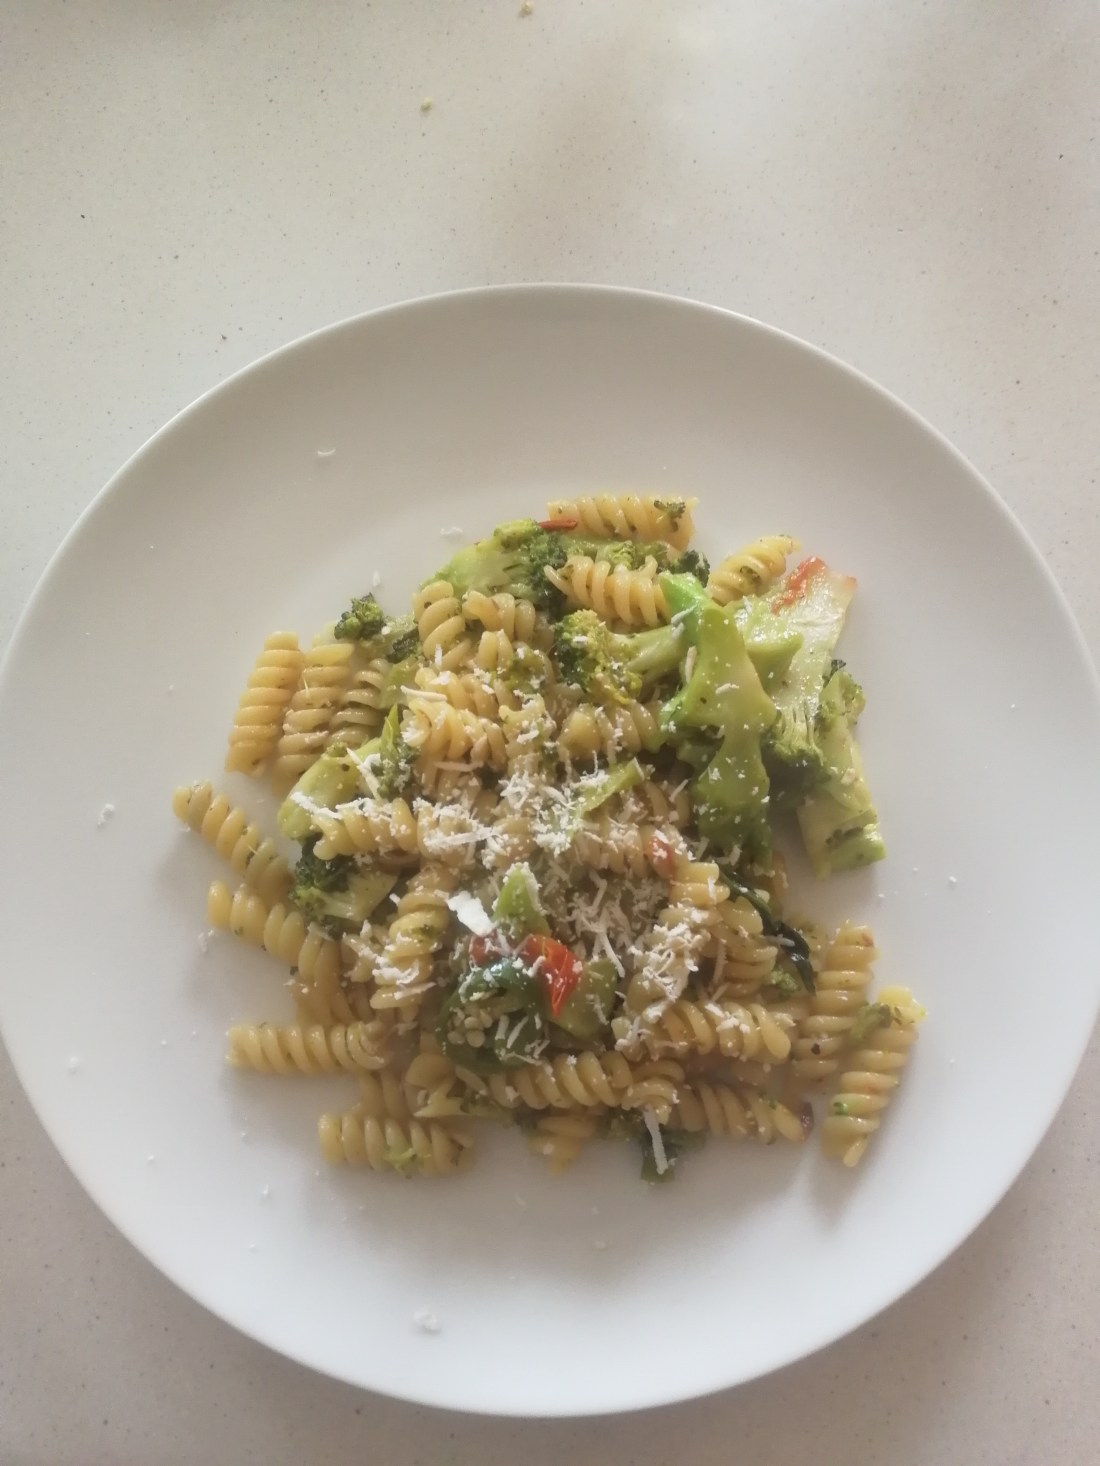
Hey three readers, I’m back to publish this recipe, which has become a staple in my life. Very easy, no big requirements, guaranteed success. A friend has asked me to put it down, so here is what you’ll need:
400 g of pasta. I like to use fusilli (e.g. La Molisana) but orecchiette are more traditional, given this recipe come from Puglia;
A piece of ricotta salata (I get it from Harris Farm or Crown Street Grocer, Sydney);
90g of anchovy fillets in olive oil (you MUST use the brand Delicius, see here. Again, Crown Street Grocer);
a broccoli head;
a little parsley branch;
a chilli;
a clove of garlic;
extra virgin olive oil;
salt and pepper;
A note on ricotta salata. Ricotta salata is the aged salty version of ricotta. I strongly recommend you to use it, but if you really can’t find it or want to try out the recipe with what you have in the house, you can use pecorino or even parmesan (not recommended).
Put a pan on low-medium heat and light fry some chilli (at your discretion), a parsley branch and a clove of peeled garlic in a generous amount of evo oil. Add half of the anchovies too, making them dissolve into the oil.
When the garlic has browned (after about 5 minutes), remove it and the parsley branch, otherwise they’ll end up burning.
Now add all the chopped broccoli to the pan. The finer you chop them, the more the sauce will be “creamy” rather than chunky. The broccoli will absorb most of the flavoursome oil. That’s okay. I usually just top up after with an extra bit of oil though.
That’s it. Let the Fettuccelle boil in salty water separately for 10 minutes and then add them to the pan with a ladle of pasta water. Mix the pasta vigorously as it finishes cooking with the sauce on a high flame.
Only when the pasta is cooked (al dente!) You can turn the heat off and start grating the ricotta salata on top, while also mixing. This is what we called the “mantecatura” phase. Remember: heat off. You’re not looking for a pasta with strings of cheese. The cheese should remain kind of raw and blend in with the sauce.
Extra tips. (1) If the pasta gets too dry while on the pan, adjust the creaminess by adding pasta water to it. (2) If you want to take the edge off the anchovies, add half a glass of dry white wine to the oil-anchovies mix. Then let the alcohol evaporate. Then add the broccoli. (3) Some lemon peel in the soffritto is a nice addition.
Hi mum/sister/distant relative. This is one of my favourite dishes to cook and savour. It is essential, quick to make, tasty and will test your agility in the kitchen.
Ingredients.
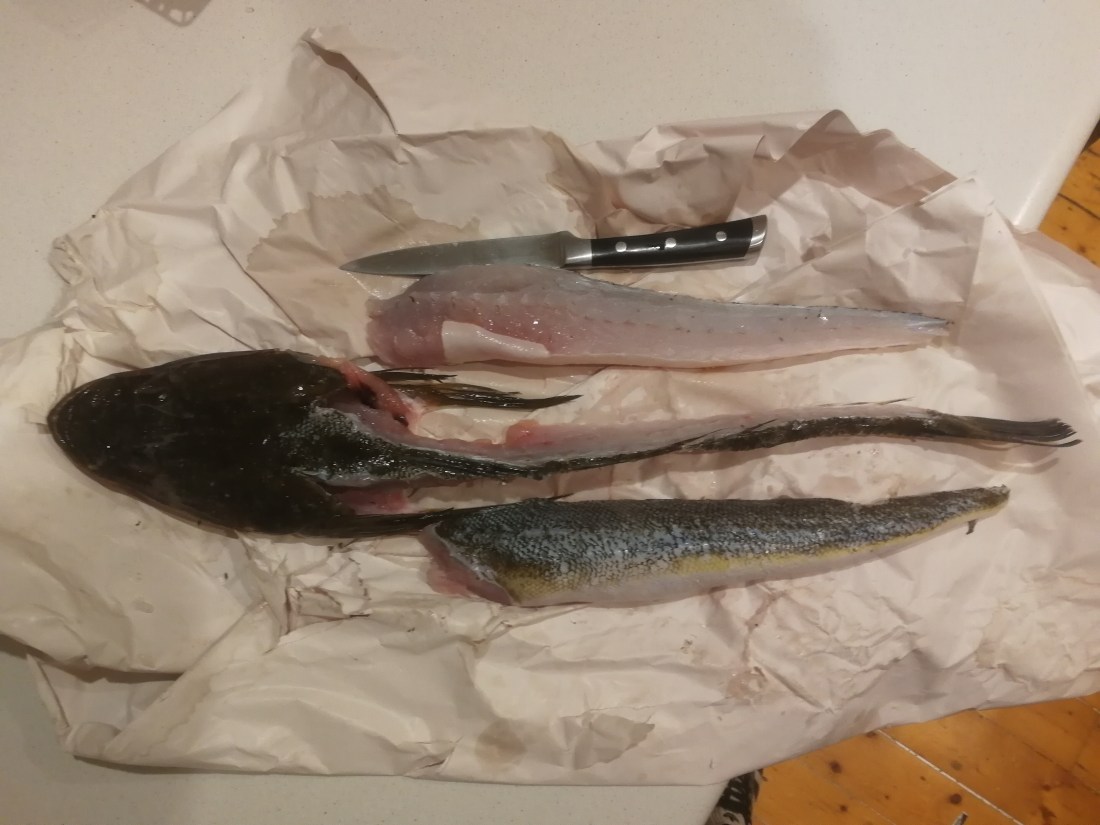
a flathead;
some basic white flour;
extra virgin olive oil;
salt & pepper (to be added after plating);
some salad to serve as a side, dressed with evo oil & lemon.
Preparation. Fillet the flathead as shown in this video. I enjoy filleting my own fish, you should try it too. I usually buy my flathead de-gutted and without scales. Leave the skin on. Put some flour on a plate and fill a bowl with cold water. Now dip one fillet in the cold water and let the excess water drip back into the bowl. Then, place the fillet on the plate and cover it with flour. Now dip it again and flour it again. You should have managed to create a somehow fragile but reasonably thick batter. Repeat the procedure for the other fillet.
The oil. Pour some evo oil into a pan, so that it is 0.5-1cm deep. Turn the heat on and check when it is hot enough by throwing little balls of flour and water in every now and again. If the fry, the oil is ready. throughout the frying, you need to ensure that the oil is not burning (lots of smoke and bad smell). You can lower the temperature by adding some extra oil and lowering the flame.
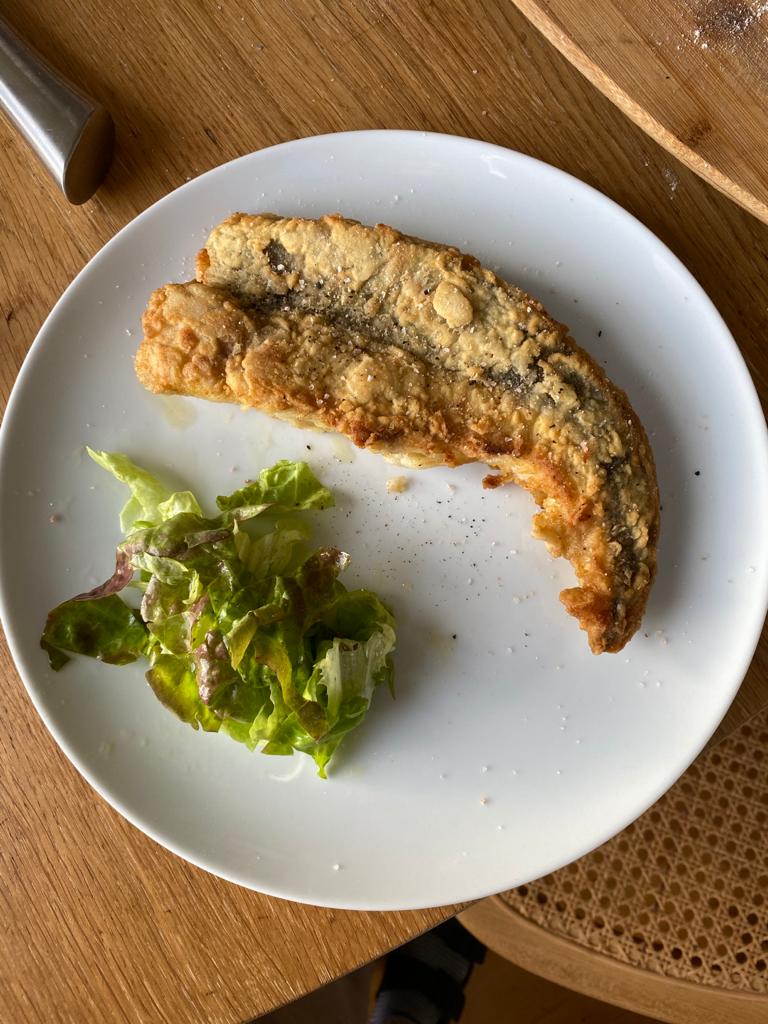
Fry! Now gently place your fillet(/s) into the pan. Let it fry on one side until it is crunchy (on that side). Then turn it. Be mindful to turn it only once, and be gentle. Let it fry it to crunchiness on that side too. You should also regularly scoop some hot oil on the short sides of the fillet, which will tend to remain undercooked. The whole frying process should take you 15 minutes maximum. The lovely golden colour of the battered fillet will suggest you when to take it off the flame and serve it. Only now add salt and pepper. Salting before or while frying will make your fish soft, not crispy.
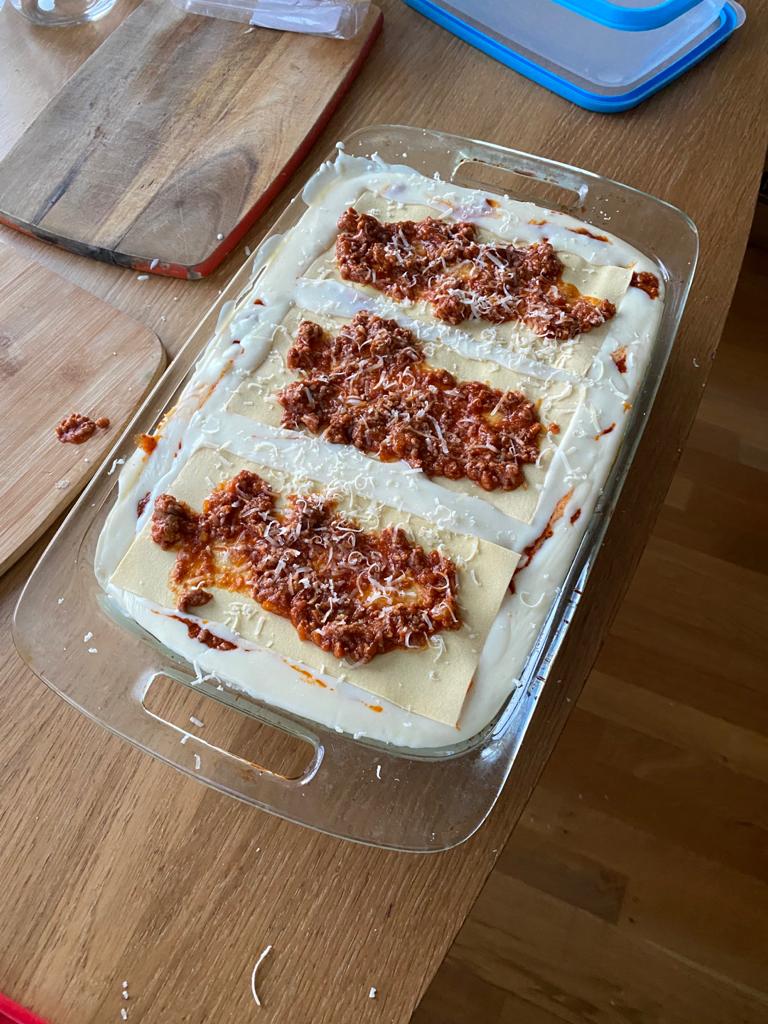
Hey you, family member, let me explain how I make my lasagna to you, so you we can share the joy of making and devouring it. The recipe is not particularly mine — it’s a rather traditional version — but it is such in that I am sure it differs from other recipes you will find online. Notice that the prep pictures refer to a huge lasagna I made last year (unless specified). Let’s get to it.
Ingredients. I like to make more ragù (the Bolognese sauce) and besciamel (the white cream) than necessary, so that I can freeze some of the leftovers or repurpose them for another recipe. Hence, I make a lot of both. The below list will give you enough to make 6 BIG portions of lasagna.
Ragù:
a carrot, a celery stick (the whole branch), an onion;
half a glass of white wine (better if dry). You can use red wine too;
1kg of fatty beef mince (not the lean one, which will result dry);
The ragù. This is 90% of the work. Let’s make another list, so that it is easier to follow:
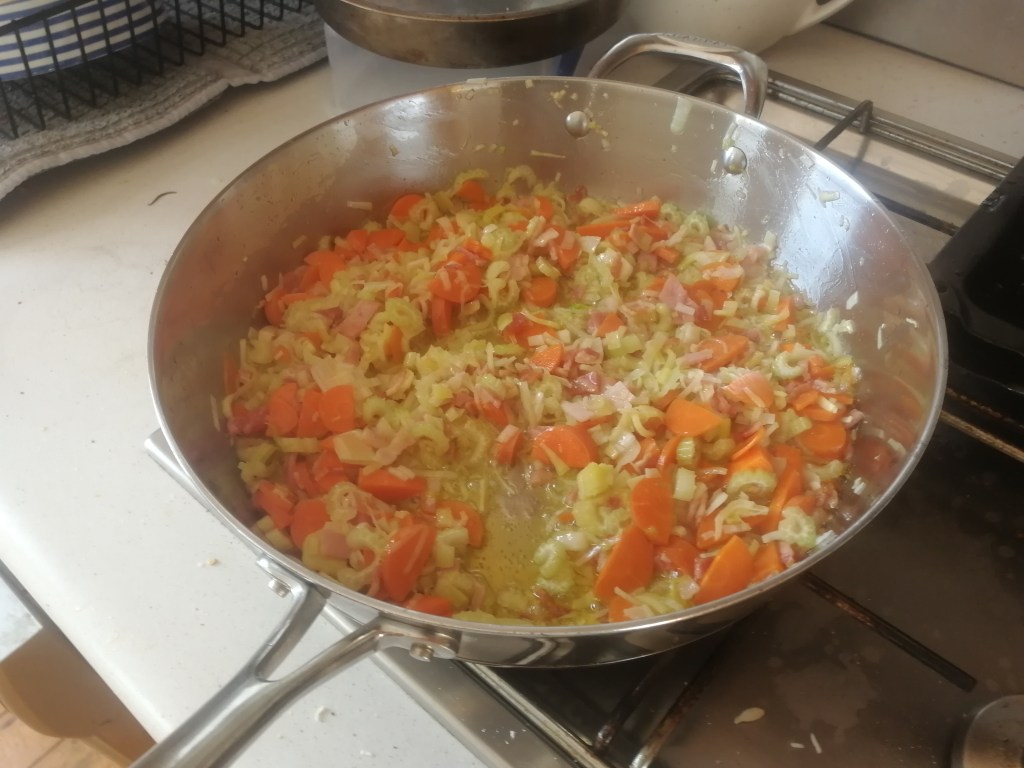
Pour a generous amount of extra virgin olive oil into a big pot. Dice the onion, the carrot, the bacon and the celery stick and let them light fry in the pot, while being careful not to burn them.
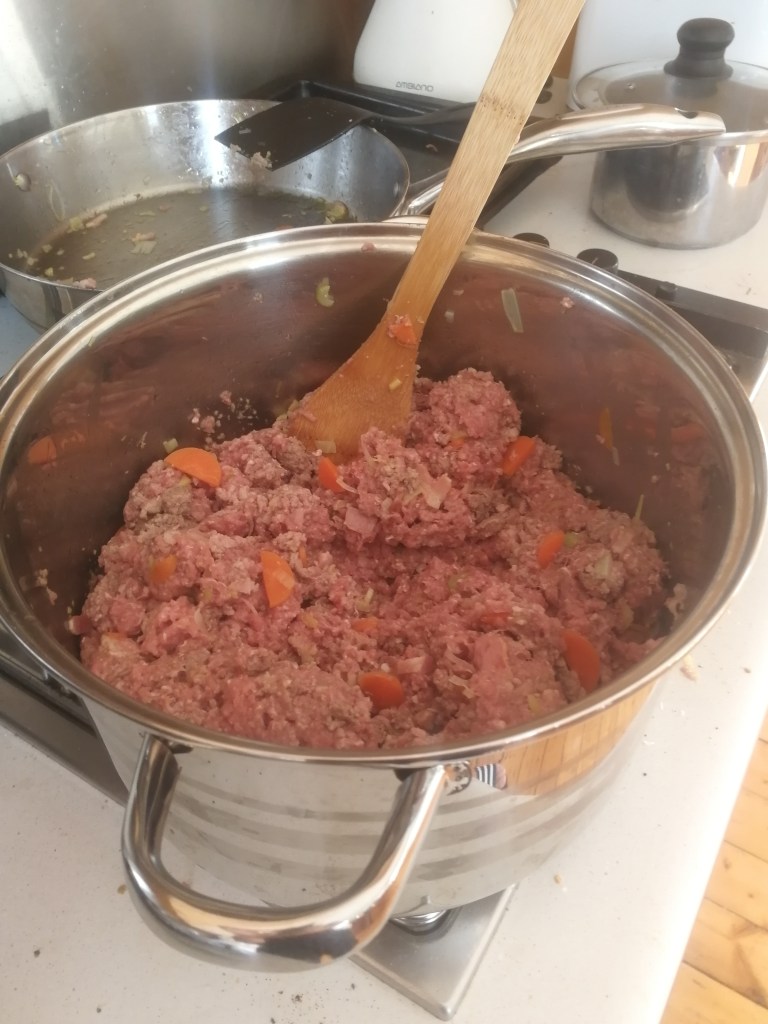
When they start browning, put the minced meat in, which you have already mixed all together (beef, veal and pork) by hand.
Put the flame on high allowing the meat to brown. Mix it while it cooks to brown in uniformly.
After about 10 minutes, the mince should have browned enough, pour the wine, keeping the flame on high, thus allowing the alcohol will evaporate quickly.
Add salt and pepper to your own taste.
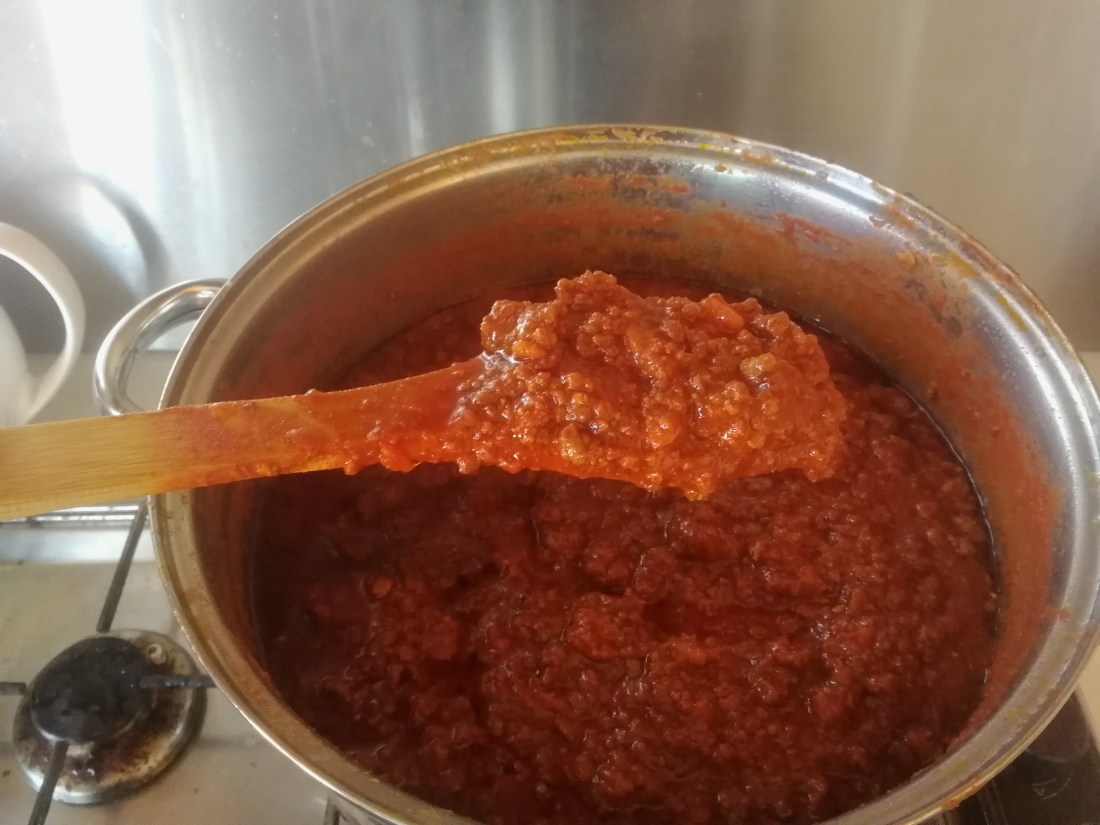
Once you cannot smell the wine’s alcohol, add the tomato passata and turn the flame to minimum.
At this point, if you have some meat or even chicken stock, add it. I usually don’t have it nor I want to buy it ready-made, so I substitute it with a dollop of milk (from the 2 litres listed above). The milk adds fats and texture, just like the stock, and it is a variation present in many traditional recipes. Some will see it a heretic move. Ignore them.
Together with the passata, add the bay leaf and let the whole mix cook for hours. The longer, the creamier. I left mine for an entire afternoon.
When it’s nice and thick, and you have decided to turn the heat off, add salt and pepper again.
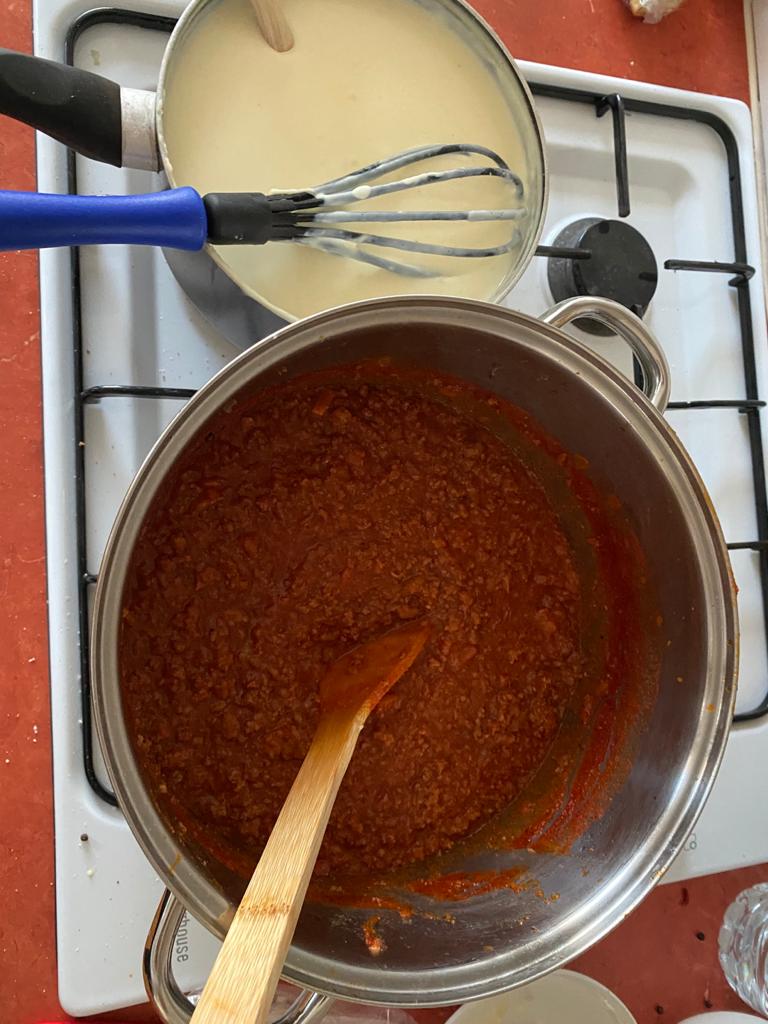
Prep of huge Easter lasagna #2
The besciamel. This is a tricky stage, as making besciamel is conceptually easy but requires care. You must stay on it and continuously mix it until it is ready. Failure to do so will result in a burnt and lumpy cream.
Put the butter in a pot and let it melt gently. Careful not to burn it.
Add the flour. Sifting it will minimise the formation of grumes.
Mix and cook for about 5 minutes on a gentle flame.
Add the milk in about three steps, while increasing the heat to medium-low. The stronger the heat, the faster the thickening, but the more intensely you will have to whisk.
Keep whisking and dissolving the grumes until besciamel has lightly thickened. I say lightly thickened as it will keep thickening after you turn it off and you need to take that into account.
When it is ready, add a touch of grated nutmeg, adjusting based on you preferences.
Prep of lasagna using quantities listed in this post #1
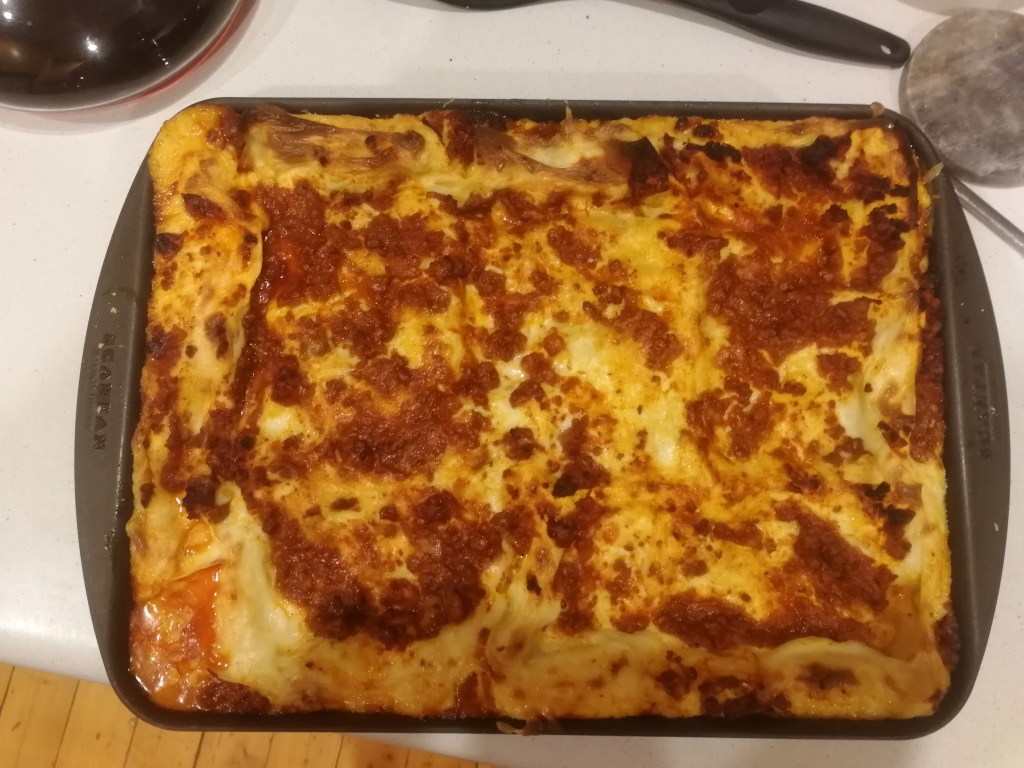
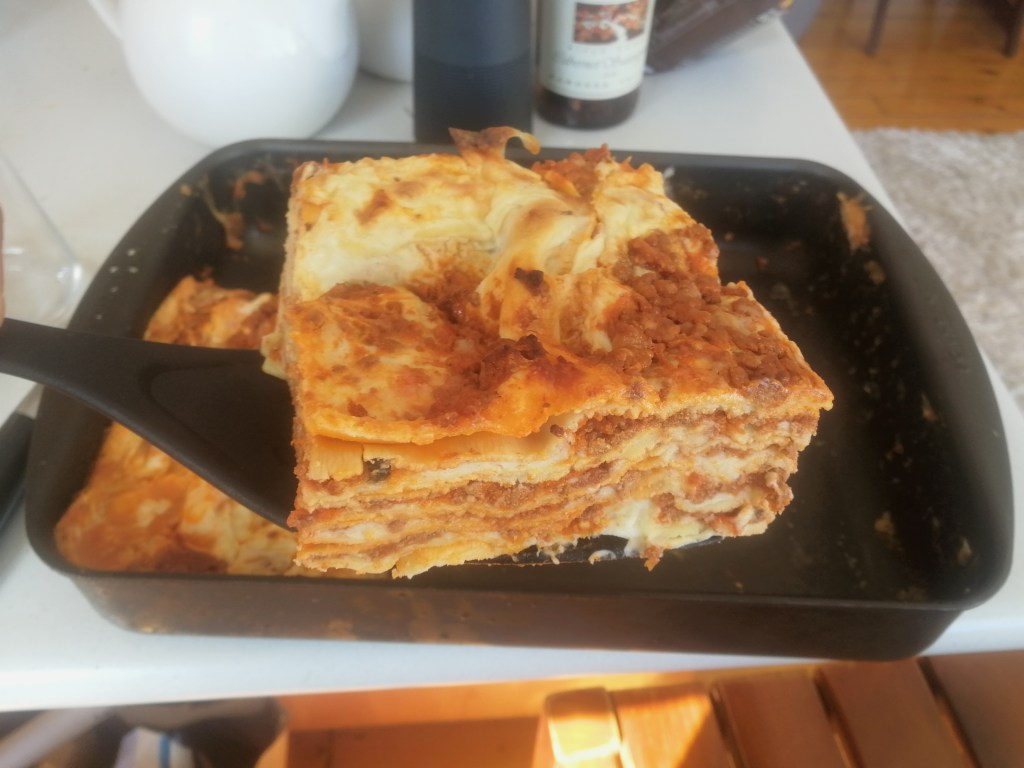
Build & Cook. Now pre-heat the oven at 200 C (fan oven). Pour a first layer of besciamel on your roasting pan (something similar to this kind of product). Then, cover it with (raw) lasagna sheets. Now pour a layer of besciamel, then a layer of ragù. Now grate a little bit of parmesan on top. Repeat the sheet-besciamel-ragù-parmesan process until the pan is full. The last layer should be made only of ragù and lots of parmesan (no besciamel). Cook it for about 30 minutes at 180 C. More importantly, simply take it out when the top looks golden, crispy and — why not — a bit burnt.
Prep of lasagna using quantities listed in this post #2
Let it cool down for a few minutes and enjoy it with your loved ones!
Ciao
PS you can find some very helpful step-by-step pics here. Use them to better visualise the steps.
Hi relatives, I am writing this post to recommend you this video and to put the video-recipe down in words. I shall be brief and painless. I only have one thing to say before I start: this is easily the tastiest easy meat-based pasta than you could ever make. Hence, give it a chance with your guests.
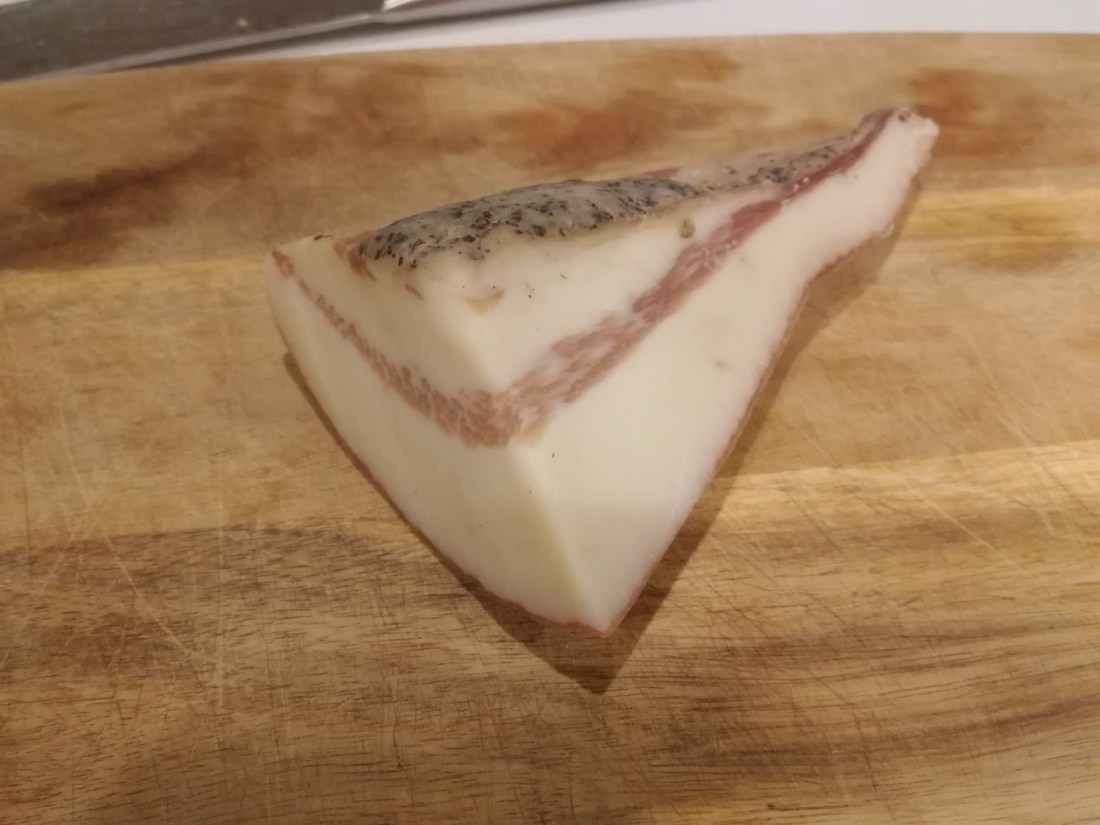
Disclaimer. Do not use pancetta nor bacon. It has to be guanciale. The flavour is completely different, lightly smoked and earthy, nutty… Heaven on Earth. In Sydney, you can find it in Harris Farm (I found it in two different shops, check the product at this link) and Crown Street Grocer (which has lots of top Italian imports and a fair price).
Ingredients. I think last time I made it for two people I used 200g of guanciale. The only other ingredients are spaghetti, a drop of white wine (best if dry), salt (for the pasta water) and pepper. The rule for buying good quality pasta, is to pick pastas that have at least 12.5 grams of proteins per 100g of product. A weak basic Barilla features only 11g, not to mention international brands. No, please, no. It will overcook and spoil your meal.
This one I got was a bit too fatty. Better to have more “red stripes” in it.
The recipe, in bullet points.
Cut skin of the guanciale (cotenna)
Cut the guancile in strips about .5 cm thick (no need for them to be cubes)
Put in pan. Nothing else: no butter nor oil go with it
Let it release its grease (the fat needs to melt)
Keep mixing it so that it cooks evenly and does not stick to the pan
When they are nice and golden, take the guanciale pieces out of the pan
Now the pan only contains the guanciale fat
Pour a little bit of white wine (less than half a glass) to take the edge off the taste of the fat
Max the heat
Use pecorino that is fairly fresh (not very seasoned and salty)
Grate it as thin as possible: it should look like a cloud!
When the alcohol has evaporated, put the pasta in the pan (when it is still a bit raw) . At this point, he removes some fat from it, I don’t… why lose flavour?
Add a bit of pasta water too, to finish cooking the pasta
Now grate black pepper on generously (the grey of the pepper gives the pasta its name)
Hey 3 readers, let me put down this short and hopefully effective blog post for you (and for myself).
Let’s assume that you want a big loaf that will last you for most of the week (further assuming only 2 people are eating it). The baking method is, as before, the poolish method, which is probably gives you the best bread you can get without creating your own starter (which is burdensome to keep alive). Hence you start by creating a predough, called poolish, to which you will at some point add the remaining ingredients to form your actual dough.
Notice that bakers think in percentages relative to the flour’s weight when they work with a recipe, so that they can easily scale it for loafs of different size. My recipe is for 1kg of flour so it has the extra benefit of making percentages straightforward. These are the overall ingredients that you will use:
1kg of flour, of which 500g of wholemeal flour and 500g of Manitoba [100% flour];
770g of water [77% hydration];
20g of salt [2% salt];
1g of dry yeast or less [0.1%]
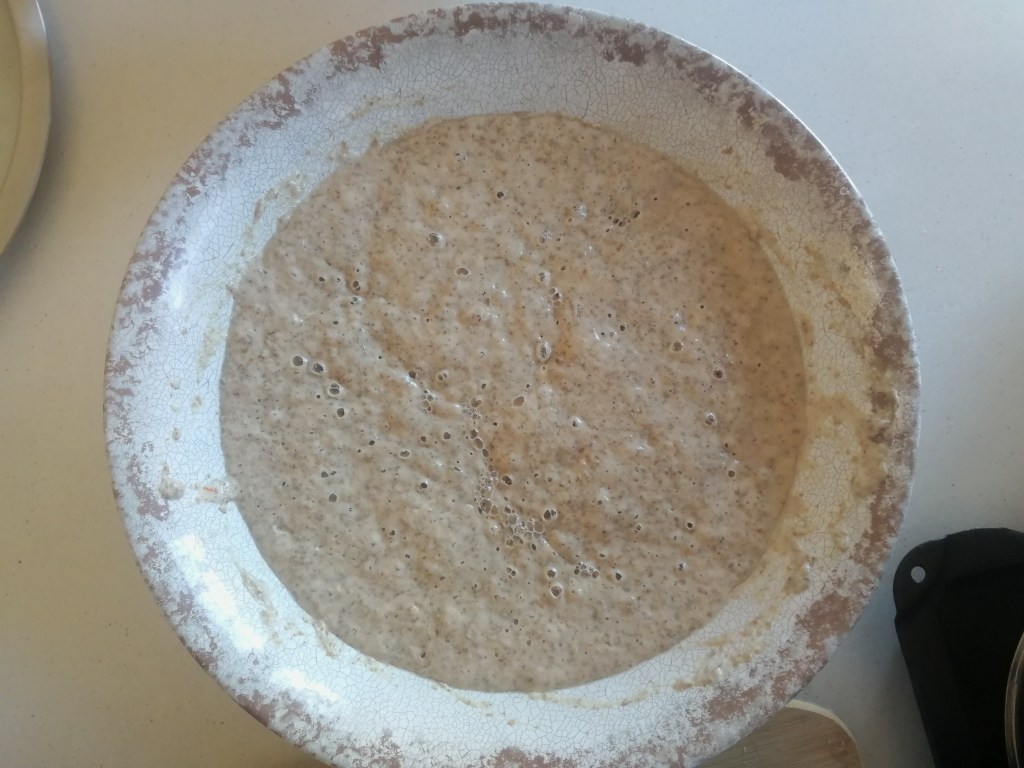
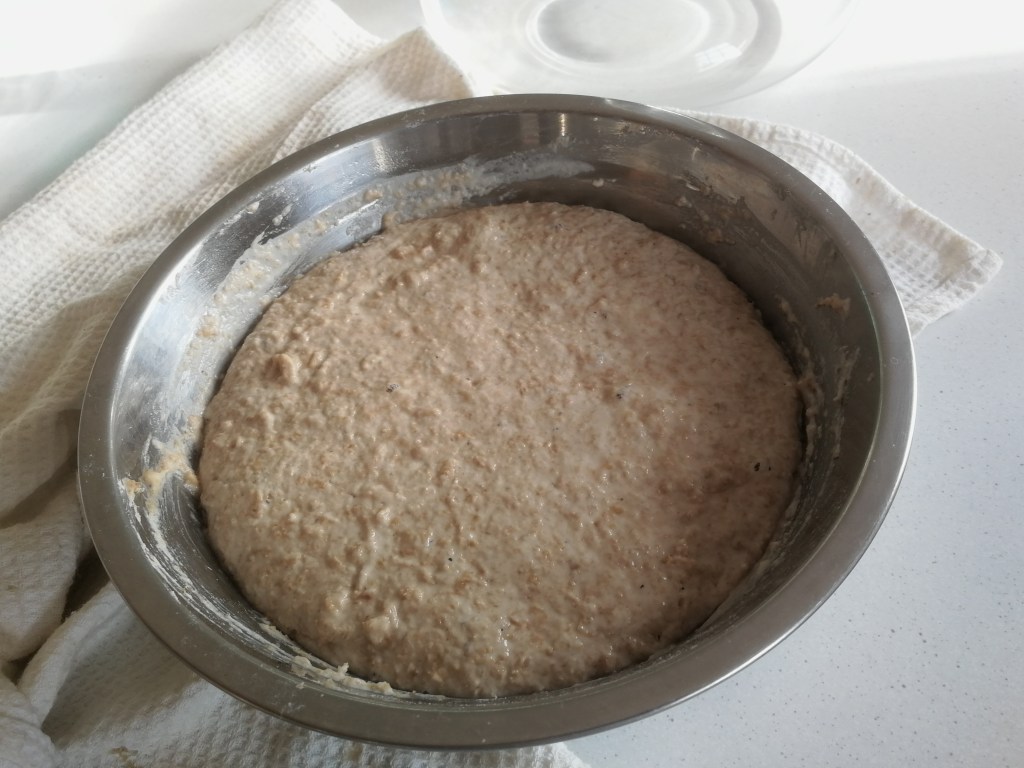
The poolish.Dissole all the yeast in 350g of lukewarm tap (drinking) water. Then add 350g of wholemeal flour and mix gently until you have a mass, a blob, of water and flour. If you have doubts about how to do the mixing in practice: don’t worry, it’s super simple. Check how this YouTuber does it (consider only the mixing part). Now cover it with a plastic film or a lid (always cover your dough) and leave it to rest at least overnight. If the temperature of your house is warm, it will be enough, if it is rather cold, it might take more. It should feature bubbles on its surface, as in the picture below. If you are not feeling confident that the poolish is ready, try the float test.
the poolish is ready
The actual dough. Add the rest of the ingredients (not the salt yet) and form the your actual dough. Let’s see how. Put your poolish in a big bowl (it might be already in one) and add 1/3 of the remaining flour (which will be a mix of wholemeal and Manitoba) and about 1/3 of the remaining water. Now mix and repeat until all the flour and almost all the water have been added. In the bit of water you kept aside, add all your 20g of salt. Don’t do anything with this salty water yet. You can get indications on how to mix from this video (from minute 1:47).
Autolysis. Have breakfast while your dough rests for minimum 20 minutes (max 1h). This will “automatically” create some structure within your dough, in what is a kind of self-kneading process. After the 20 minutes have passed, add the salty water and gently work the dough until the water is fully absorbed by the dough.
The folds. This recipe does not involve actively kneading, but rather helping the dough “self-kneading”, gaining structure progressively. If you are in lockdown, maybe you can fold the dough as shown below every 45 minutes or so for 3 times. If you have to go to work or don’t want to be harassed, just let the dough rest for 8 hours and do the folding after that. To see how to fold, check how it is done in this video, it’s super easy. Each time you repeat the procedure, you will feel the dough getting more supple and elastic, more stretchable. It is gaining the structure that will allow it to trap air inside (produced by the yeast) and to form “the bubbles”. If you have chosen the lockdown option, let the dough rest for 8 hours after the third cycle of folding.
Your pre-lamination dough.
The lamination. Now, this is an interesting passage that I have introduced only recently. It is very effective in giving additional structure to the dough and spreading the bubbles evenly. I learnt how to do it by watching this video. They add ingredients while laminating, but you don’t have to and if you are following my recipe you shouldn’t. After you have completed this step, leave the dough on the table for about 30-45 minutes.
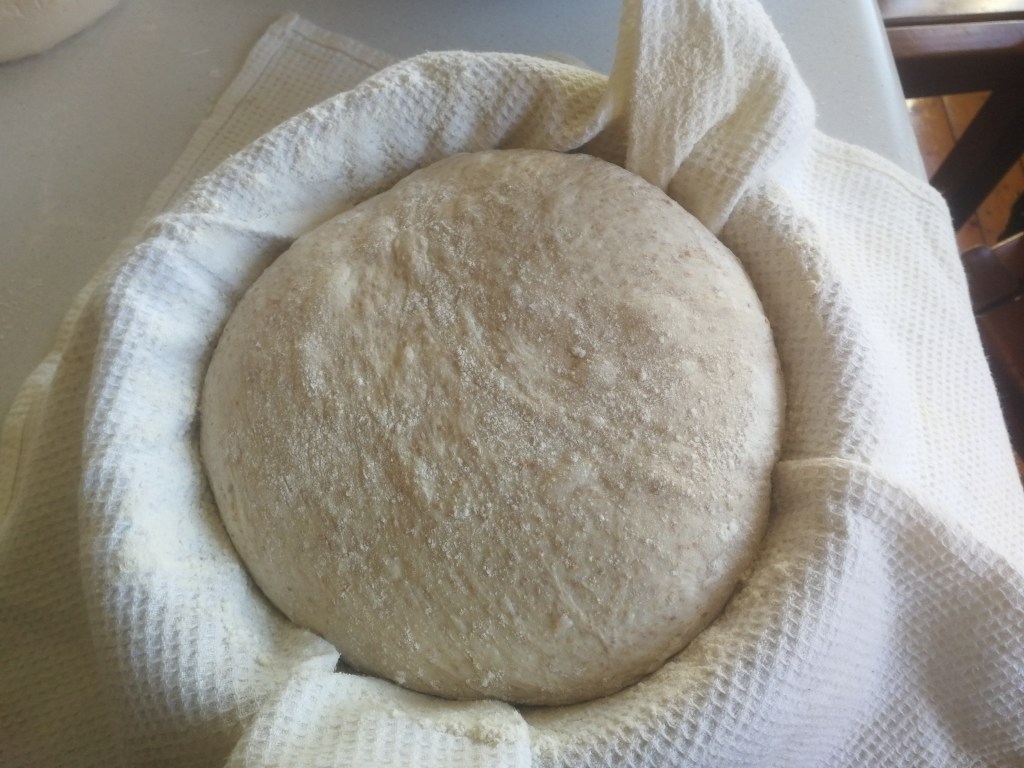
The formation. It is time to work the dough for the last time. Shape it in a boule (a round loaf) using this technique. Then grab a clean and dry towel, put it (wide open) in a bowl and cover it with a generous amount of flour. Now place your nice and round dough into it and dust it with flour at the top too. Cover the dough with the corners of the towel and put it in the fridge (proofing phase). It will stay there at least 30 minutes, the minimal amount of time to make it cold.
The dough is ready for proofing.
The scoring. Leave the dough on the table while your oven gets to 250 degrees (Celsius). When the oven is ready: (i) create tension in the dough, as shown here (as the dough has relaxed a bit since the time you shaped it); (ii) score it, using your sharpest knife, as shown here; (iii) generate steam in the oven. About point (iii), I usually do as shown here, which entails pouring water on a hot tray at the bottom of the oven.
The baking. The loaf will bake for 15 minutes at 250 degrees (static oven, often called bake, or classic bake, mode). Then you will open the oven, remove the steam-generating tray, lower the temperature to 180 (200 max) degrees and let it bake.
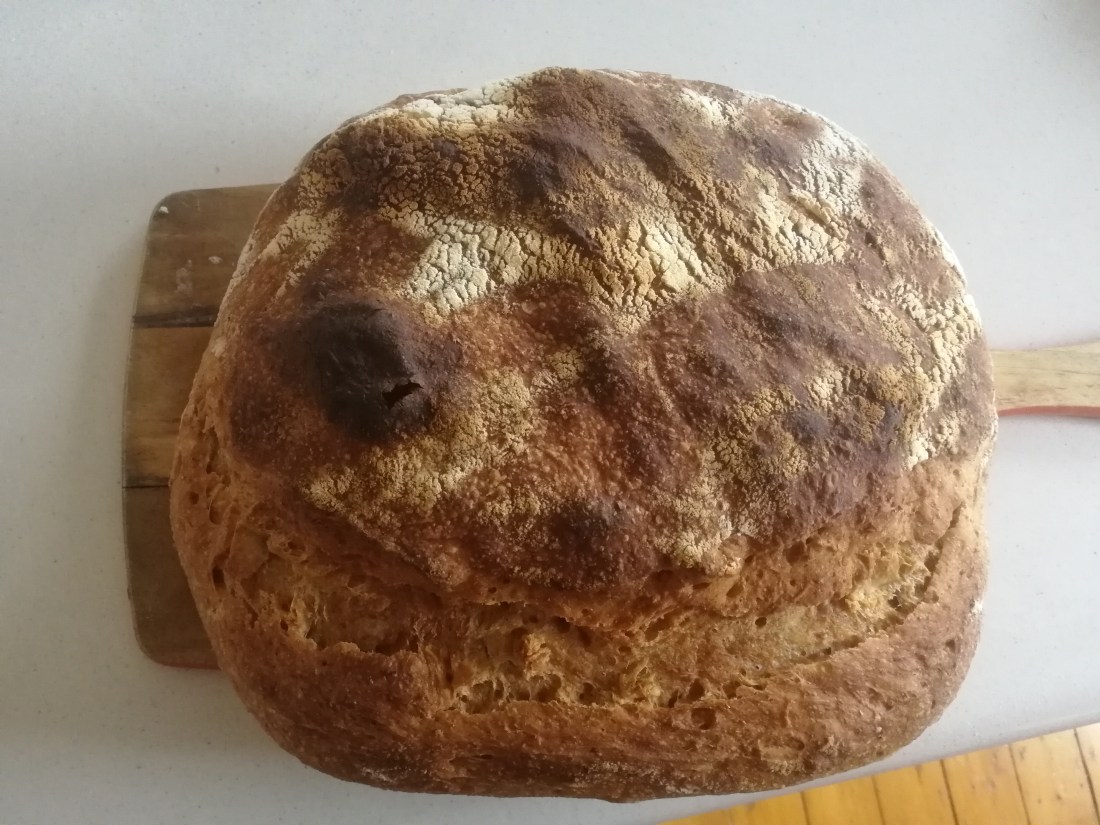
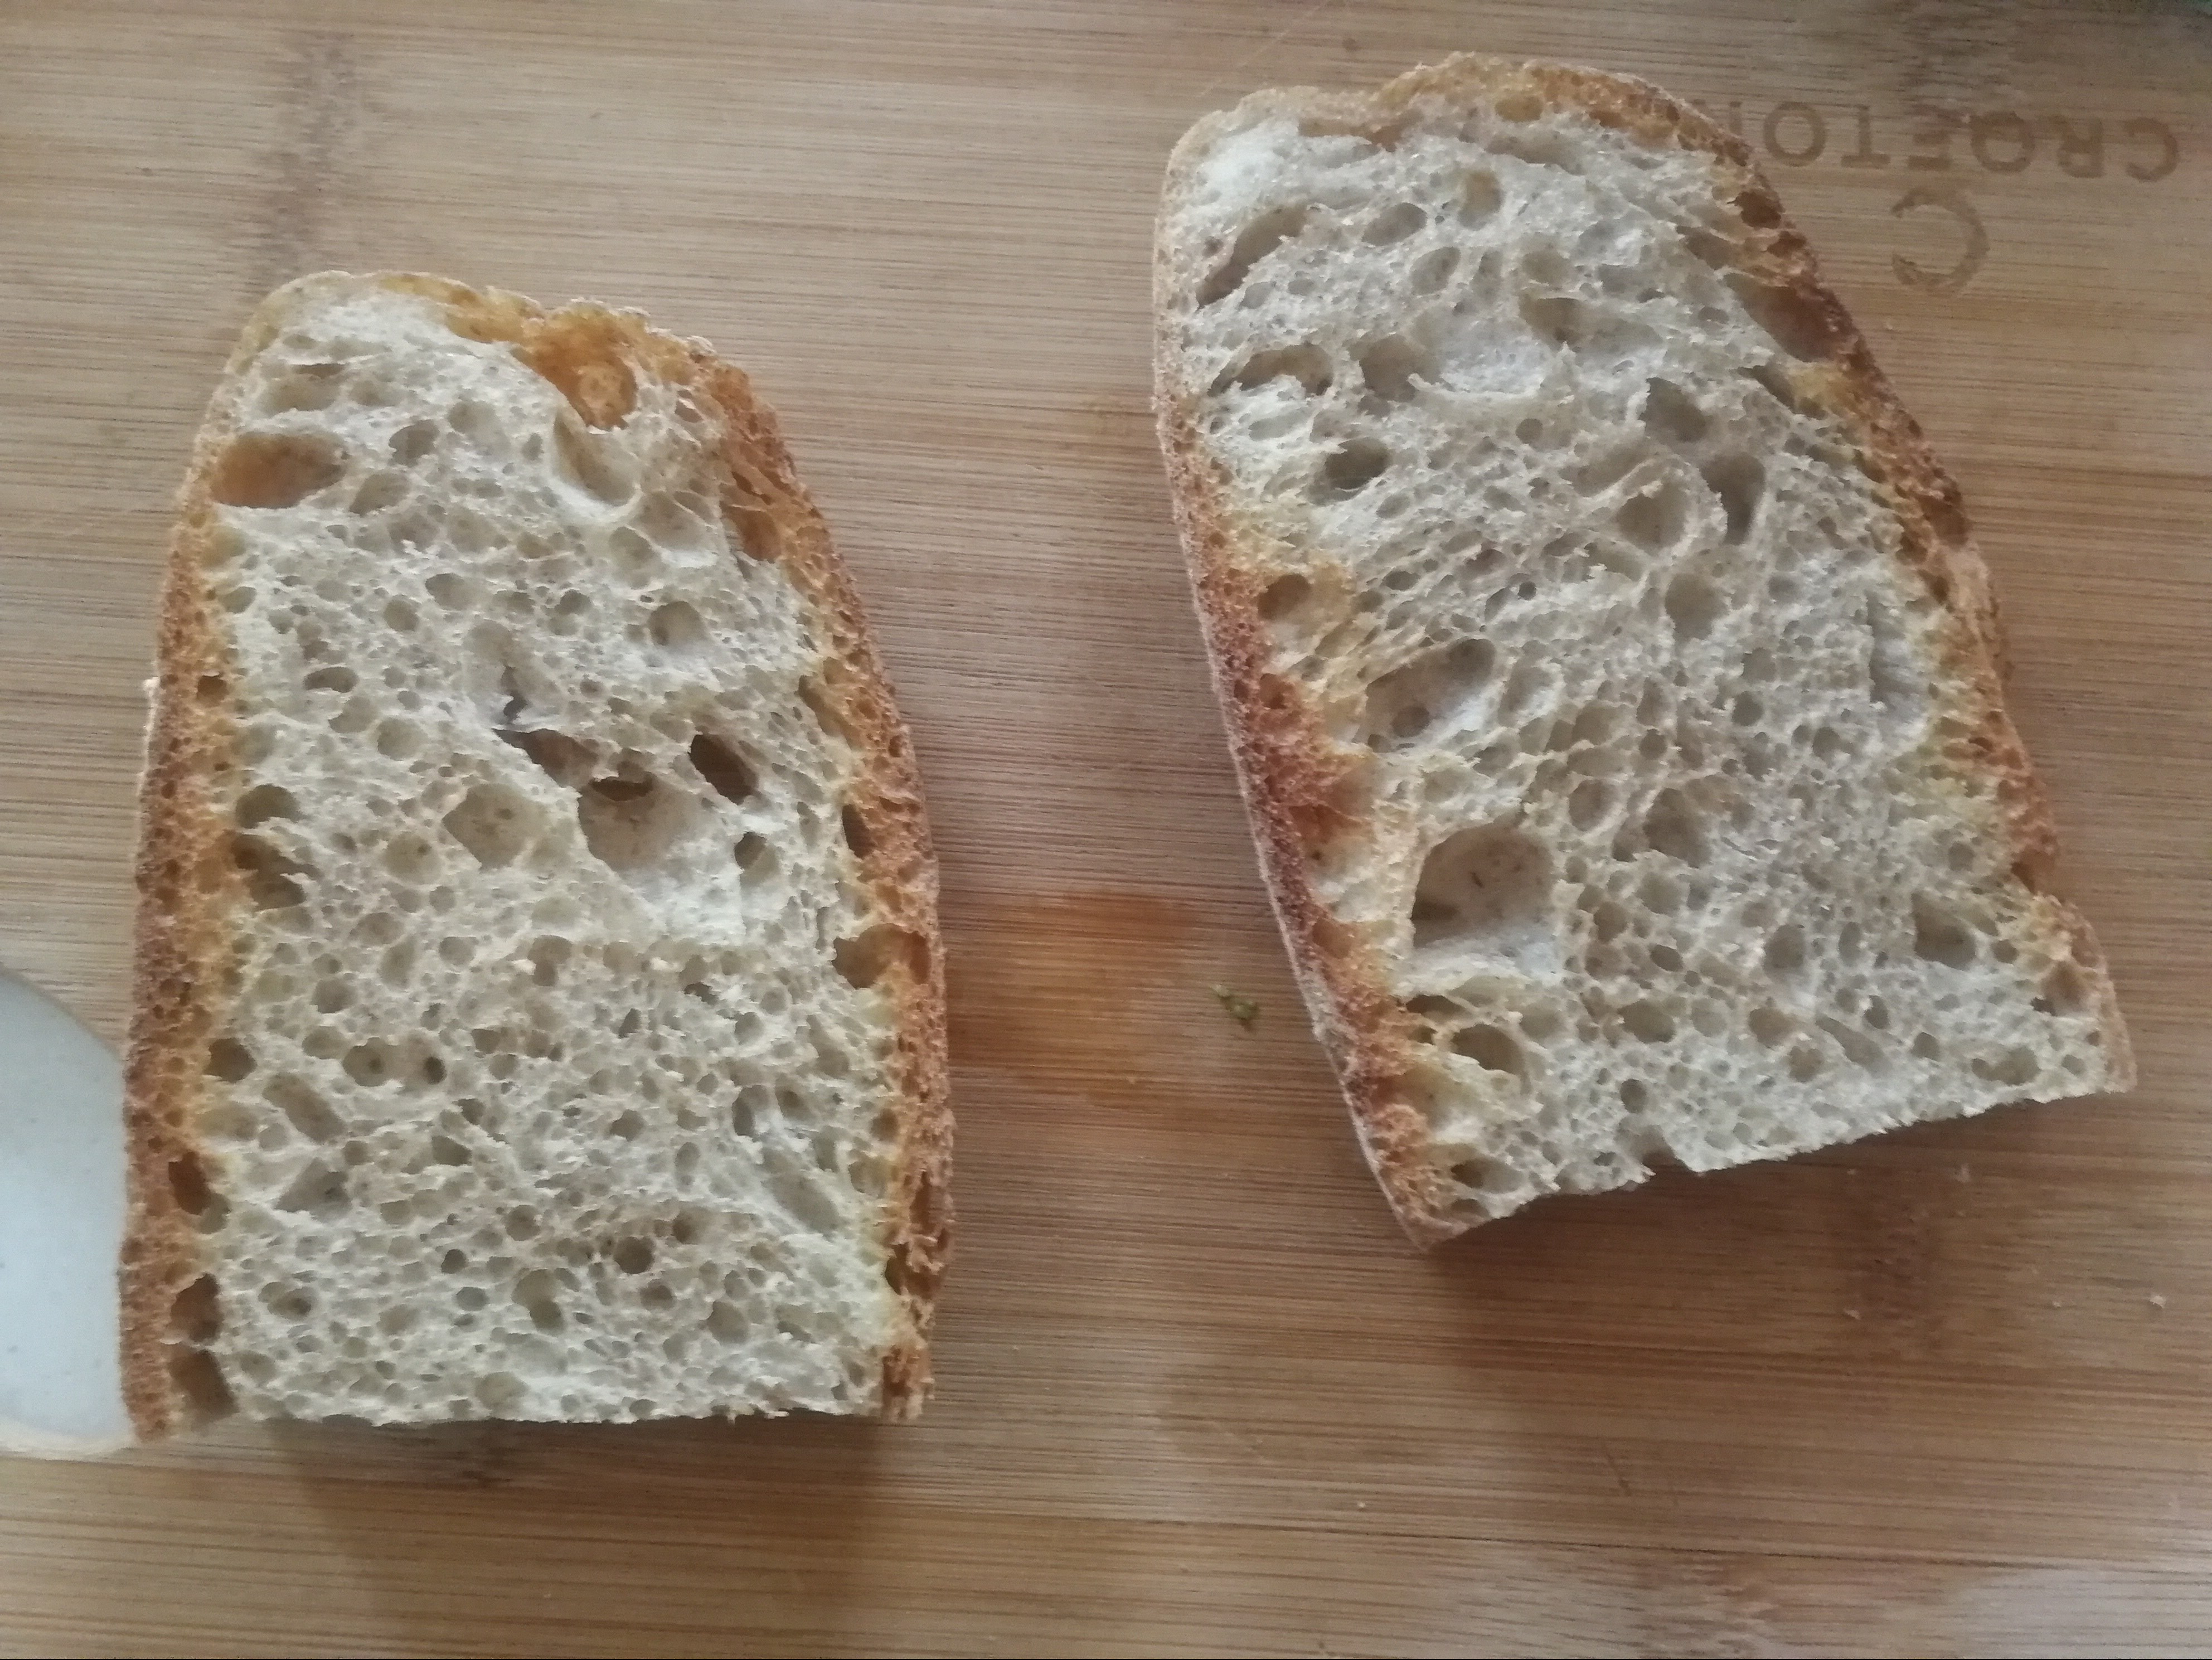
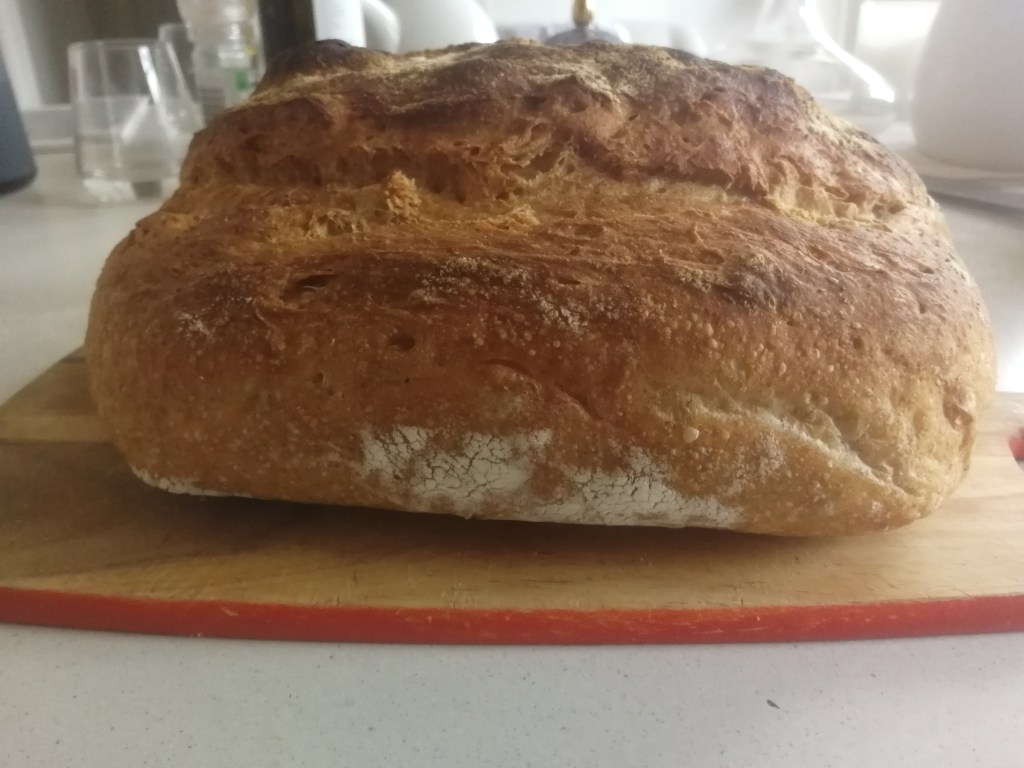
Ta-dà. You can now remove the loaf from the oven, and let it cool down on a grill for 4 hours. I let it cool overnight and try it first thing in the morning. As a grill I use my gas cooktop (obviously not turned on). Congratulations! See some results below.
Food unites people and creates fond memories. It is then only natural that a person like you and I, who intimately loves food, will at some point get interested in bread. Indeed, bread is at the core of Italian and more in general of Western cousine.
In our tradition, the simplest meals are made by “pane e companatico”, which means “bread and what-goes-with-bread”, aka cheese and cold cuts. Bread adds to cooking the fascination of the live component: yeast. This introduces and element of care for a living being in the process, not dissimilar to growing a plant. We feed our yeast appropriately and keep our dough at the right temperature so that it may deliver us with well-developed rich loaf.
Getting a bit more practical, let’s start by seeing what will be needed for this simple recipe:
350g of wholemeal flour;
650g of high-protein (approx. 13% of protein) white flour (I use the Caputo Cuoco);
tap water;
a “lentil” of dry yeast (or 3g of fresh yeast);
20g of salt;
Not much, right? In terms of utensils, the only one I use is a scraper. This can be useful to clean up your hands and the working surface and to handle the dough without getting entangled in its stickiness. If you plan on baking from now on, buy one.
Executive summary.
Make poolish (350g water, 350g wholemeal flour, 1g of dry yeast) and let it rest for 8-12 hours;
Add other ingredients (650g high-protein white flour, 420g water, 20g salt);
Let the dough rest during the day and fold it in a couple of times in the evening;
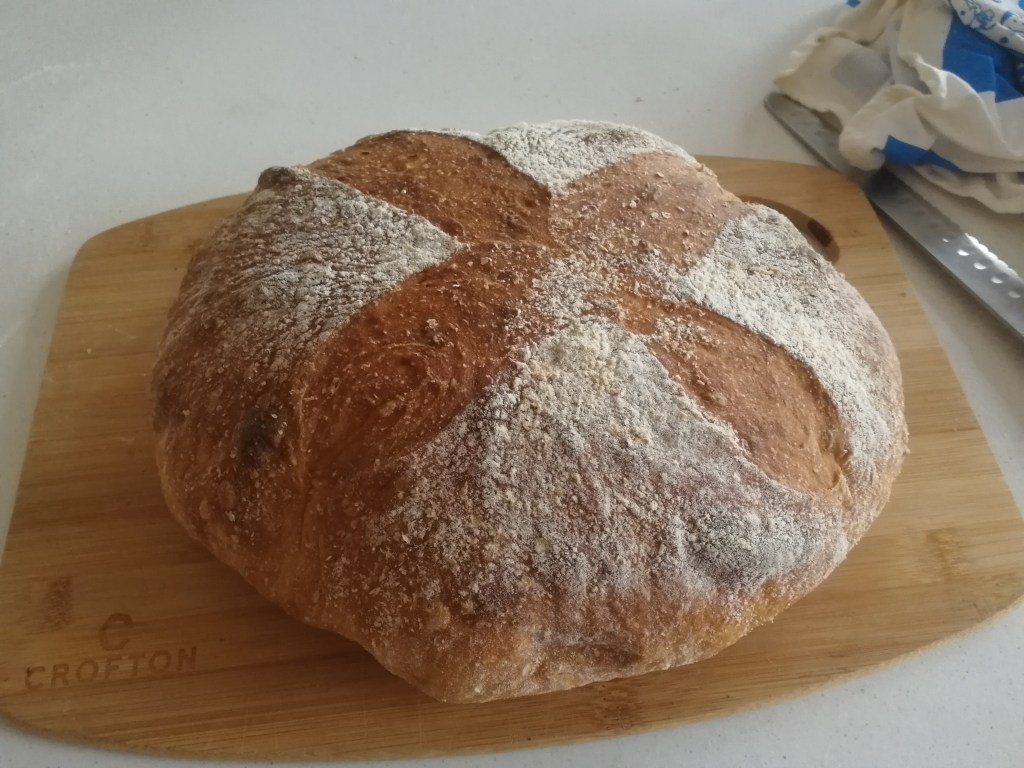
Shape the dough, score it and bake it at 250° for 15 minutes and then at 180° for 35 minutes;
Let it cool overnight, wake up and enjoy.
Phase 1. You are about to go to bed when you remember that you want to make a pre-dough (poolish), so that the morning after the next one you will be able to start the day with your very own long-fermentation loaf. Put 350g of lukewarm water in a bowl and mix your tiny bit of dry yeast (1g max) in it. If the temperature in the room is hot, use colder water, while if cold, warmer. Now gently mix your 350g of wholemeal flour in it, until the flour has absorbed all the water. This should take you 5 minutes or less. Cover with a wet towel and let it rest overnight, for up to 12 hours.
Fermented poolish. You wake up to the thought of your poolish. You rush to the kitchen and find it grown and bubbly on the surface; the yeast has been eating sugars and producing CO2. If you cut the poolish in two (don’t do it), you would see that the above process has formed a gluten net in the dough. In other words, the flour’s gluten has successfully trapped the CO2 produced by the yeast into bubbles.
The poolish.
Forming the dough. Now you need to form the final dough, by adding the other ingredients. First, spread out the poolish on a large bowl. Gradually add your 650g of white flour and another 400g of lukewarm water while folding it as best as you can. The idea is to maintain intact the net that you have created in your poolish, while enlarging the dough. As a final step, mix your 20g of salt in 20g of water and add it to the dough. Notice that our dough has a hydration of 77%, so we are using 770g of water per each 1000g of flours. We have already put 350g of water in the poolish, so this is why in this phase we add 420g. Remember that the slower you add the flour, the easier it will be to mix it well with the water and the poolish. Keep in mind the water temperature advice is even more important here. During a hot day you should use cold water, thus preventing the dough from getting too warm in the following hours.
Autolysis and kneading the dough. If you want to have an easy life, while you enjoy your breakfast, leave your new dough to rest in its bowl. Leaving it for 30-45 minutes will make the dough self-knead (by autolysis). Once breakfast is over, you should find that your dough has become more wholesome, more united and less prone to break if stretched. Fold it now a few times and form a nice ball. Help yourself not getting all sticky by dusting your hands with flour frequently. As a reference on how to you can fold it, watch this slap-and-fold video here. The kneading process is instrumental to the reinforcement of the gluten net. You will need it to hold during the long fermentation process, where more and more CO2 will be produced in the dough. If your net lacked strength, the pressure created by the growing CO2 would tear it apart and your dough would collapse. A collapsed dough would produce a loaf with a disappointingly dense crumb. You do not want that.
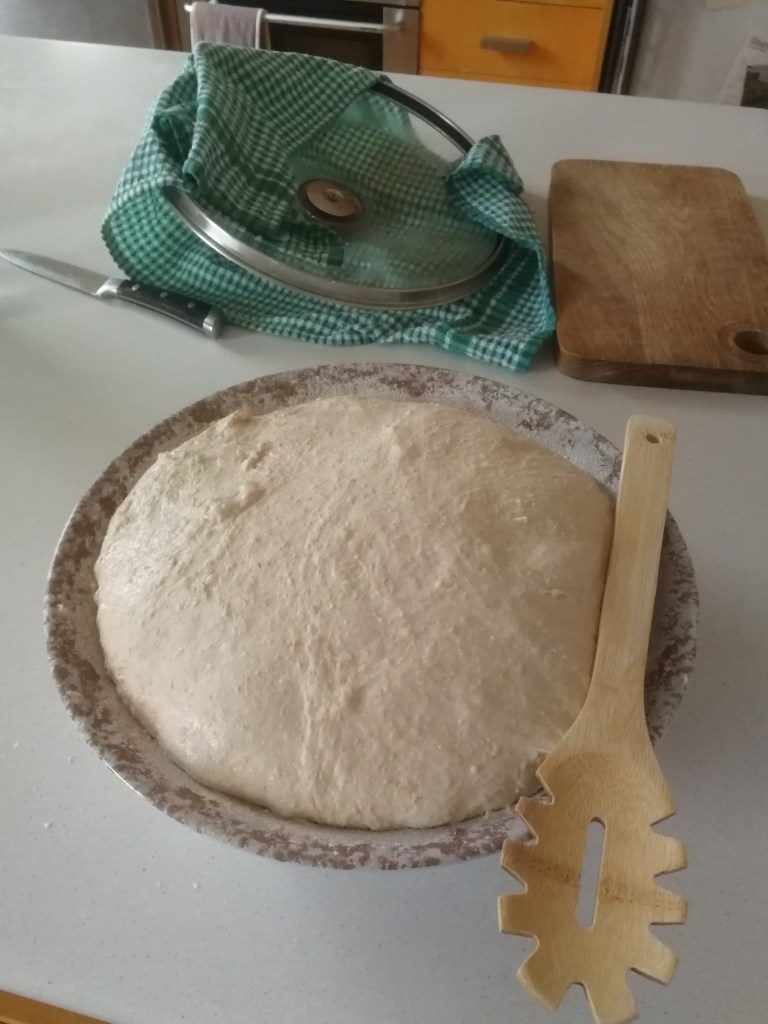
Phase 2. Leave the dough resting in a bowl covered with a wet towel until you are back from work. This will be your main fermentation phase. If you are back in the late afternoon and still have several hours of wakefulness ahead, fold the dough, as shown in this video. Wait for about 45 minutes (30 minimum), then repeat. After 45 minutes, shape the dough as illustrated here. If you have less time, shape the dough straight away, ideally twice with a 45 minutes interval. The issue is that, according to professional baking manuals, you should have 3 fermentation phases of similar length. Instead, our fermentation time is concentrated in the first phase. Therefore, these tiny phases of 45 minutes combined with structure-enhancing procedures help us building back that structure and shape that has been lost during the long fermentation. The more you work on them, the less your dough will flatten out while baking.
This is how you will find your dough after it grew during the day. You will need to shape it.
Notes. Firstly, apply minimal pressure to the fermented dough while working it. You don’t want to squeeze the air out! Secondly, after the first shaping, put your dough in a bowl on top of a heavily-floured dry towel. Still put the wet towel on top, making sure it does not touch the dough. If it does touch the dough, use a drainer as a lid to the bowl and place the wet towel on top of it.
Almost ready to bake. Now the dough only needs to be scored.
Baking. It’s time to bake! Turn on the oven in (static) bake mode and set the temperature to 250°. Once it has reached the temperature, put a bowl of hot water at the bottom of the oven. Now score the bread and put it in the oven for 15 minutes. At the end of the 15 minutes, remove the bowl of water and lower the temperature to 180°.
Now simply remove the bread from the oven and let it cool down overnight on top of a cooling rack (I use the top of my gas stove).
Go to sleep, wake up and enjoy your very own bread!
Your loaf!
PS these are another couple of useful links: this and this