Hey you, family member, let me explain how I make my lasagna to you, so you we can share the joy of making and devouring it. The recipe is not particularly mine — it’s a rather traditional version — but it is such in that I am sure it differs from other recipes you will find online. Notice that the prep pictures refer to a huge lasagna I made last year (unless specified). Let’s get to it.
Ingredients. I like to make more ragù (the Bolognese sauce) and besciamel (the white cream) than necessary, so that I can freeze some of the leftovers or repurpose them for another recipe. Hence, I make a lot of both. The below list will give you enough to make 6 BIG portions of lasagna.
- Ragù:
- a carrot, a celery stick (the whole branch), an onion;
- half a glass of white wine (better if dry). You can use red wine too;
- 1kg of fatty beef mince (not the lean one, which will result dry);
- 500g pork and veal mince;
- a bacon strip;
- 1.4 l tomato passata (e.g. x2 Mutti 700g);
- a bay leaf;
- salt & pepper;
- Besciamel:
- 200g flour;
- 160 butter;
- 2 l milk;
- a pinch of nutmeg;
- salt & pepper;
- Pasta sheets (I always use Barilla’s)
- About 125g of grated parmesan.
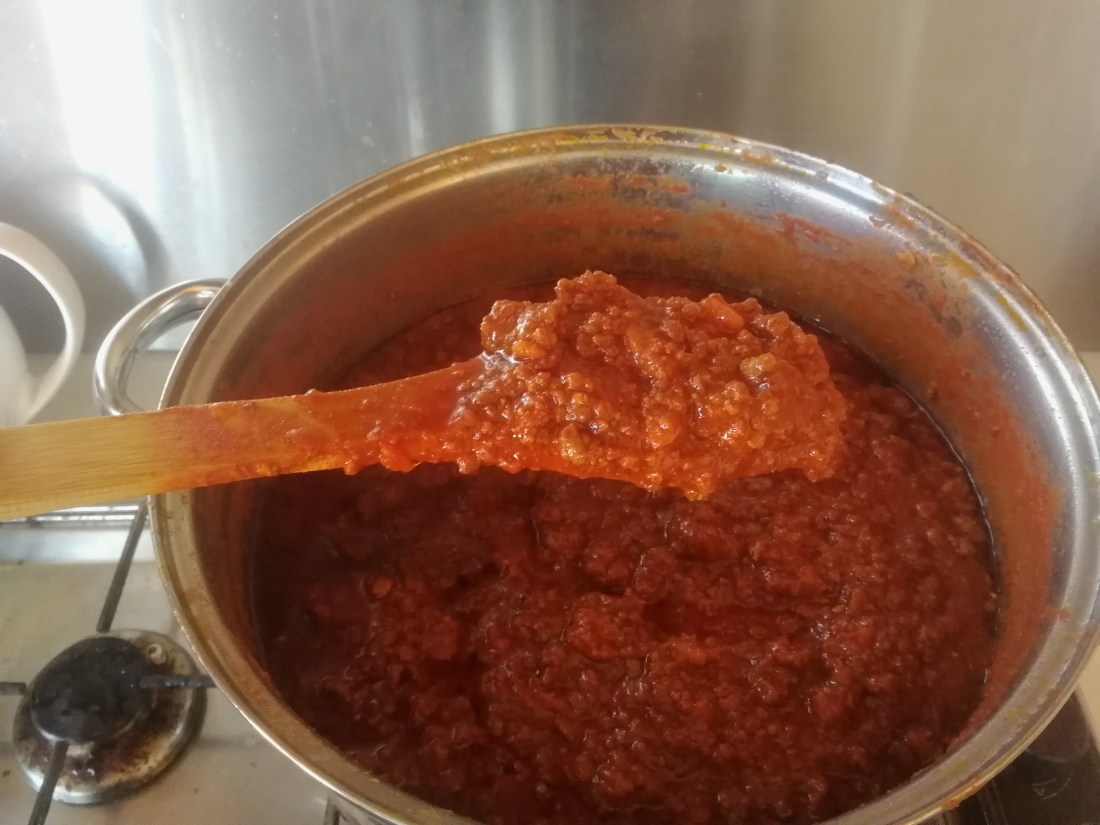
The ragù. This is 90% of the work. Let’s make another list, so that it is easier to follow:
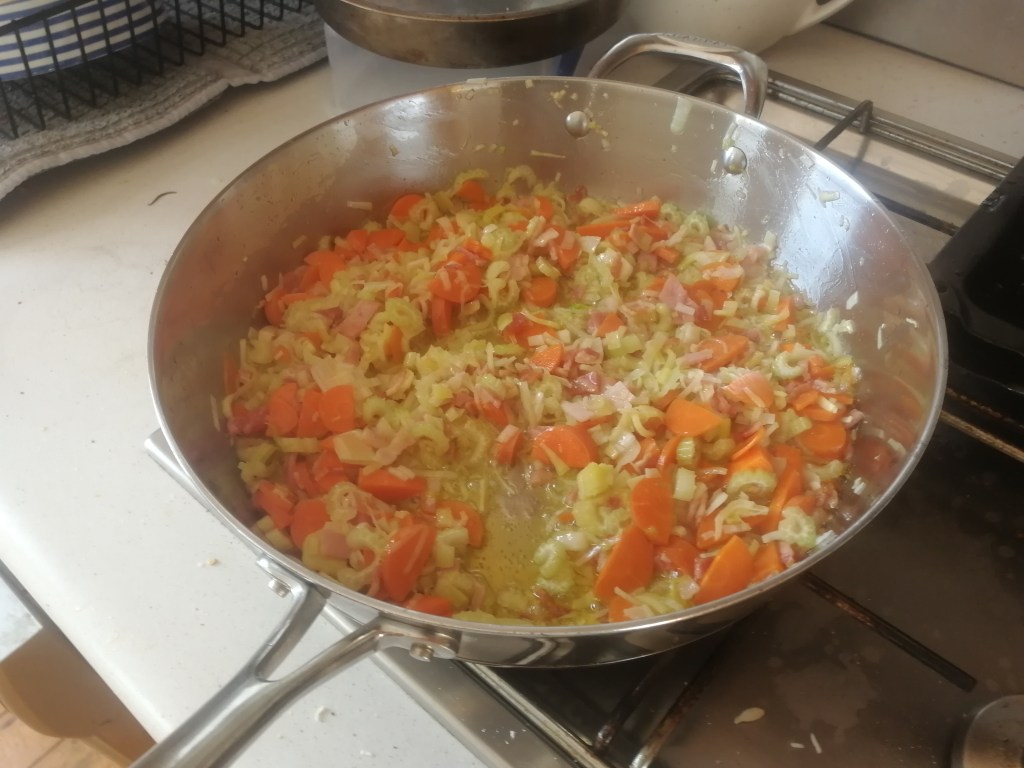
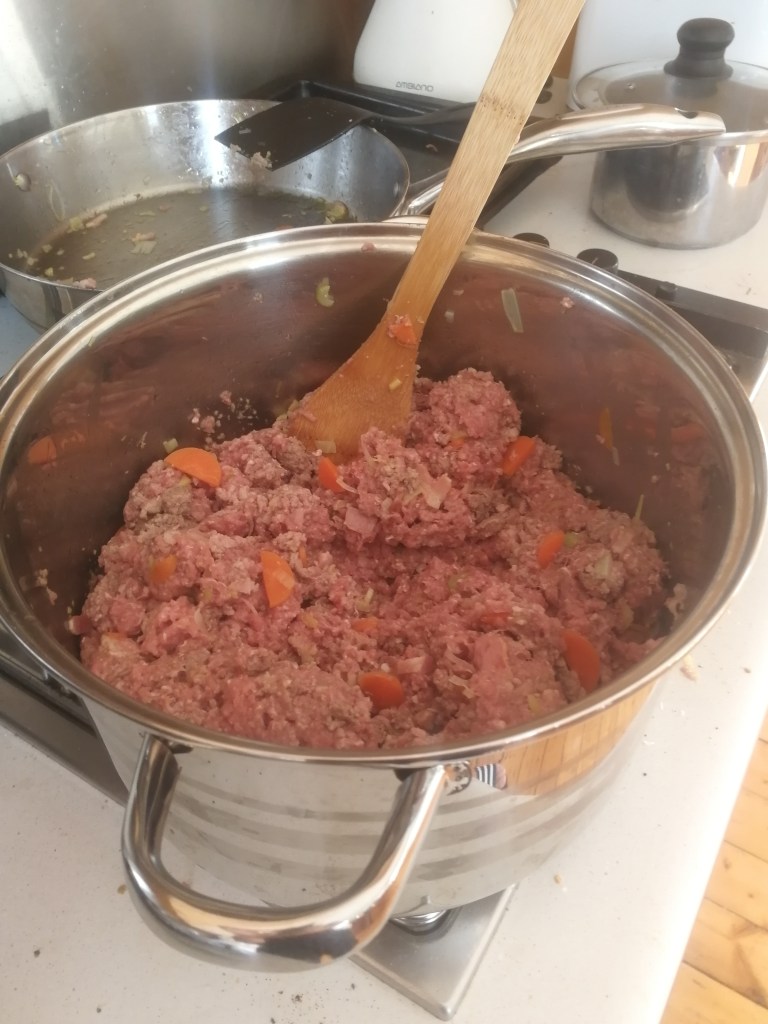
- Pour a generous amount of extra virgin olive oil into a big pot. Dice the onion, the carrot, the bacon and the celery stick and let them light fry in the pot, while being careful not to burn them.
- When they start browning, put the minced meat in, which you have already mixed all together (beef, veal and pork) by hand.
- Put the flame on high allowing the meat to brown. Mix it while it cooks to brown in uniformly.
- After about 10 minutes, the mince should have browned enough, pour the wine, keeping the flame on high, thus allowing the alcohol will evaporate quickly.
- Add salt and pepper to your own taste.
- Once you cannot smell the wine’s alcohol, add the tomato passata and turn the flame to minimum.
- At this point, if you have some meat or even chicken stock, add it. I usually don’t have it nor I want to buy it ready-made, so I substitute it with a dollop of milk (from the 2 litres listed above). The milk adds fats and texture, just like the stock, and it is a variation present in many traditional recipes. Some will see it a heretic move. Ignore them.
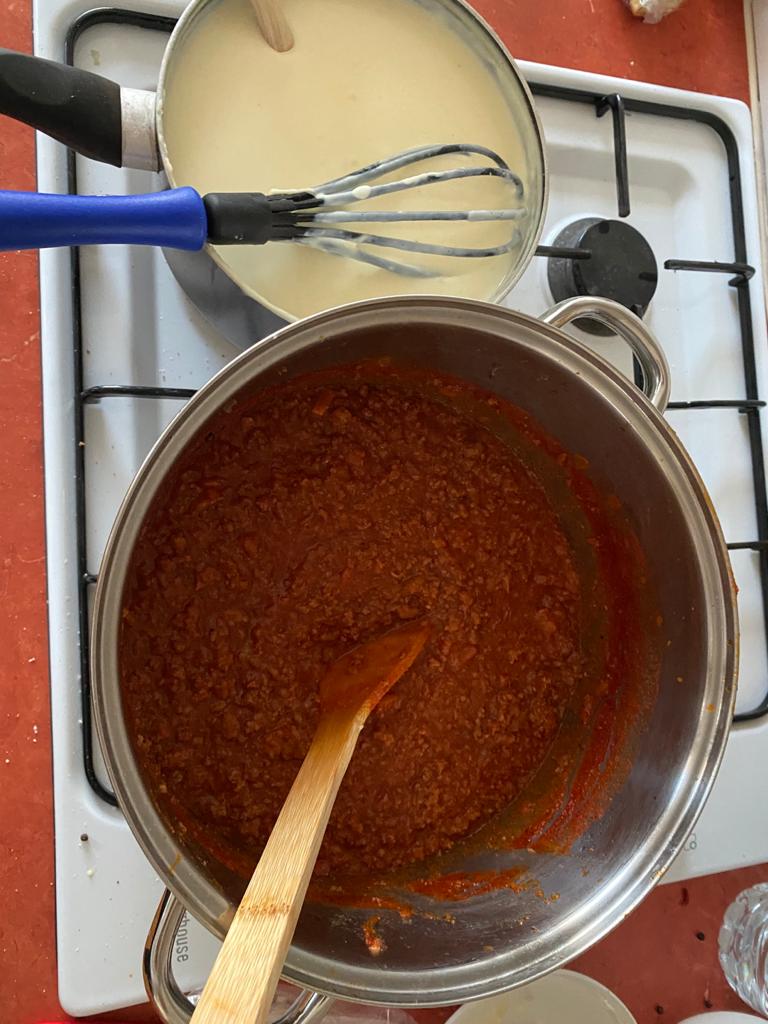
- Together with the passata, add the bay leaf and let the whole mix cook for hours. The longer, the creamier. I left mine for an entire afternoon.
- When it’s nice and thick, and you have decided to turn the heat off, add salt and pepper again.
The besciamel. This is a tricky stage, as making besciamel is conceptually easy but requires care. You must stay on it and continuously mix it until it is ready. Failure to do so will result in a burnt and lumpy cream.
- Put the butter in a pot and let it melt gently. Careful not to burn it.
- Add the flour. Sifting it will minimise the formation of grumes.
- Mix and cook for about 5 minutes on a gentle flame.
- Add the milk in about three steps, while increasing the heat to medium-low. The stronger the heat, the faster the thickening, but the more intensely you will have to whisk.
- Keep whisking and dissolving the grumes until besciamel has lightly thickened. I say lightly thickened as it will keep thickening after you turn it off and you need to take that into account.
- When it is ready, add a touch of grated nutmeg, adjusting based on you preferences.
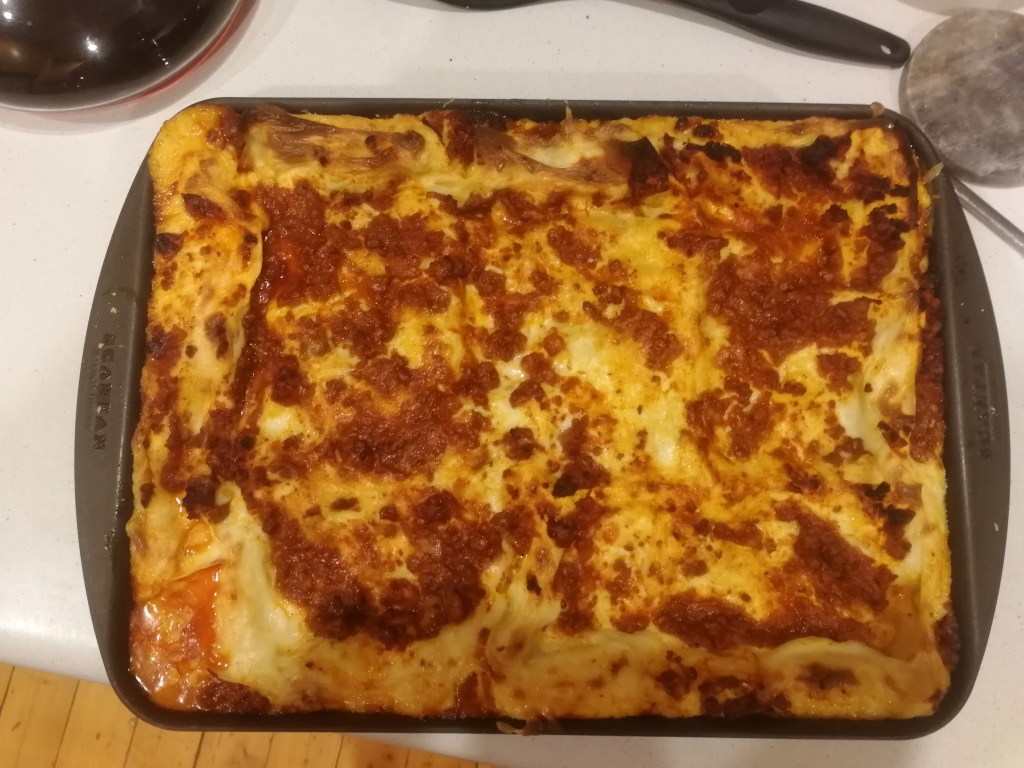
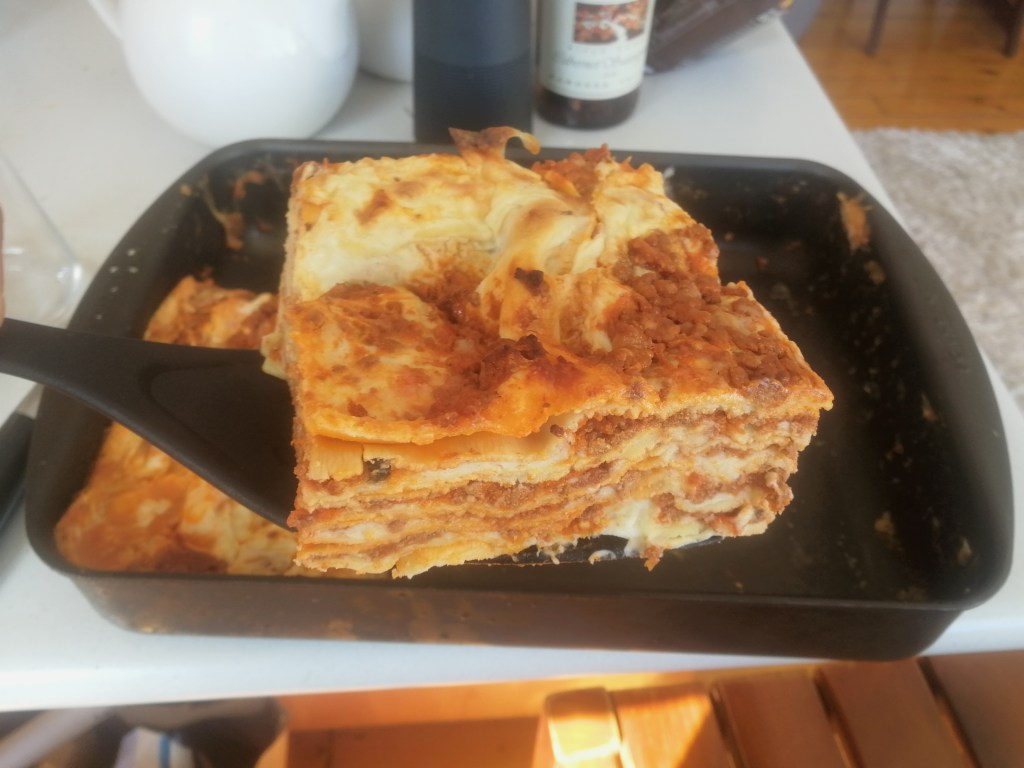
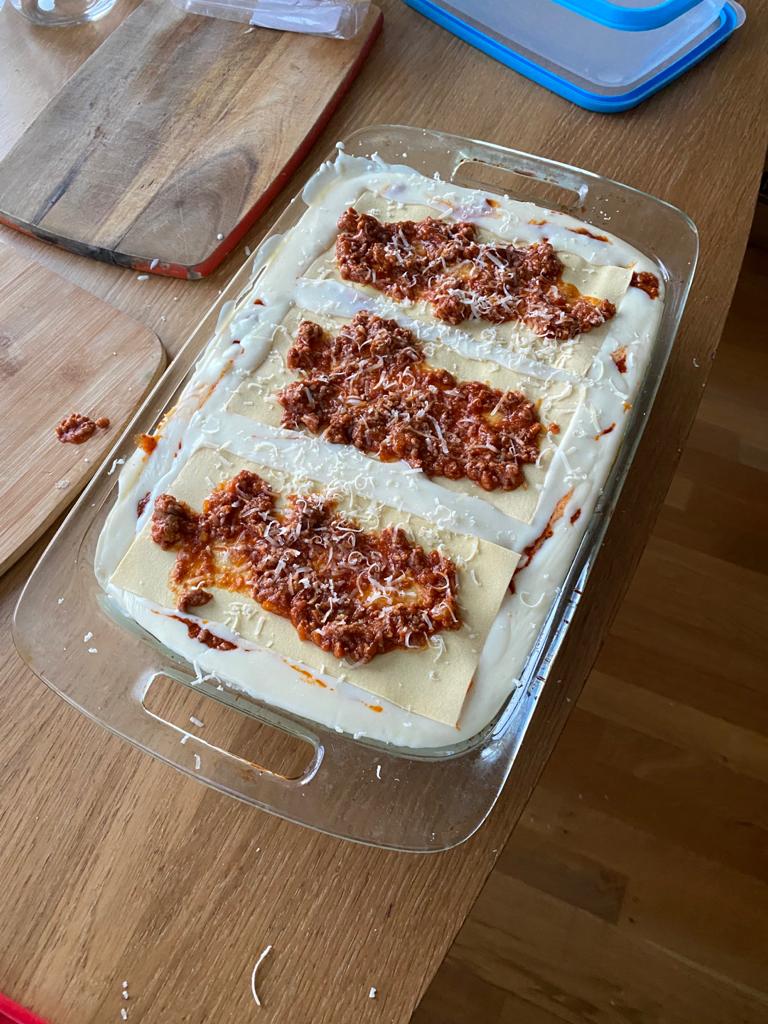
Build & Cook. Now pre-heat the oven at 200 C (fan oven). Pour a first layer of besciamel on your roasting pan (something similar to this kind of product). Then, cover it with (raw) lasagna sheets. Now pour a layer of besciamel, then a layer of ragù. Now grate a little bit of parmesan on top. Repeat the sheet-besciamel-ragù-parmesan process until the pan is full. The last layer should be made only of ragù and lots of parmesan (no besciamel). Cook it for about 30 minutes at 180 C. More importantly, simply take it out when the top looks golden, crispy and — why not — a bit burnt.
Let it cool down for a few minutes and enjoy it with your loved ones!
Ciao
PS you can find some very helpful step-by-step pics here. Use them to better visualise the steps.