
Food unites people and creates fond memories. It is then only natural that a person like you and I, who intimately loves food, will at some point get interested in bread. Indeed, bread is at the core of Italian and more in general of Western cousine.
In our tradition, the simplest meals are made by “pane e companatico”, which means “bread and what-goes-with-bread”, aka cheese and cold cuts. Bread adds to cooking the fascination of the live component: yeast. This introduces and element of care for a living being in the process, not dissimilar to growing a plant. We feed our yeast appropriately and keep our dough at the right temperature so that it may deliver us with well-developed rich loaf.
Getting a bit more practical, let’s start by seeing what will be needed for this simple recipe:
- 350g of wholemeal flour;
- 650g of high-protein (approx. 13% of protein) white flour (I use the Caputo Cuoco);
- tap water;
- a “lentil” of dry yeast (or 3g of fresh yeast);
- 20g of salt;
Not much, right? In terms of utensils, the only one I use is a scraper. This can be useful to clean up your hands and the working surface and to handle the dough without getting entangled in its stickiness. If you plan on baking from now on, buy one.
Executive summary.
- Make poolish (350g water, 350g wholemeal flour, 1g of dry yeast) and let it rest for 8-12 hours;
- Add other ingredients (650g high-protein white flour, 420g water, 20g salt);
- Let the dough rest during the day and fold it in a couple of times in the evening;
- Shape the dough, score it and bake it at 250° for 15 minutes and then at 180° for 35 minutes;
- Let it cool overnight, wake up and enjoy.
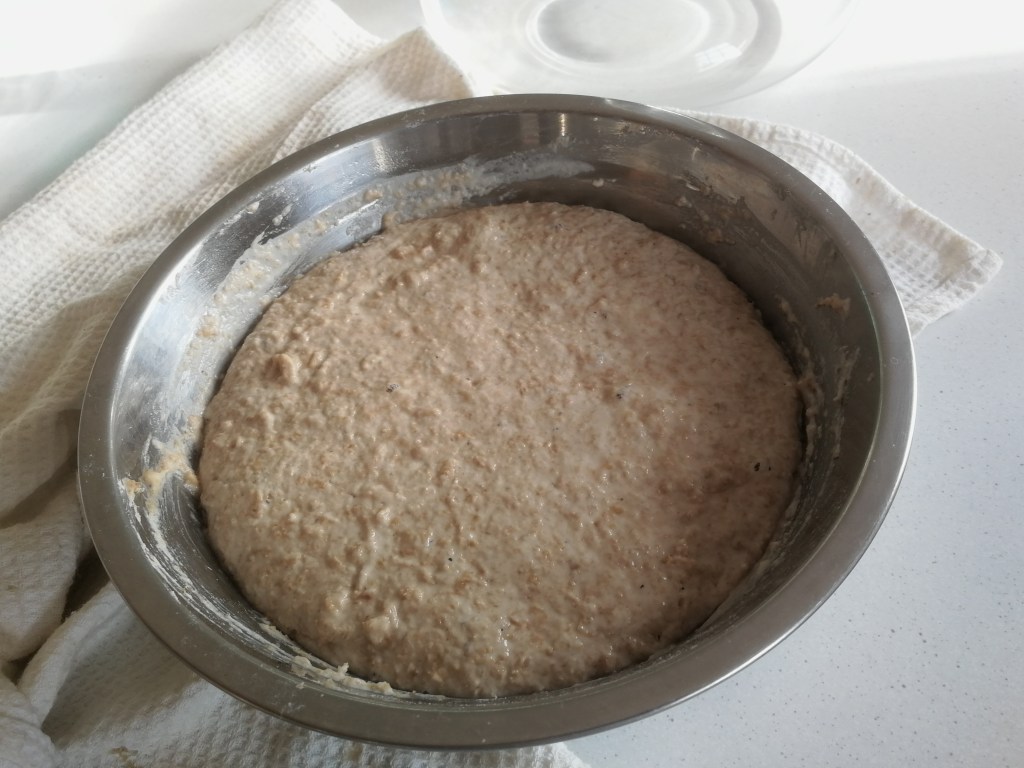
Phase 1. You are about to go to bed when you remember that you want to make a pre-dough (poolish), so that the morning after the next one you will be able to start the day with your very own long-fermentation loaf. Put 350g of lukewarm water in a bowl and mix your tiny bit of dry yeast (1g max) in it. If the temperature in the room is hot, use colder water, while if cold, warmer. Now gently mix your 350g of wholemeal flour in it, until the flour has absorbed all the water. This should take you 5 minutes or less. Cover with a wet towel and let it rest overnight, for up to 12 hours.
Fermented poolish. You wake up to the thought of your poolish. You rush to the kitchen and find it grown and bubbly on the surface; the yeast has been eating sugars and producing CO2. If you cut the poolish in two (don’t do it), you would see that the above process has formed a gluten net in the dough. In other words, the flour’s gluten has successfully trapped the CO2 produced by the yeast into bubbles.
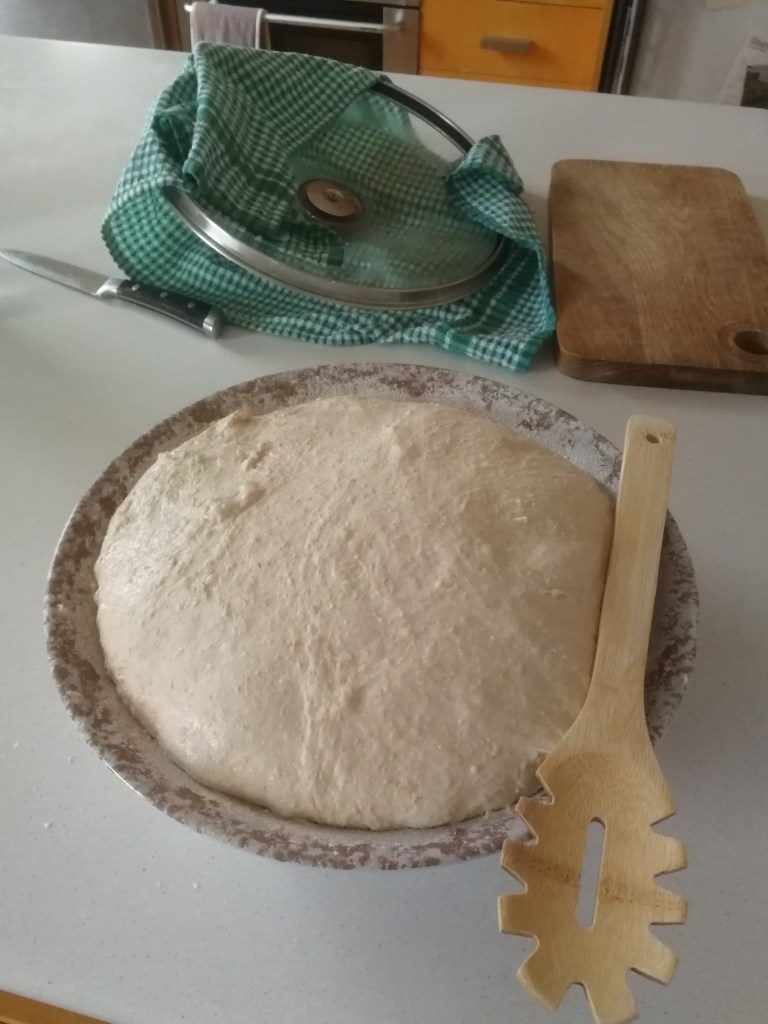
Forming the dough. Now you need to form the final dough, by adding the other ingredients. First, spread out the poolish on a large bowl. Gradually add your 650g of white flour and another 400g of lukewarm water while folding it as best as you can. The idea is to maintain intact the net that you have created in your poolish, while enlarging the dough. As a final step, mix your 20g of salt in 20g of water and add it to the dough. Notice that our dough has a hydration of 77%, so we are using 770g of water per each 1000g of flours. We have already put 350g of water in the poolish, so this is why in this phase we add 420g. Remember that the slower you add the flour, the easier it will be to mix it well with the water and the poolish. Keep in mind the water temperature advice is even more important here. During a hot day you should use cold water, thus preventing the dough from getting too warm in the following hours.
Autolysis and kneading the dough. If you want to have an easy life, while you enjoy your breakfast, leave your new dough to rest in its bowl. Leaving it for 30-45 minutes will make the dough self-knead (by autolysis). Once breakfast is over, you should find that your dough has become more wholesome, more united and less prone to break if stretched. Fold it now a few times and form a nice ball. Help yourself not getting all sticky by dusting your hands with flour frequently. As a reference on how to you can fold it, watch this slap-and-fold video here. The kneading process is instrumental to the reinforcement of the gluten net. You will need it to hold during the long fermentation process, where more and more CO2 will be produced in the dough. If your net lacked strength, the pressure created by the growing CO2 would tear it apart and your dough would collapse. A collapsed dough would produce a loaf with a disappointingly dense crumb. You do not want that.
Phase 2. Leave the dough resting in a bowl covered with a wet towel until you are back from work. This will be your main fermentation phase. If you are back in the late afternoon and still have several hours of wakefulness ahead, fold the dough, as shown in this video. Wait for about 45 minutes (30 minimum), then repeat. After 45 minutes, shape the dough as illustrated here. If you have less time, shape the dough straight away, ideally twice with a 45 minutes interval. The issue is that, according to professional baking manuals, you should have 3 fermentation phases of similar length. Instead, our fermentation time is concentrated in the first phase. Therefore, these tiny phases of 45 minutes combined with structure-enhancing procedures help us building back that structure and shape that has been lost during the long fermentation. The more you work on them, the less your dough will flatten out while baking.
Notes. Firstly, apply minimal pressure to the fermented dough while working it. You don’t want to squeeze the air out! Secondly, after the first shaping, put your dough in a bowl on top of a heavily-floured dry towel. Still put the wet towel on top, making sure it does not touch the dough. If it does touch the dough, use a drainer as a lid to the bowl and place the wet towel on top of it.

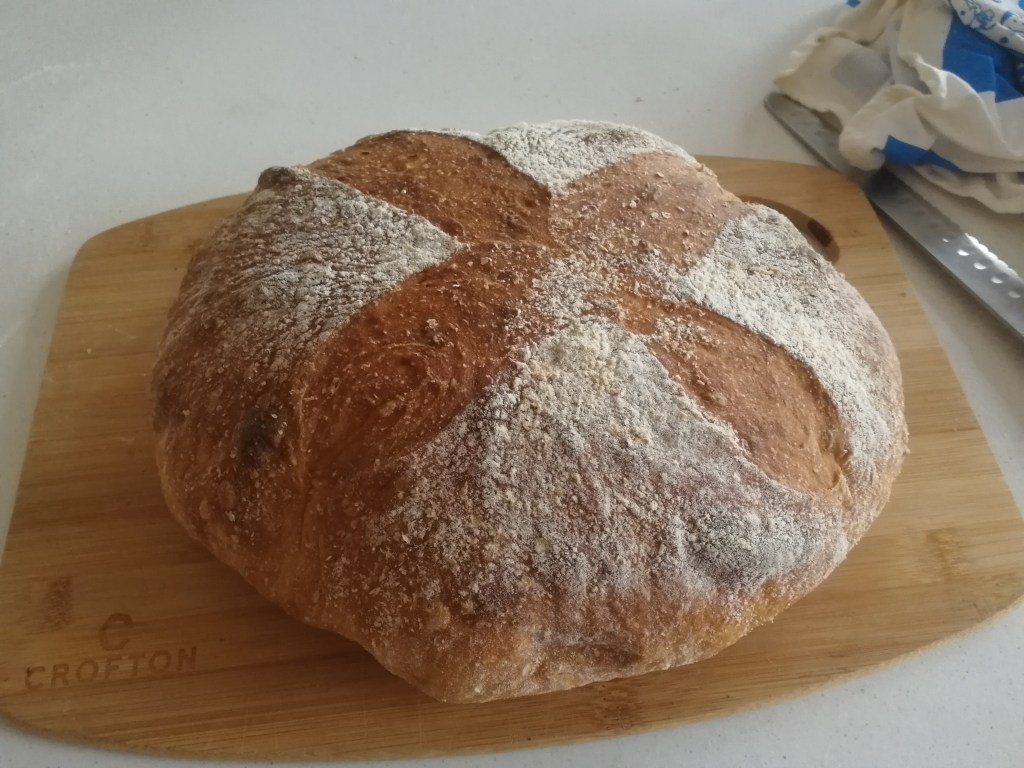
Baking. It’s time to bake! Turn on the oven in (static) bake mode and set the temperature to 250°. Once it has reached the temperature, put a bowl of hot water at the bottom of the oven. Now score the bread and put it in the oven for 15 minutes. At the end of the 15 minutes, remove the bowl of water and lower the temperature to 180°.
Now simply remove the bread from the oven and let it cool down overnight on top of a cooling rack (I use the top of my gas stove).
Go to sleep, wake up and enjoy your very own bread!
PS these are another couple of useful links: this and this

It looks fantastic, thank you!!!
LikeLike